Browser extensions are third-party add-ons that provide extra functionality to Microsoft Edge. When your browser slows down or it doesn’t load webpage properly, a problematic extension may be the major cause. In this tutorial we’ll show you how to disable extension support and prevent users from installing any extension in Microsoft Edge on Windows 10.
Method 1: Disable Extensions in Microsoft Edge Using GPO
- Press the Windows Key + R together, type in gpedit.msc and hit Enter to open Local Group Policy Editor.

- Navigate to:
Computer Configuration -> Administrative Templates -> Windows Components -> Microsoft Edge. In the right pane you will see the Allow Extensions policy. Double-click on it to modify.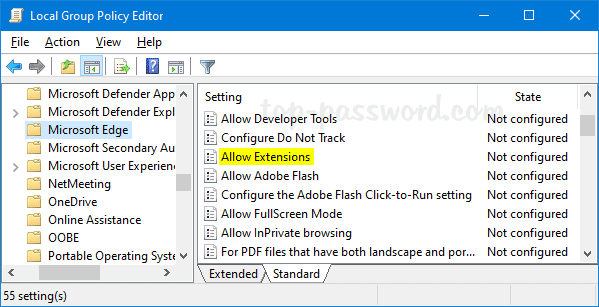
- Select the Disabled option and click OK.

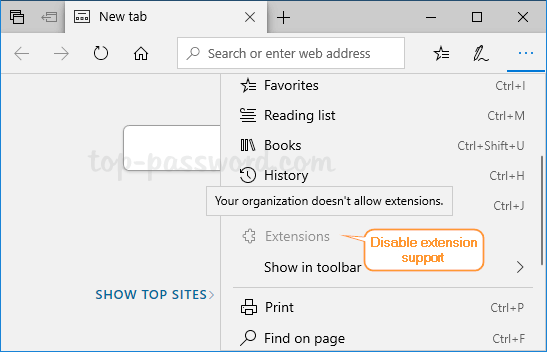
- After restarting your computer, you can no longer install extensions in the Edge browser, and the extensions that are already installed will also be disabled automatically. If you open the Settings menu in the Edge browser, you will see that the “Extensions” option is greyed out.
Method 2: Disable Extensions in Microsoft Edge Using Registry Editor
- Press the Windows Key + R together, type in regedit and hit Enter to open Registry Editor.

- In the left pane of Registry Editor, navigate to:
HKEY_LOCAL_MACHINE\SOFTWARE\Policies\Microsoft. Right-click on the “Microsoft” key to create a new key named MicrosoftEdge. Next, right-click on the newly created key and create a new key named Extensions.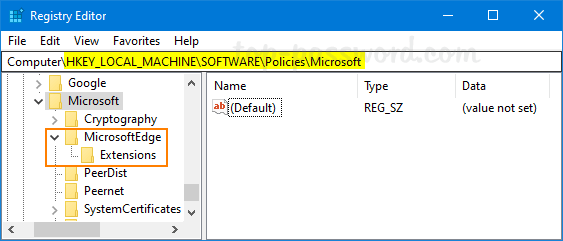
- Right-click on any blank area in the right pane to create a DWORD (32-bit) Value named ExtensionsEnabled, and make sure the value data is set to 0.
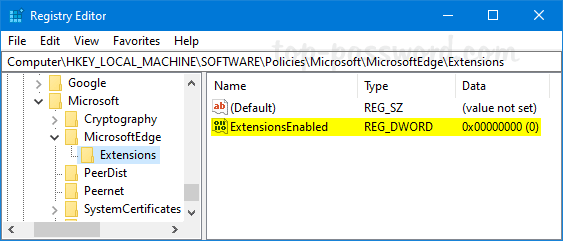
- Close Registry Editor and restart Windows, you won’t be able to use or install any extension on Microsoft Edge. Whenever you need to enable extension support again, simply delete the DWORD ExtensionsEnabled and you’re done.