A customer recently mentioned that his Windows 8 laptop was stuck in an Automatic Repair loop. When he turned on the computer, it came up with the ‘Preparing Automatic Repair’ screen, and then rebooted automatically and ran Automatic Repair again, becoming caught in the loop again and again.
There could be many reasons for a failed automatic repair. However, the most common problem is corrupted registry or missing files on the hard disk. Here I will give the complete solutions on how to fix this issue in Windows 10, 8 and 7.
All the solutions below require you to run certain commands at the Command Prompt. Here is a way to access the Command Prompt at boot:
- Insert your Windows installation DVD, turn on the computer, and wait until you see the message “Press any key to boot from CD or DVD“. Just press any key to continue. (Note: If you don’t see this message, you probably have to change the boot order in the BIOS)
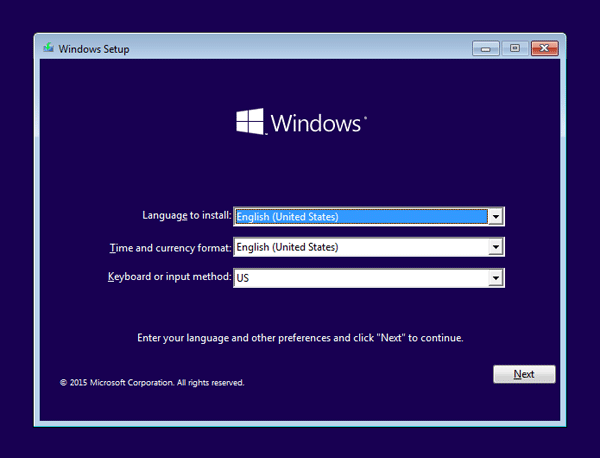
- After a while, you’ll get to the Windows Setup screen. Press Shift + F10 to open a Command Prompt.
Solution 1: Running check disk to see if your hard drive is the problem
Chkdsk could be used to check and repair your hard drive for filesystem corruption. Before running the chkdsk command, you have to find out the drive letter of your system drive. Depending on how your system is setup, this could be either C: or D:.
- Type dir C:\ and press Enter.
- If you see the common folders: Program Files, Users and Windows, then you have found your system drive.
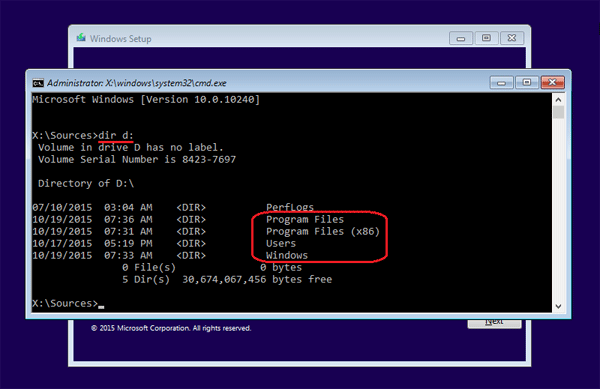
If the drive is not your system drive, repeat the step above, changing the drive letter to D, E or some other letter until the system drive is located.
When you have located your Windows system drive, type the following command and press Enter. Replace d: with the actual drive letter of your system drive.
chkdsk d: /f
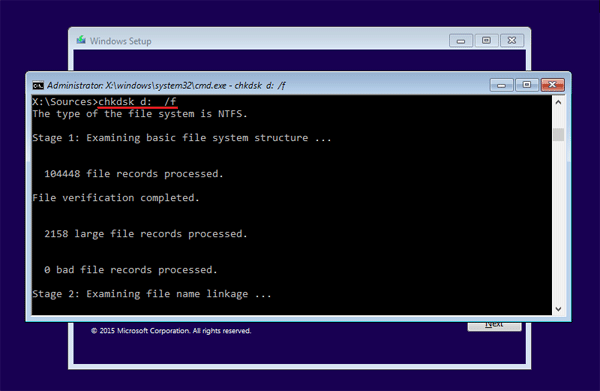
The scan should start. This could take several hours depending on the size of your hard drive. Once the scan is done, exit the Command Prompt and reboot your computer to check if the problem has been solved.
Solution 2: Manually attempt to rebuild the BCD and repair MBR
Running the bootrec utility to rebuild the BCD / MBR might fix the automatic repair loop problem. Type the following set of commands at the Command Prompt, one by one.
bootrec /fixmbr

bootrec /fixboot

bootrec /rebuildbcd
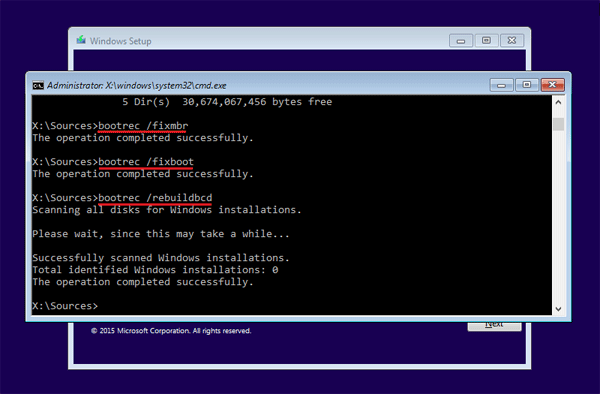
The /fixmbr switch writes a new MBR (Master Boot Record) to the system partition, the /fixboot switch writes a new boot sector onto the system partition, and the /rebuildbcd switch scans all disks for Windows installations and provides a choice of which entries to add to the BCD store.
Solution 3: Disable Automatic Startup Repair
If the automatic repair couldn’t really repair your PC and just get you stuck in a repair loop, it’s better to disable the automatic startup repair. Type the following command and press Enter:
bcdedit /set {default} recoveryenabled No
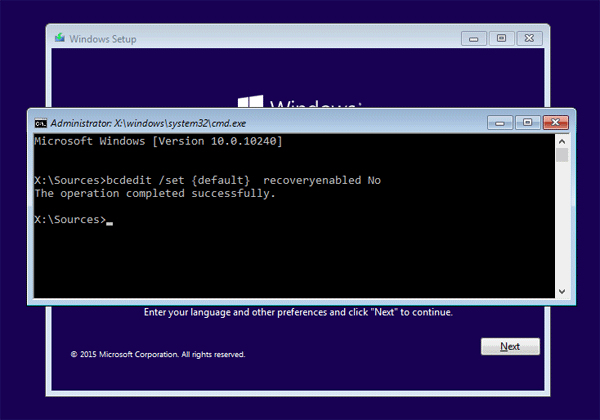
Now you’ve successfully disabled the automatic startup repair feature in Windows.
Solution 4: Restore your Windows registry
A corrupted registry settings can also cause a auto-repair loop. Here is how to restore your registry from the RegBack directory. The RegBack folder is located in
Assuming your system drive is d:, run the following command to restore Windows registry:
copy d:\windows\system32\config\RegBack\* d:\windows\system32\config
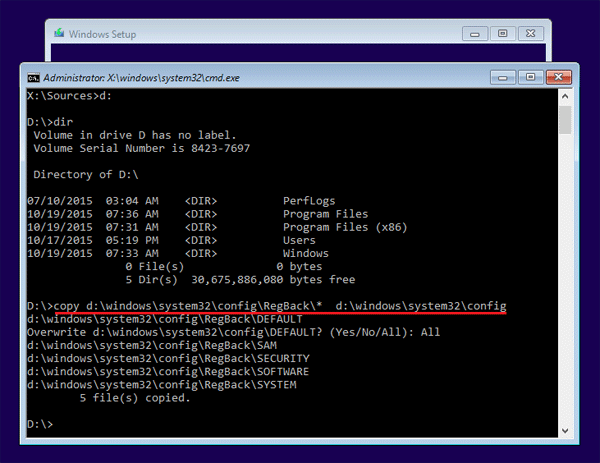
if prompted to overwrite existing files, type All and hit Enter. Type exit and hit Enter to close the Command Prompt window. Restart your computer and most probably, you may able to access your Windows system as before.