How to enable write protection for a disk drive or set your volume read-only? How can I prevent a hard drive from being formatted? In this tutorial we’ll show you how to set a particular disk or volume read-only in Windows 10 / 8 / 7, without using any third-party software.
Part 1: Set a Volume Read-Only
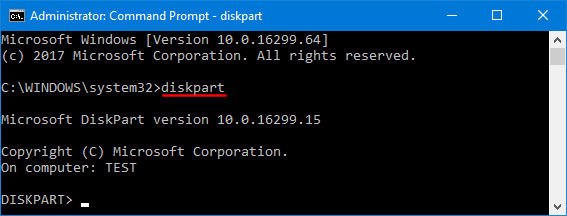
- Open the Command Prompt as administrator, and then run the diskpart command.
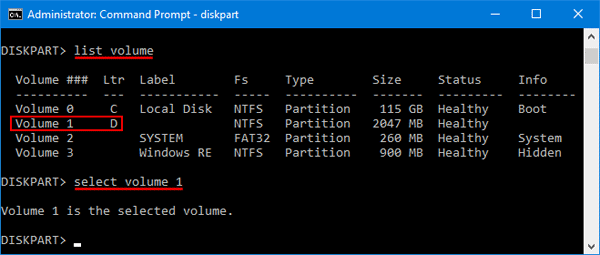
- Type list volume and press Enter. Next type select volume #, where # is the number of the volume you’re going to lock it as read-only.
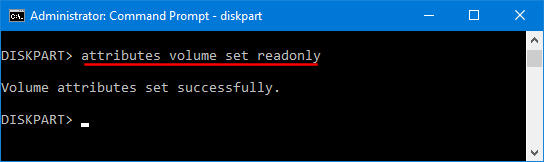
- To make your selected volume read-only, type attributes volume set readonly and press Enter.
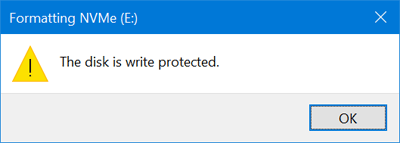
- Now, you’ll be unable to delete or modify the files on that volume. When you try to format that volume, you’ll get the error “The disk is write protected“.
If you want to clear ready-only attribute for your volume later, just repeat steps 1 through 2 above and then run this command:
attributes volume clear readonly
Part 2: Set a Disk Read-Only
If you want to set the entire disk read-only, follow these steps:
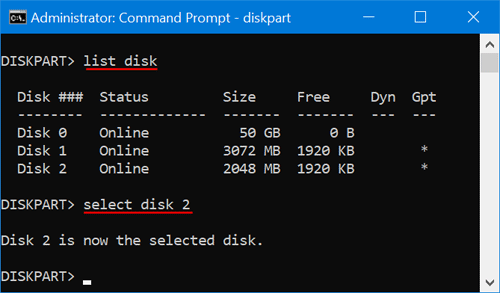
- Open the Command Prompt as administrator, and then run the diskpart command.
- Type list disk and press Enter. Next type select disk #, where # is the number of the disk you want to make read-only.
- To set your chosen disk read-only, type attributes disk set readonly and press Enter.
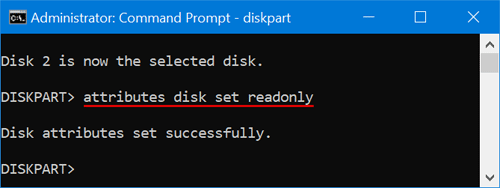
- Now your disk is write-protected and all its partitions turn into read-only.
When you want to clear ready-only attribute for your disk, just repeat steps 1 through 2 above and then run this command:
attributes disk clear readonly
That’s it!