Did you accidentally deleted a vital system file? Windows failed to load because of missing or corrupt system files? In this tutorial we’ll show you how to repair corrupt or missing system files using the Windows built-in command line utility – SFC (System File Checker). SFC is built into Windows 10/8/7/Vista that can scan your system files for corruption or modification. If a file is missing or modified, it will automatically replace that file with the correct version.
When your Windows system won’t load normally, start it in Safe Mode or boot off Windows Setup DVD, and you can also use the SFC command to repair corrupt or missing system files, without having to reinstall the whole OS.
Note: Though these guides are written for Windows 10 and Windows 8, a very similar process will work for Windows 7, Vista or XP.
Method 1: Repair System Files After Logging into Windows
- Open an elevated Command Prompt. To do this, press the Windows key + X to open the Quick Access menu and then select “Command Prompt (Admin)“.
- In the Command Prompt, run the following command:
sfc /scannow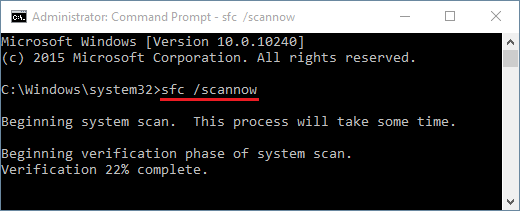
- Just keep waiting & be patient because running this command will take quite a bit of time. The scan results will be shown after this process is finished. If you see a “Windows Resource Protection found corrupt files but was unable to fix some of them” message, try reboot into Safe Mode and run the SFC command again, or try the method below.
Method 2: Repair System Files Offline When Windows Won’t Boot
If Windows cannot start because some of system files are corrupted or missing, just boot your computer from Windows Installation DVD and you can repair the system files offline. If you don’t have a Windows Installation DVD, you can borrow one from a friend or use a Recovery Drive created in any computer running Windows 10/8.
- Insert the Windows Installation DVD and set up your computer to boot from optical drive (You might need to change the boot priority in the UEFI / BIOS). Press a key when prompted to boot from DVD.
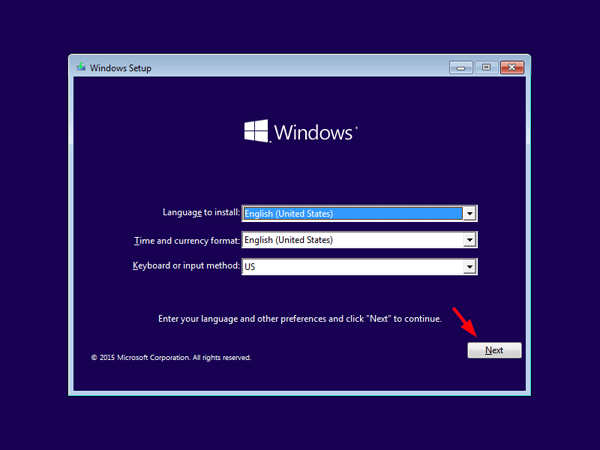
-
Once booted to the DVD, you’ll see the familiar Windows installation language-selection screen. Click Next.
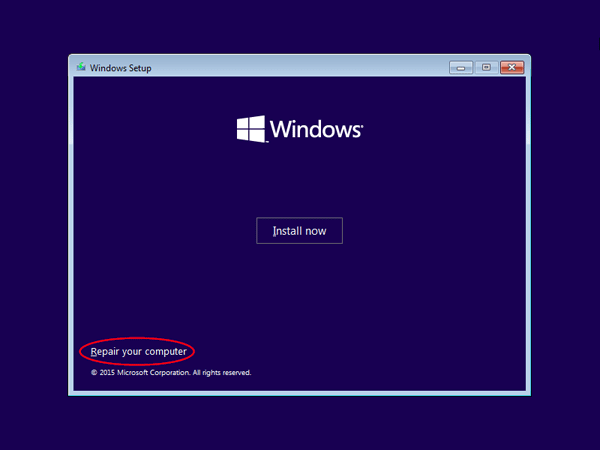
-
Click on “Repair your computer“.
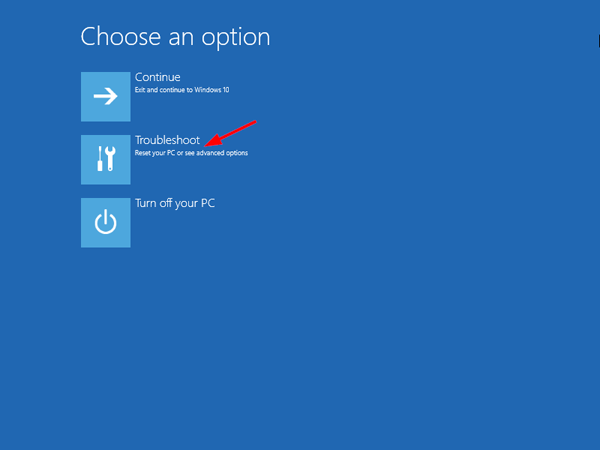
-
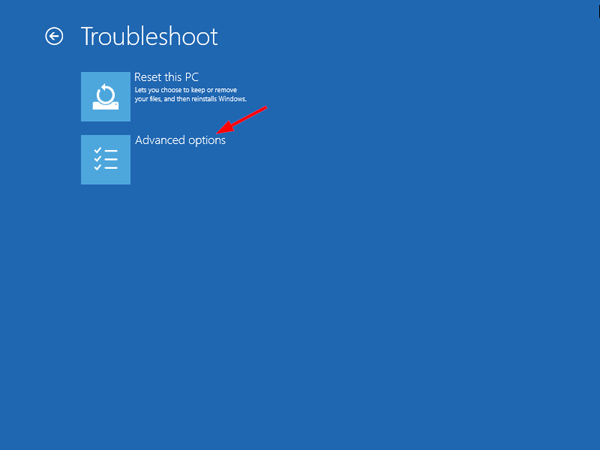
When you are asked to choose an option for how you want to continue. Click Troubleshoot.
-
Next click “Advanced options“.
-
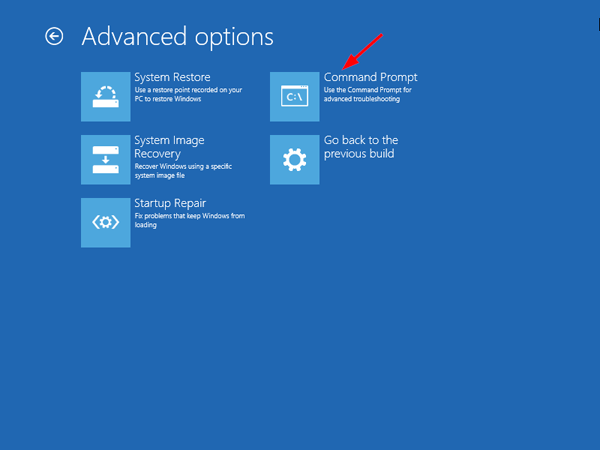
On the next screen, click “Command Prompt“.
-
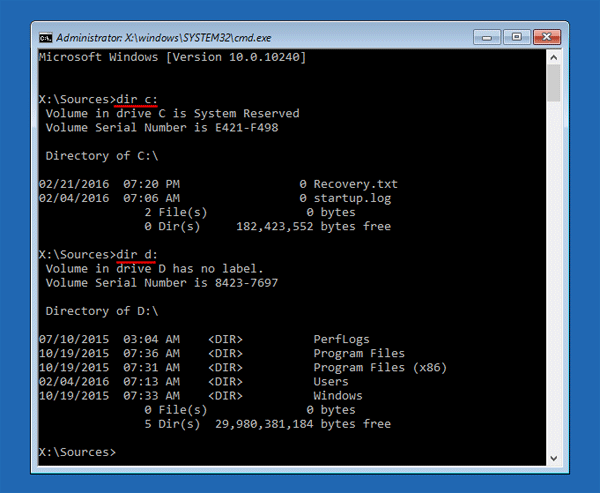
In the Command Prompt, use the dir command to find the drive letter of your Windows partition. In my example, C:\ is the System Reserved partition and D:\ is my actual Windows partition.
-
Now run the SFC command to repair your Windows installation. It will scan all your system files, identify those that are corrupt or missing and try to fix the problems it find.
sfc /scannow /offbootdir=D:\ /offwindir=D:\windows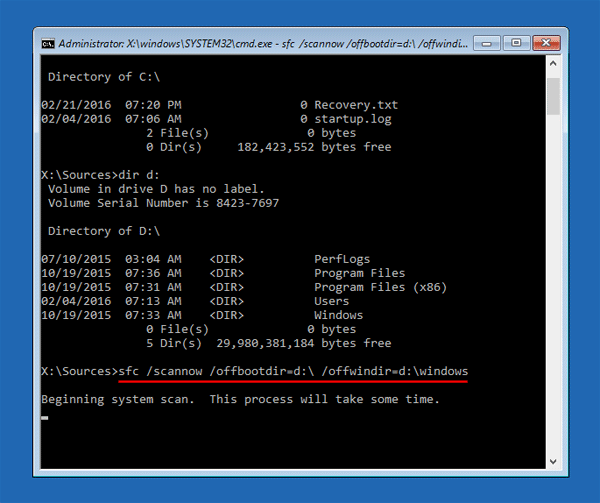
Remember to replace D:\ with the actual drive letter of your Windows partition.
When the scan is complete, remove the installation DVD and restart your computer to check if your problem is fixed. To perform the recovery experiment, I intentionally deleted a system file c:\windows\system32\sechc.exe, and the file can be restored successfully by running the SFC command.