It could be quite annoying if your computer goes to sleep at all the wrong times or if you have trouble coming out of sleep state. In this tutorial we’ll show you 2 ways to put your computer to never sleep & disable sleep mode in Windows 10.
Method 1: Set Windows 10 PC to Never Sleep Using Control Panel
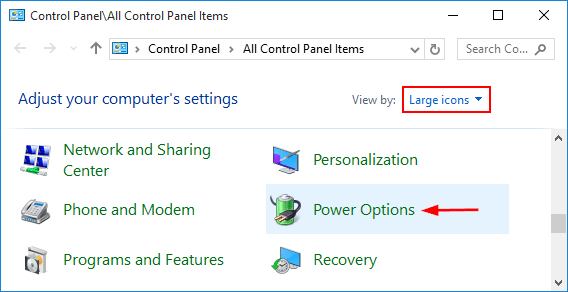
- Open the Control Panel in Windows 10. Change your view to either Large icons or Small icons. Look for and click on the Power Options.
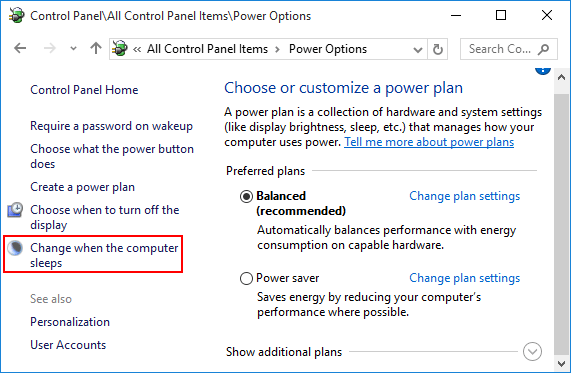
- This will bring you to a place where you can choose your power plan. From the left hand side of the window, select Change when the computer sleeps.
- From the drop down box next to Put the computer to sleep, select the amount of time you would like Windows 10 to wait before entering sleep state. If you want to stop Windows 10 from going to sleep, select Never from the list. From there, you can also see an option for making your computer never turn off monitor display.
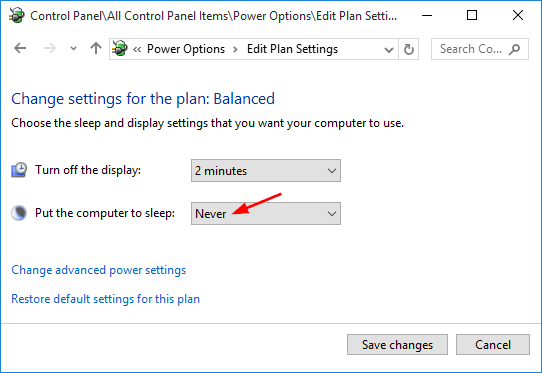
- When done, click the Save changes button to exit.
Method 2: Set Windows 10 PC to Never Sleep Using Settings App
- To get started, open the Settings app by pressing Win + I keys together, or clicking on the Start button and selecting Settings.
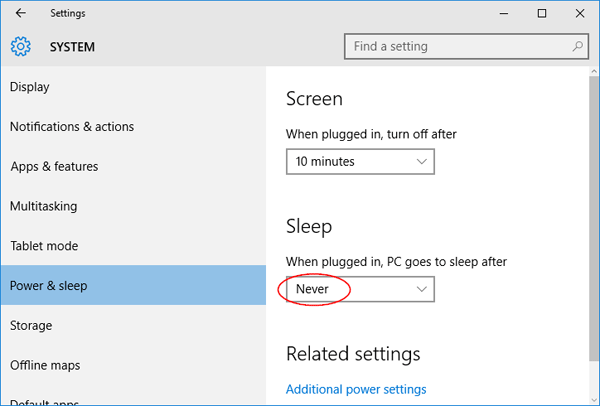
- From the Settings window, click on System.

- Select Power & sleep on the left pane. Under the Sleep option, select Never from the drop-down list. You can also click the Screen drop-down list and then select Never if you want your PC to never turn off screen display.
- That’s it! Your PC will never go to sleep mode again.