Every operating system needs an occasional repair job, and Windows 7 is no exception. Whether the source of the problem is corrupt data, a particularly brutal piece of malware, or some other serious issue, you’ll occasionally have to reinstall your copy of Windows.
Wiping your hard drive and performing a fresh installation can be a huge headache; but fortunately there’s a way to repair a corrupt Windows 7 installation while keeping all your programs, personal data, and user accounts intact. This article will show you how to do a repair install to fix Windows 7 issues.
Step 1
Put the Windows 7 installation disc in the CD drive and Click on Setup.

Step 2:
Then Click on “Install Now“.

Step 3:
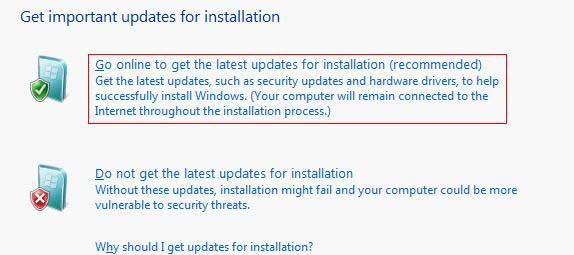
Now click on “Go Online and get the latest updates for Installation“, then it might take few minutes to download the critical updates and apply them depending upon your Internet speed.
Step 4:
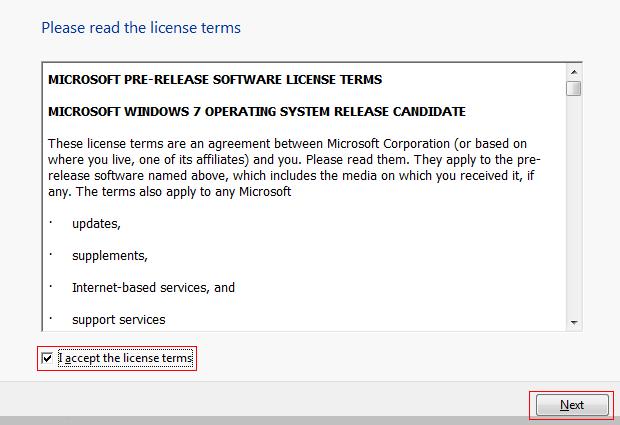
Then Accept the Terms and Conditions and Click Next.
Step 5
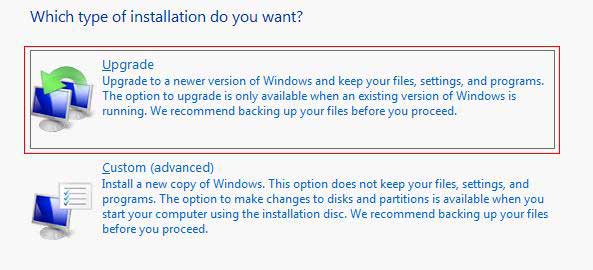
Now click on “Upgrade” to begin the Repair.
Step 6:
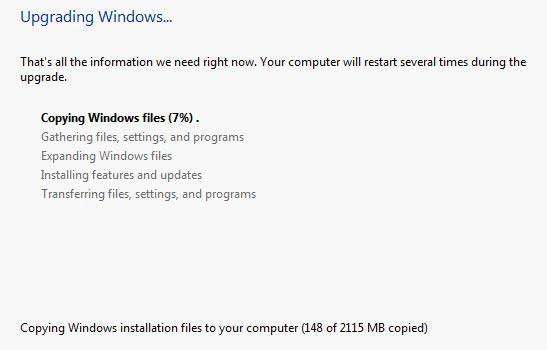
Once the Repair is complete the setup will reboot your computer.
Step 7:
You need to activate your Windows 7 and do the initial setup like setting up date time etc.
Step 8:
In case your missing any user setting copy them from C:\Windows.old folder or under C:\$INPLACE.~TR and C:\WINDOWS.~Q backup folders ( Thanks to Shawn Brink, MVP for the Tip).
Make sure you enable Hidden Files folder. Once you confirmed everything run the Windows Disk Cleanup to remove the old installation files.
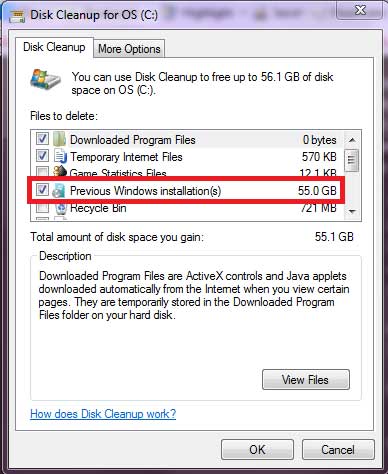
select “Files discarded by Windows Upgrade“.
Congratulations, you’ve successfully brought your Windows 7 PC back from the brink of corruption! Make sure to keep this guide handy, in case you ever need to repair a corrupted copy of Windows 7 again.
Note: If the Upgrade option is unavailable for some reason, you can still perform a repair by using a simple workaround: Right-click the Setup.exe file before you run it, and select the Properties menu. From there, navigate to the Compatibility tab, and check Run this program in compatibility mode for:. Then select Windows Vista (Service Pack 2) from the drop-down menu. Be sure to also check the box at the bottom labeled Run this program as an administrator; then click OK. Run the Setup utility again, and the upgrade installation option should be available.