If your PC is part of a home network, you can see other computers in the same workgroup and access the resources (like files and printers) being shared by others. In this tutorial we’ll show you 3 ways to change workgroup name in Windows 10, if you need to join an existing workgroup or create a new one.
Method 1: Change Workgroup Name from System Properties
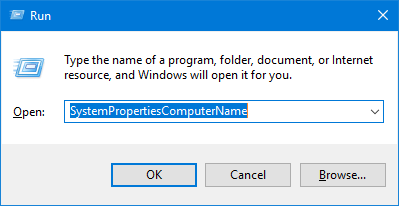
Press the Windows key + R to open the Run box, type SystemPropertiesComputerName and press Enter.
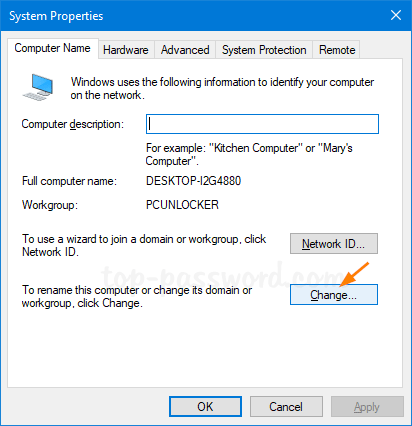
When the System Properties window opens, click the Change button.
Select Workgroup under “Member of” at the bottom, and enter the desired workgroup name and click OK.
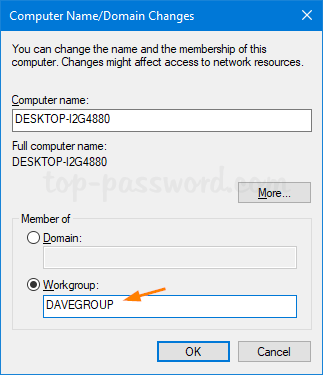
You’ll be prompted to restart your PC and apply the new workgroup name.

Method 2: Change Workgroup Name Using Command Prompt
Open an elevated Command Prompt, and run the following command. Replace “Workgroup_Name” with the new workgroup name.
wmic computersystem where name="%computername%" call joindomainorworkgroup name="Workgroup_Name"

When the command is executed successfully, reboot your PC.
Method 3: Change Workgroup Name Using PowerShell
Open the PowerShell as adminstrator, and execute the following command. Substitute “Workgroup_Name” with the actual name of the workgroup you want to join.
Add-Computer -WorkGroupName "Workgroup_Name"
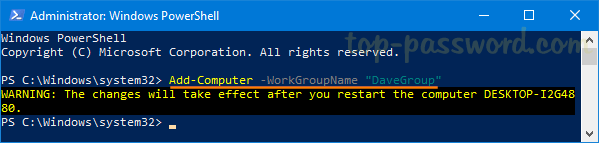
When finished, close the Windows PowerShell and restart your computer.