If you routinely forget to lock the screen when you walk away from your computer, it’s recommended to set Windows 10 to automatically lock itself after a specific period of inactivity. This can prevent prying eyes from peeking your work. Here are 2 simple ways to configure inactivity time to automatically lock your PC for all user accounts in Windows 10.
Method 1: Auto Lock Windows 10 PC After Inactivity Using GPO
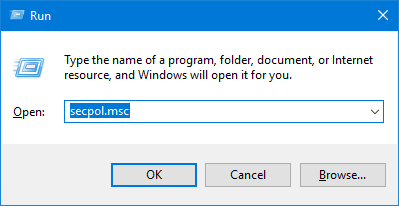
- Use the Windows key + R keyboard combination to open the Run command. Type secpol.msc and hit Enter.
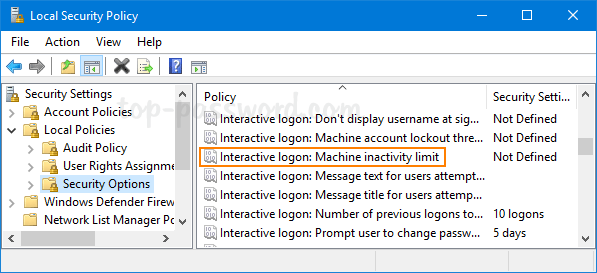
- When the Local Security Policy is opened, expand Local Policies -> Security Options. Double-click on the “Interactive logon: Machine inactivity limit” policy in the right pane.
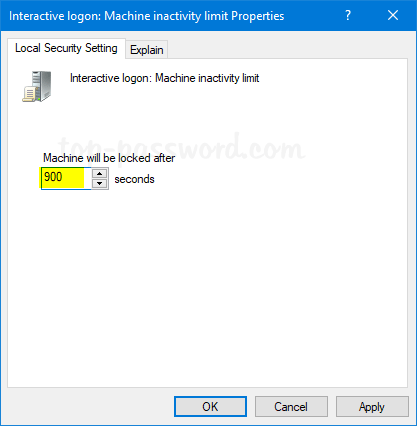
- Now you can set desired inactivity time limit, which can range from 0 to 599940 seconds. If Machine will be locked after is set to zero, the policy is turned off and your PC will never lock after any inactivity.
- Save your changes and reboot. Your computer will lock automatically when it has been idle for the specified inactivity limit, and you’ll need to enter your password to unlock it.
Method 2: Auto Lock Windows 10 PC After Inactivity Using Registry Editor
- Open the Registry Editor. Copy and paste the following path in the address bar, and press Enter.
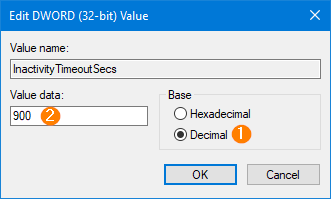
HKEY_LOCAL_MACHINE\SOFTWARE\Microsoft\Windows\CurrentVersion\Policies\System - In the right pane, look for the 32-bit DWORD InactivityTimeoutSecs and double-click it to modify. If it doesn’t exist, you have to create it.
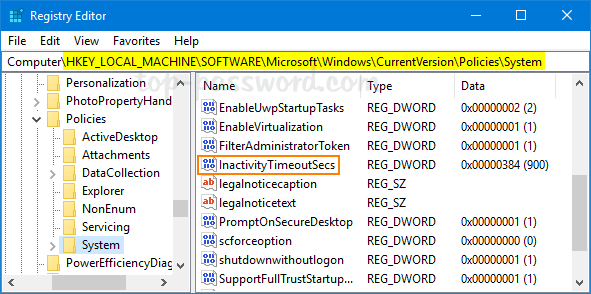
- In the popup dialog, select Decimal and enter the amount of idle time before Windows 10 locks the screen. For instance, if you want Windows to auto lock after 15 minutes of inactivity, set the value to 900.
- Close Registry Editor and restart your computer.