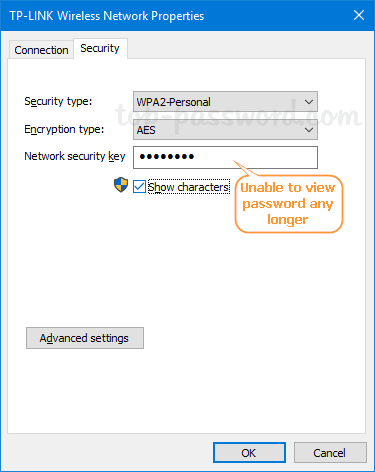
Having Windows remember your WiFi password is a great convenience, but this will also make your wireless password exposed to anyone who has physical access to your computer. Just open the Properties of a WiFi adapter and we can check the “Show characters” option to view the saved wireless network security key/password.
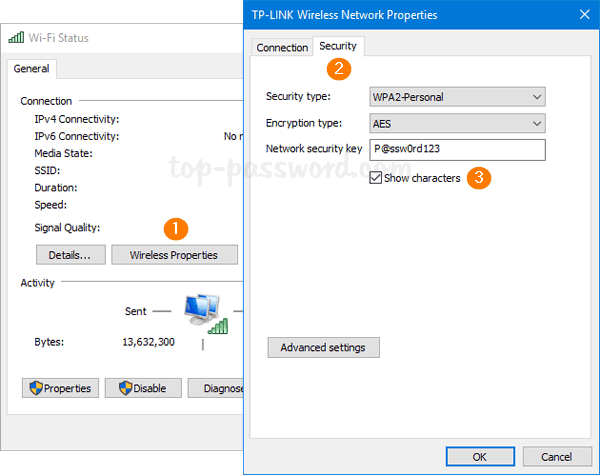
This might inadvertently leak your WiFi password. In this tutorial we’ll show you a simple way to hide wireless password from the WiFi adapter’s properties window in Windows 10.
How to Hide Wireless Network Password in Windows 10
- Open the Registry Editor. Copy and paste the below line into the address bar and then hit Enter.
HKEY_CLASSES_ROOT\AppID\{86F80216-5DD6-4F43-953B-35EF40A35AEE}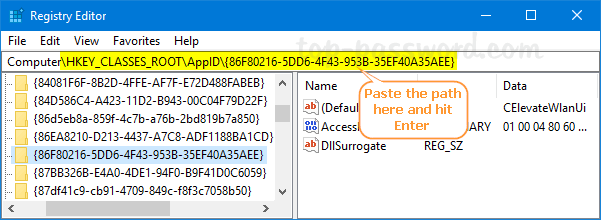
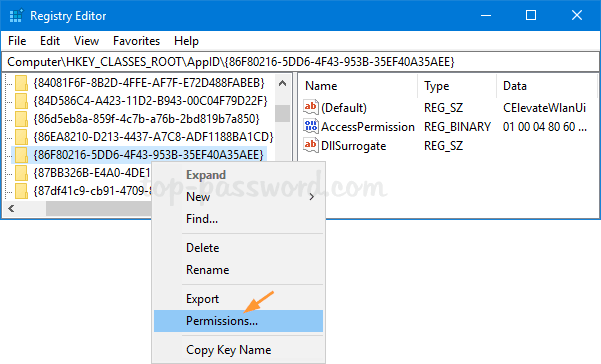
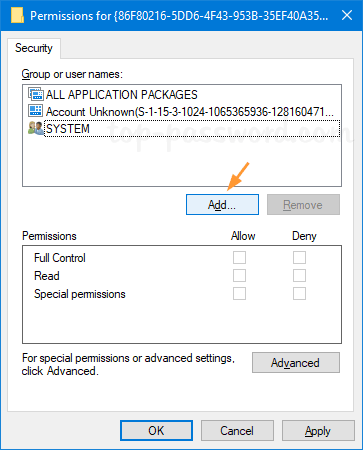
- Right-click on the subkey named {86F80216-5DD6-4F43-953B-35EF40A35AEE} in the left-side pane and then select Permissions from the context menu.
- Click on Advanced button.
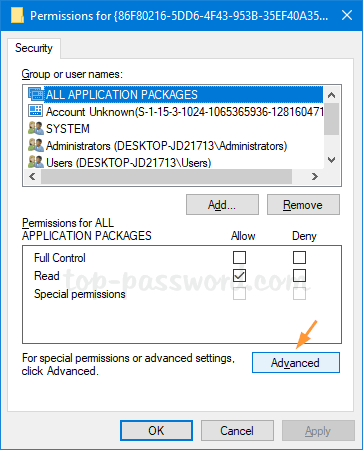
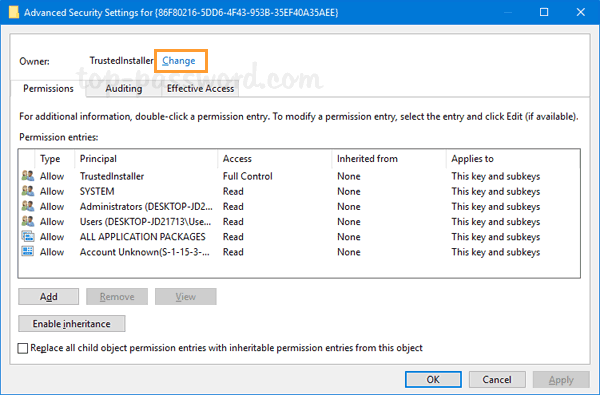
- By default TrustedInstaller is showing up as the owner, and we need to click the Change link.
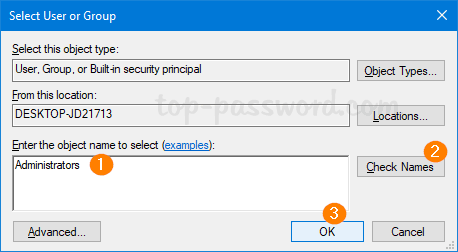
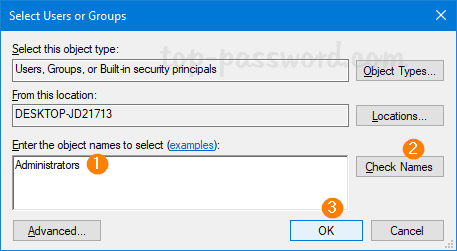
- Type the name of your Administrators group and then click the “Check Names” button to validate the account name. When that’s done, click OK.
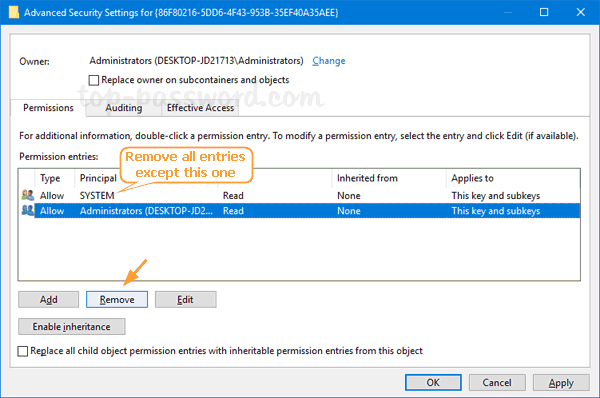
- Now, back to the Advanced Security Settings window. Just keep the permission entry for the “System” account and remove all other entries from the list. When done, click OK.
- From now on, you should no longer be able to view your wireless password from the WiFi network adapter’s Properties window.
However, this won’t prevent users from recovering your wireless password using third-party password cracking software or other methods described in this article: 3 Ways to Find Saved Wi-Fi Passwords on Windows 10
Whenever you need to get the the “Show characters” option back to work again, just grant your account access to the registry key: HKEY_CLASSES_ROOT\AppID\{86F80216-5DD6-4F43-953B-35EF40A35AEE}. Follow these steps:
- Open Registry Editor and navigate to
HKEY_CLASSES_ROOT\AppID\{86F80216-5DD6-4F43-953B-35EF40A35AEE}. Right-click on the {86F80216-5DD6-4F43-953B-35EF40A35AEE} subkey and select Permissions. - Click on Add button.
- Type Administrators in the “Enter the object names to select” text box, and click on Check Names button. If there is no error found, click OK.
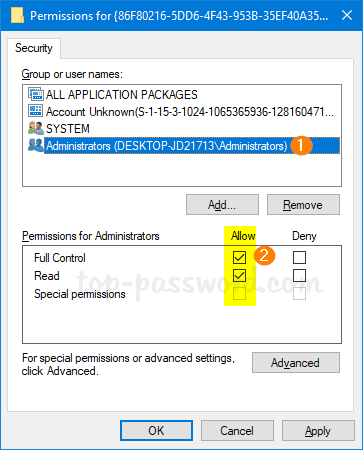
- Back at the Permissions window, select the Administrators group and then click the Allow check box next to the “Full Control” permission.
- Click OK and close Registry Editor.