Windows Ink Workspace is a new feature introduced in Windows 10 Anniversary Update, which makes pen input more usable for everyone with a PC. Within Windows Ink Workspace, you can use a digital pen to write sticky notes, doodle in Sketchpad, take a screenshot of your desktop and load it for your sketching.
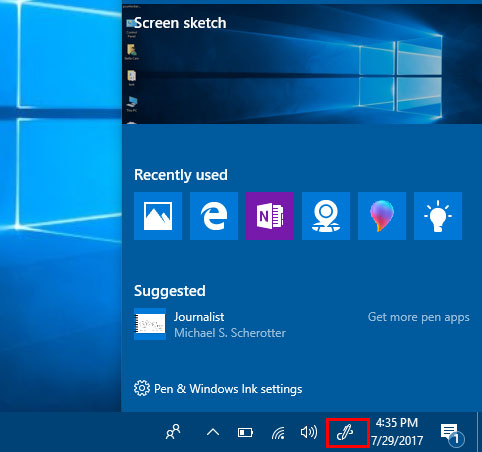
If you don’t have a digital pen or you want to remove Windows Ink Workspace icon from your taskbar, here are 2 easy ways to disable Windows Ink Workspace in Windows 10.
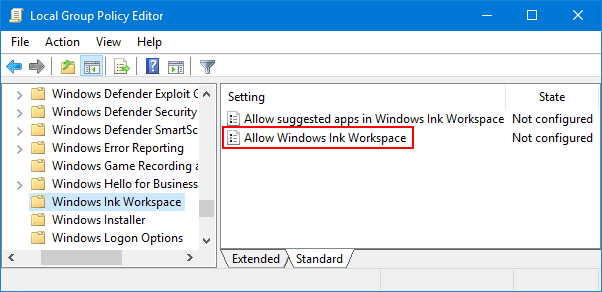
Method 1: Disable Windows Ink Workspace in Windows 10 Using Group Policy
- Open the Local Group Policy Editor. Navigate to: Computer Configuration ->Administrative Templates ->Windows Components ->Windows Ink Workspace.
- In the right side pane, double-click Allow Windows Ink Workspace to open its properties.
- Check the Enabled option. Next, select Disabled from the drop-down menu under Options section.
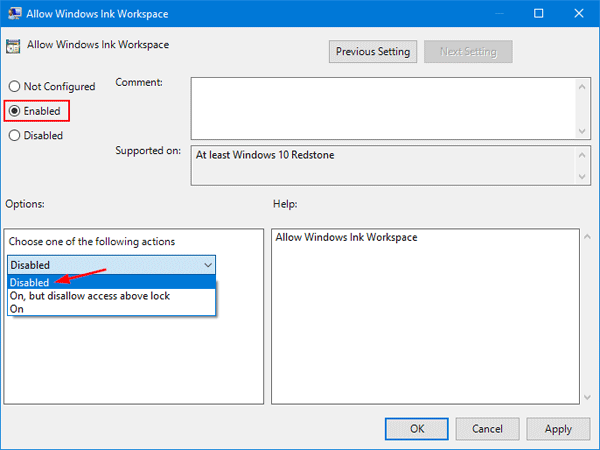
- Click on Apply and then OK. Restart your PC to make the changes to take effect.
Method 2: Disable Windows Ink Workspace in Windows 10 Using Registry Tweak
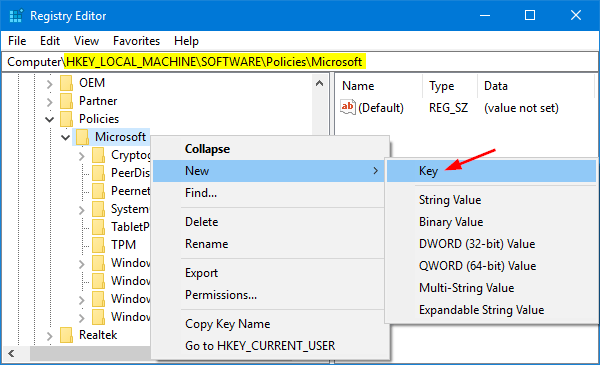
- Open the Registry Editor. Navigate to the following key:
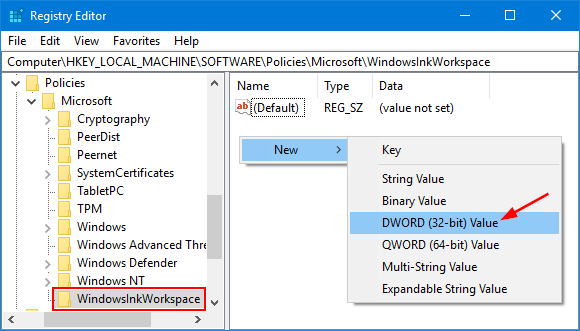
HKEY_LOCAL_MACHINE\SOFTWARE\Policies\Microsoft - Right-click the Microsoft key in the left pane, and then select New -> Key. Name the Key as WindowsInkWorkspace.
- Now, select the WindowsInkWorkspace key. Right-click empty space in the right pane, select New -> DWORD (32-bit) Value.
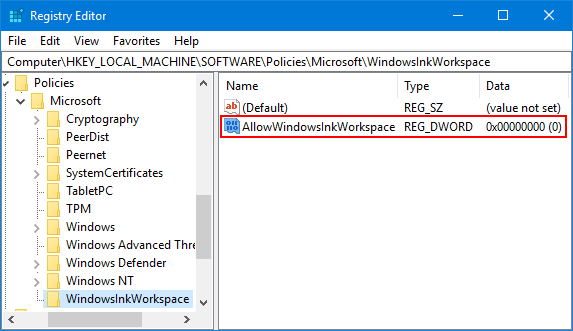
- Name the DWORD value as AllowWindowsInkWorkspace. Leave its value data as 0.
- Restart your computer. Once signed back in, you should see Windows Ink Workspace disabled.
If you want to enable Windows Ink Workspace again, just follow the steps above and change the DWORD AllowWindowsInkWorkspace value from 0 to 1, and restart your computer.