Memory compression is a new feature introduced in Windows 10, which can store more data in your RAM than it otherwise could, by storing part of the memory pages in RAM in a compressed form. For example, if your applications need to store 4 GB of data in the RAM at the same time, Windows might have 3 GB of uncompressed data and 0.5 GB of compressed data that actually takes up 1 GB in RAM.
With memory compression, Windows can compress a fraction of the memory in order to reduce page swap out. This is very useful when your PC doesn’t have enough physical memory. In this tutorial we’ll show you how to disable or enable memory compression in Windows 11 / 10.
Part 1: Check if Memory Compression is Enabled
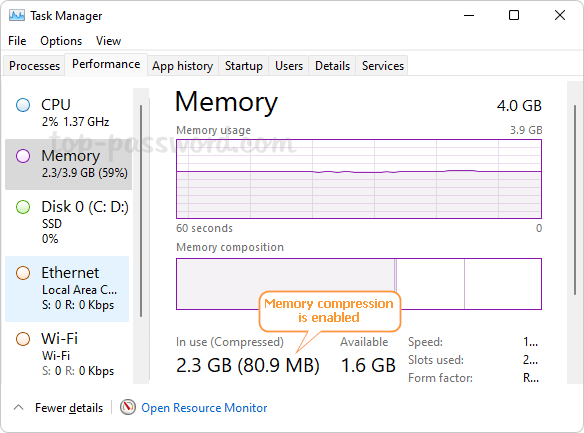
Open up Task Manager. Go to the Performance tab and select Memory on the left sidebar. You will see how much memory is compressed under the “In use (Compressed)” section. As you can see in the following screenshot, 2.3 GB of memory is in use, and of that 80.9 MB is compressed.
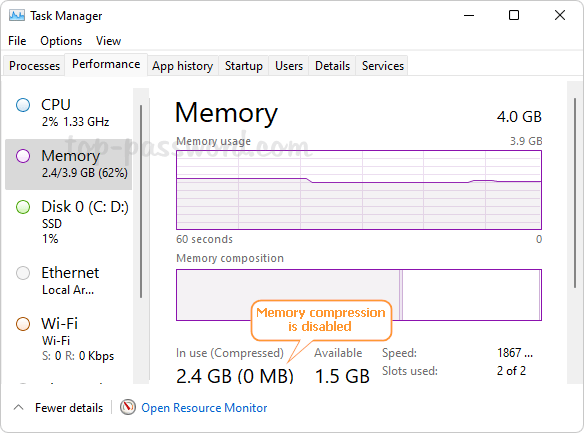
If the compressed memory is shown as 0 MB, it’s likely that the memory compression feature is disabled on your system.
Part 2: Disable or Enable Memory Compression
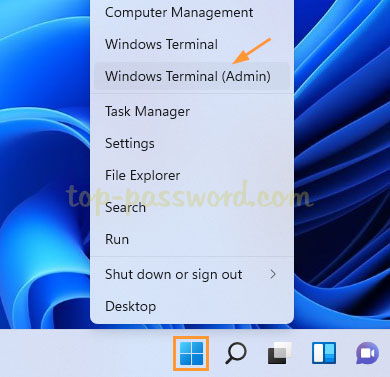
- Right-click on the Start button in the taskbar and select Windows Terminal (Admin). If you’re running Windows 10, open Windows PowerShell as administrator.
- Then run the
Disable-MMAgent -mccommand to disable memory compression, and afterwards execute the commandGet-MMagentto check if memory compression is disabled successfully.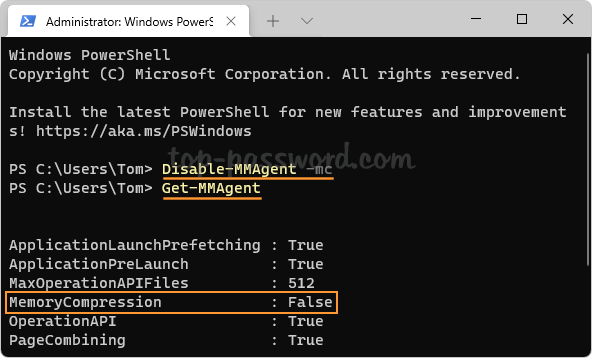
- If you need to turn on or enable memory compression, enter this command and press Enter.
Enable-MMAgent -mc
- Reboot your computer to apply the changes. The next time you log in to your system, you can launch Task Manager and check if memory compression is running or not.