Before upgrading or adding memory, it’s necessary to find out your RAM speed and check if your PC has empty slots available. In this tutorial we’ll show you 3 simple ways to check RAM speed or frequency on Windows 11 / 10, without using any third-party software.
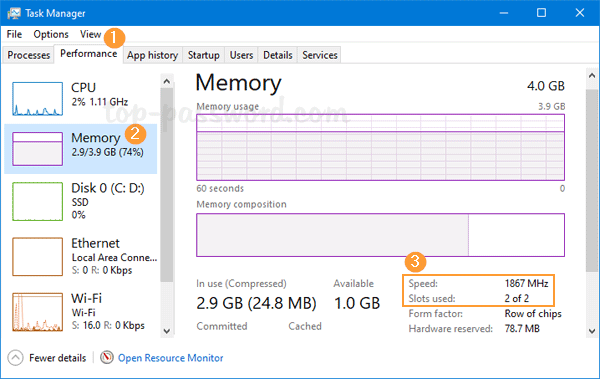
Method 1: Check RAM Speed or Frequency Using Task Manager
Press Ctrl + Shift + Esc keyboard shortcut at the same time to open Task Manager. Go to the Performance tab and then click Memory. In the right pane, you can see the RAM speed, slots used.
Method 2: Check RAM Speed or Frequency Using Command Prompt
Open up the Command Prompt window and run the following command:
wmic MemoryChip get DeviceLocator, Manufacturer, Speed
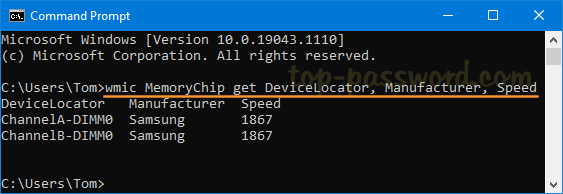
It will display your RAM speed and the number of memory slot in used.
Method 3: Check RAM Speed or Frequency Using PowerShell
Open Windows PowerShell and execute the command below:
Get-CimInstance -ClassName Win32_PhysicalMemory | Format-Table Devicelocator, Manufacturer, Speed
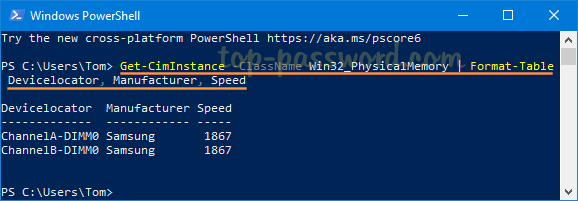
It will show the speed of RAM in each slot.
Conclusion
It’s easy to find out the RAM speed using Task Manage, Command Prompt and PowerShell. If you also need to check if the RAM type is DDR, DDR2, DDR3 or DDR4, I recommend using the third-party freeware CPU-Z.