Windows 10 keeps freezing after installing the Anniversary Update? Just upgrade from Windows 7 to Windows 10 and the login screen doesn’t accept your original password? If you face new issues with your PC’s hardware or software, you can roll back to a previous build of Windows. This tutorial will show you how to revert Windows 10 updates and go back to previous build from Windows 10 login screen.
How to Revert Windows 10 Updates by Going Back to Previous Build?
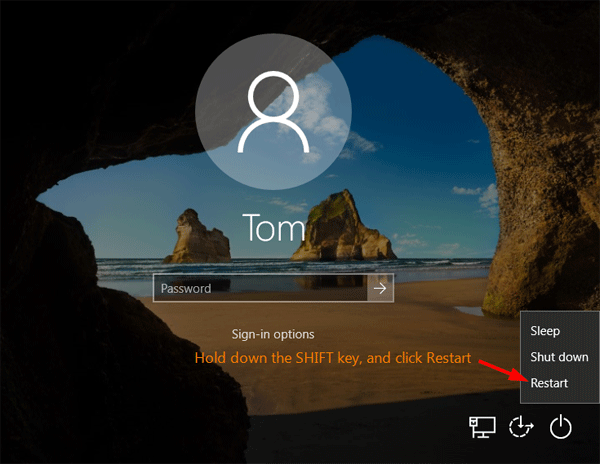
From Windows 10 sign-in screen, click on the Power button at the bottom right. Hold down the SHIFT key and select the Restart option.
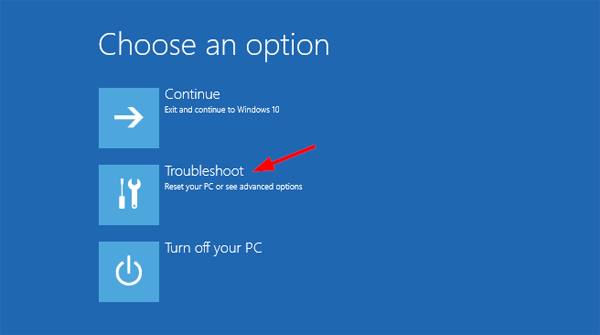
When the blue Choose an option screen appears, click Troubleshoot.
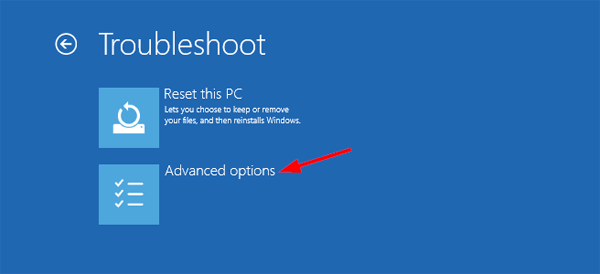
At the Troubleshoot screen, click Advanced options.
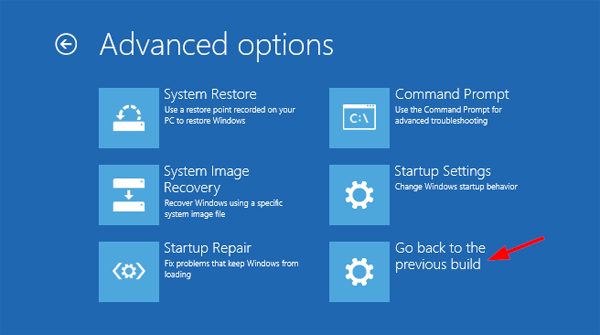
Click Go back to the previous build.
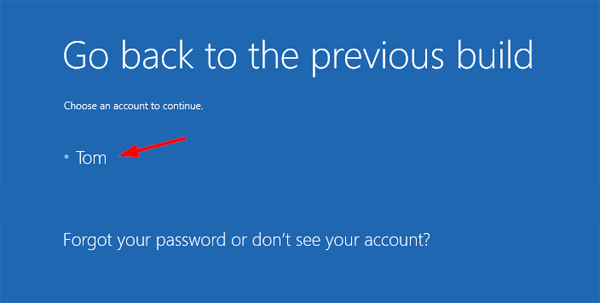
Select the Administrator account that you use and know the password of.
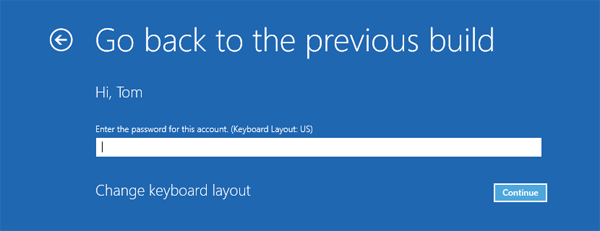
Enter the password for the selected account and then click Continue.
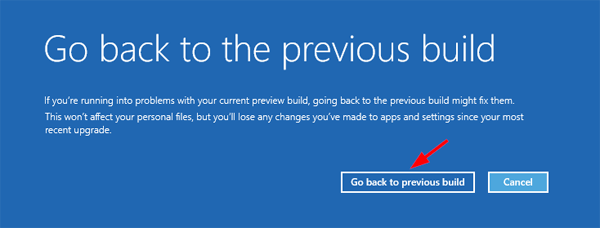
Click on Go back to previous build.
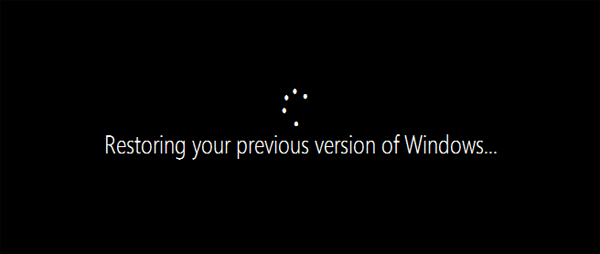
The computer begins restoring your previous build of Windows. The roll-back process can take as short as a few minutes to about half an hour depending on the speed of your computer.
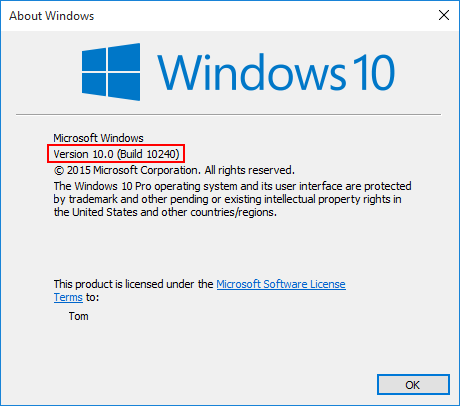
When it’s done, you can check the build number of Windows by pressing the Windows key + R and typing winver in the Run box. In my example, the build number changed from 10.0.14393 to 10.0.10240.
Note that once rolled back, you might have to reinstall some apps, and some of the settings may also be lost.