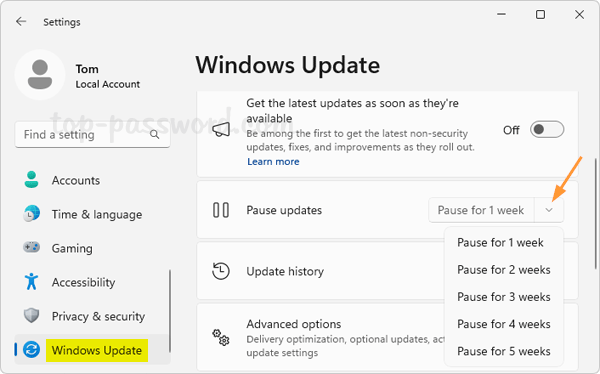
How can I pause Windows 11 update for a few months or permanently? By default, Windows 11 allows you to pause Windows update for up to 5 weeks (35 days) at maximum. Luckily, there is an undocumented method to pause updates in Windows 11 up to any desired number of days.
How to Pause Windows Update for any Amount of Time in Windows 11
- Open Registry Editor and navigate to the location:
HKEY_LOCAL_MACHINE\SOFTWARE\Microsoft\WindowsUpdate\UX\Settings, then right-click the blank area in the right pane, and choose New -> DWORD (32-bit) Value.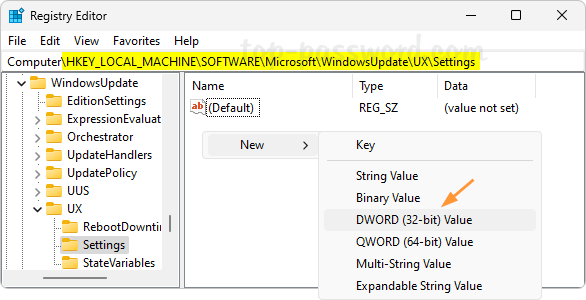
- Name the newly-created DWORD FlightSettingsMaxPauseDays, and then double-click it to bring up the “Edit DWORD Value” dialog. Choose Decimal and enter any desired number of days, click OK. If you want to pause Windows update for 10 weeks, then type 70 instead.

Though there isn’t a value for pausing Windows updates permanently, you can enter a large number to pause updates for 10 years or even 100 years.
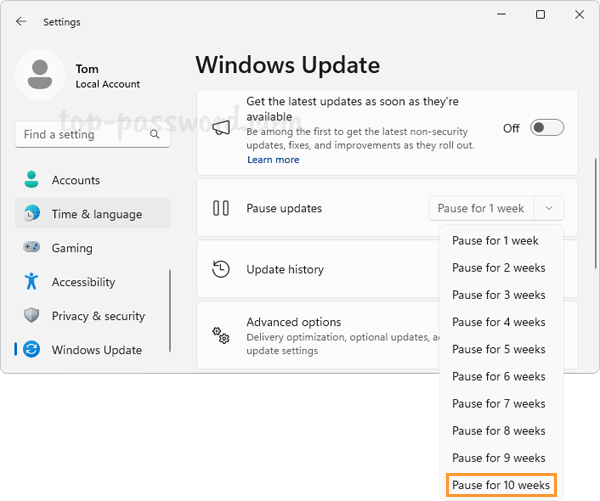
- Close Registry Editor and relaunch the Settings app. Go to Windows Update, click the arrow on the right side of the “Pause updates” drop-down box, and you can see how many weeks you can pause the update for.
If you set
FlightSettingsMaxPauseDaysto 9 and then clicked “Pause for 1 week”, the “Extend for 2 days” button will appear so you can pause updates for 9 days totally.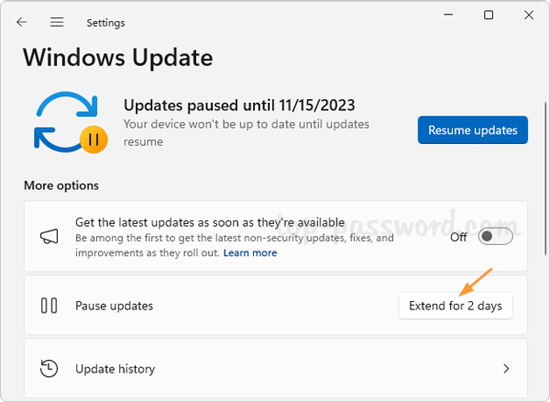
When you change your mind anytime, simple click the “Resume updates” button above.
That’s it!