Windows subsystem for Linux (WSL) is an optional Windows component that lets you install and run Linux environments natively on Windows 10, without dual-booting or using a virtual machine. In this tutorial we’ll walk you through the steps to install Kali Linux as a subsystem on Windows 10.
Step 1: Enable the Windows Subsystem for Linux
Before installing Kali Linux app, you have to enable the Windows Subsystem for Linux feature. To do this, run PowerShell as an administrator and execute the following command:
Enable-WindowsOptionalFeature -Online -FeatureName Microsoft-Windows-Subsystem-Linux
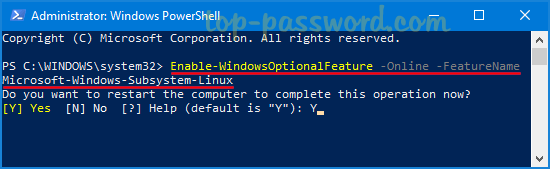
When you’re prompted to restart the computer, press Y and Enter to reboot. The system will immediately begin to restart.
Step 2: Download and Install Kali Linux App
Kali Linux is officially released as an application on the Microsoft Store. Just open the Windows Store app and search for Kali Linux, and click Get to download and install it on your computer.

The download is approximately 160Mb in size and you should be able to get it installed in minutes.
Step 3: Create a User to Log into Kali Linux
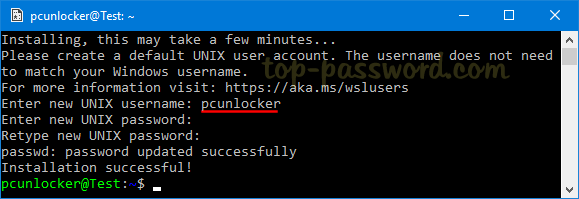
To open the Kali Linux app you installed, just click the Cortana Search box in the taskbar and type “kali”. You can then click the Kali Linux shortcut to launch it.

This will open a console window. Wait for installation to complete then you will be prompted to create your Linux user account.
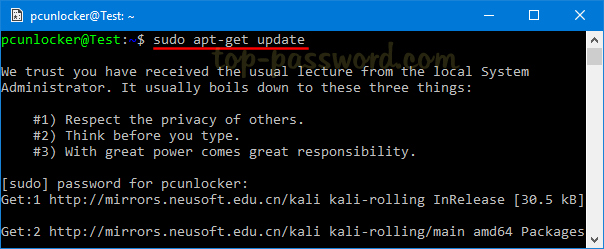
Now you can regularly upgrade the Kali Linux installation to the latest version by using the commands:
sudo apt-get update

sudo apt-get dist-upgrade

sudo apt-get clean
Congratulations, you’re all set up and running a Kali Linux subsystem directly on your Windows 10 machine!