These days, hiding a folder or file is probably something you will need if you use a computer shared with others. By default, you can change the file attribute and make your private files hidden. The problem is that just as many people know you can show files and folders that have the “hidden” attribute by simply changing a radio button under the folder view options.
In this tutorial we’ll show you a secure method to hide a folder or file in Windows 8/7/Vista/XP. Make your private folders or files invisible from Windows Explorer and Command Prompt, even computer geeks can’t find out your hidden secrets. This can be achieved by a computer security program – Protect My Folders.
How to Securely Hide A Folder or File in Windows 8/7/Vista/XP?
Download the setup package of Protect My Folders and save it on your computer. Once you’ve downloaded it, double-click the setup file to install it on your computer.
Start the Protect My Folders program. The first time you start the program, it will prompt you to set a new password for Protect My Folders. This password is designed to prevent others from unlocking your protected folders or files, or uninstalling this program.

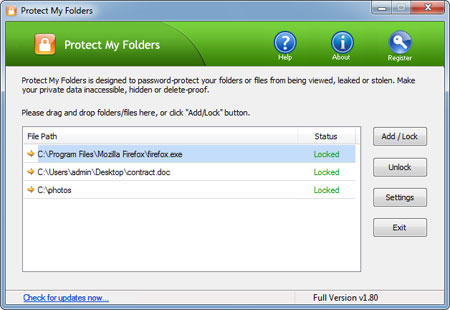
After logging into the program, you’ll see the main interface of Protect My Folders. Simply click the “Add/Lock” button and you can add a folder or file to the protected list. After that, your folder or file will be protected and disappear from Windows Explorer and other applications.
Exit the program. Your protected folders or files will keeping invisible until you unlock your folders / files with Protect My Folders program. It’s that easy!