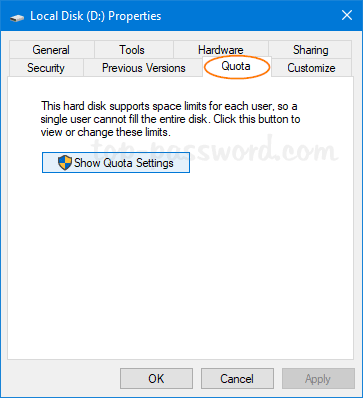
The Quota tab is not shown or missing for all hard drives? Is there a way to remove the Quota tab as I don’t need to manage disk quota settings? In this tutorial we’ll show you how to hide or add Quota tab in the Drive Properties window in Windows 10.
Part 1: Hide or Remove Quota Tab
- Open Registry Editor. Copy and paste the following path in the address bar and hit Enter.
HKEY_CLASSES_ROOT\Drive\shellex\PropertySheetHandlers\{7988B573-EC89-11cf-9C00-00AA00A14F56}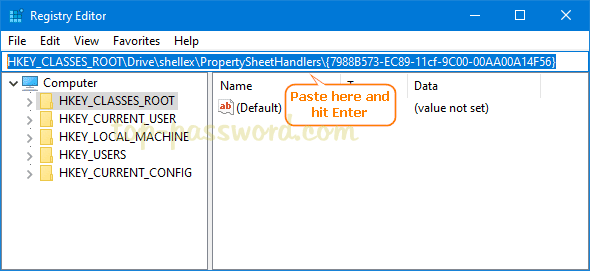
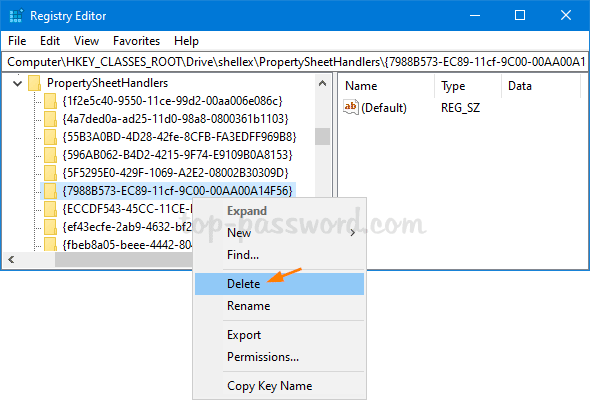
- It will take you to that location. In the left pane, right-click on the {7988B573-EC89-11cf-9C00-00AA00A14F56} subkey and then select Delete.
- Close Registry Editor. Right-click any drive in File Explorer and choose Properties, you’ll find that the Quota tab is successfully removed from the Drive Properties window.
Part 2: Add Quota Tab
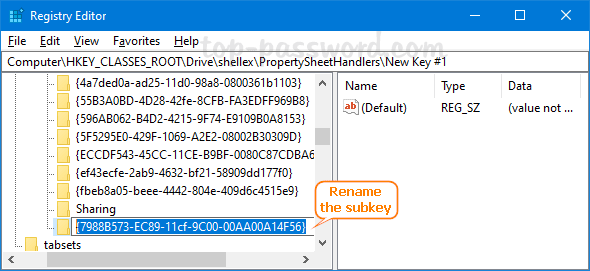
- Open Registry Editor and navigate to the following location. Right-click on the PropertySheetHandlers key and select New -> Key.
HKEY_CLASSES_ROOT\Drive\shellex\PropertySheetHandlers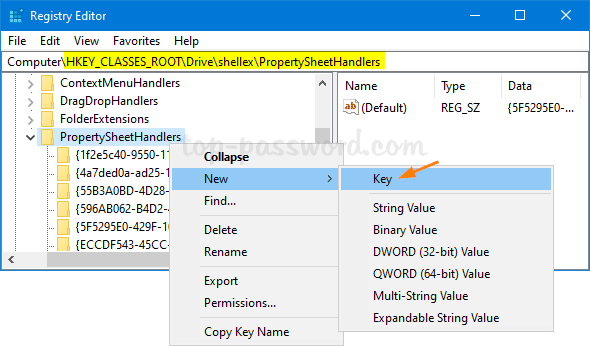
- Rename the newly-created key to {7988B573-EC89-11cf-9C00-00AA00A14F56}.
- Close Registry Editor. Now the Quota tab will be visible in the Drive Properties window.
That’s it!