Telnet is not recognized as an internal or external command on Windows 10? Starting with Windows 7, telnet is not enabled by default and you have to install it manually. In this tutorial we’ll show you 2 simple ways to enable telnet client in Windows 11 / 10 / 8 / 7.
Method 1: Enable Telnet Client Using Control Panel
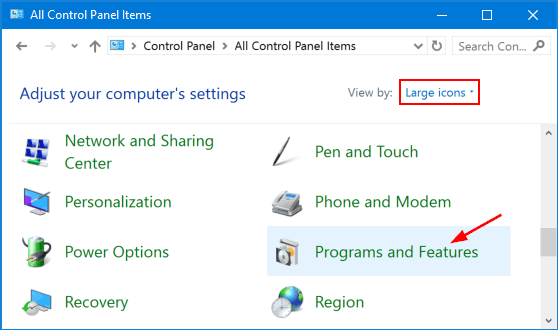
- Open the Control Panel with Large icons view, and click on Programs and Features.
- Click the “Turn Windows features on or off” option in the left pane.

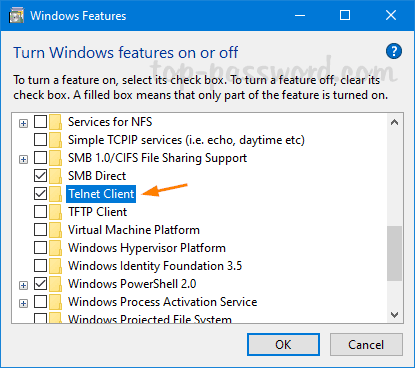
- In the Windows Features window, check the checkbox for Telnet Client and click OK.
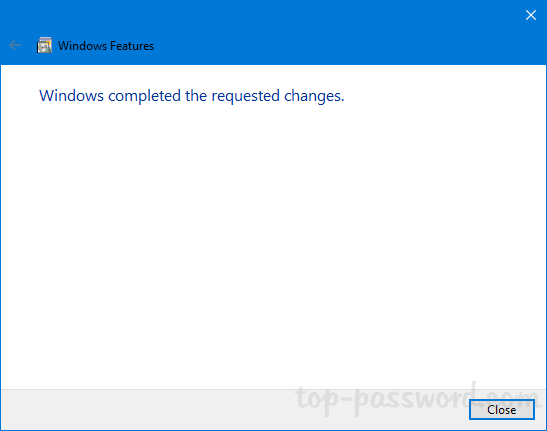
- When complete, you’ll see the “Windows completed the requested changes” message.
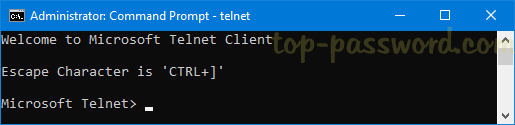
- Now, you can start using the telnet command from the Command Prompt or PowerShell.
Method 2: Enable Telnet Client Using PowerShell or Command Prompt
- Open Windows PowerShell (or Command Prompt) as administrator.
- Type the following command and hit Enter. It will take a while to install telnet on your computer.
dism /online /Enable-Feature /FeatureName:TelnetClient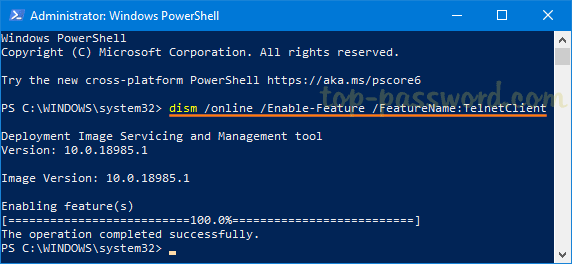
Whenever you need to disable or uninstall telnet, run the below command:
dism /online /Disable-Feature /FeatureName:TelnetClient
That’s it!