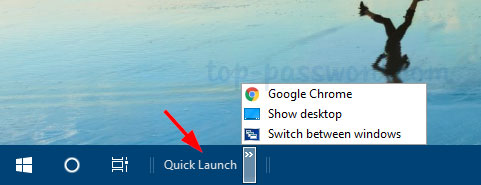
Quick Launch is a small toolbar that resides in your Windows taskbar that allows you to quickly launch programs that you place in it. Since Windows 7, Quick Launch toolbar was removed from the taskbar but you can get it back. In this tutorial we’ll show you how to enable Quick Launch toolbar in Windows 10/8/7, add your favorite programs to it, and move the Quick Launch toolbar to the left of taskbar.
Enable Quick Launch Toolbar
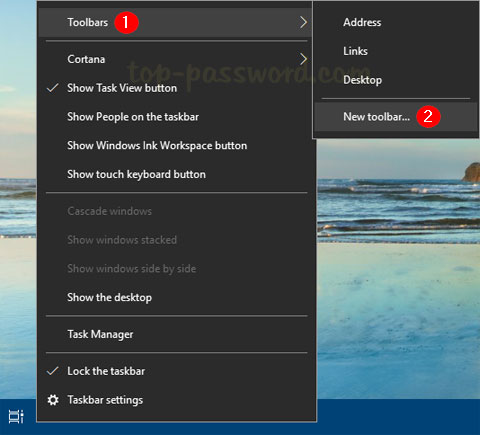
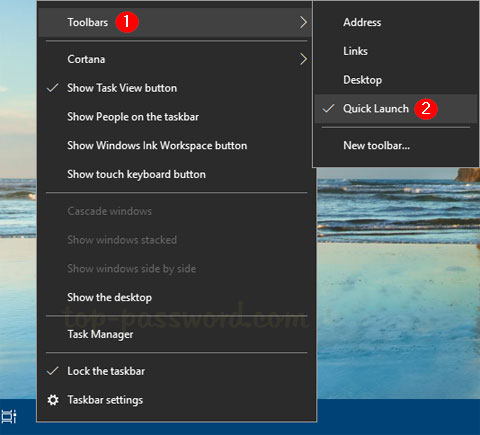
Simply right-click an empty space on the Windows taskbar, and then select Toolbars -> New toolbar.
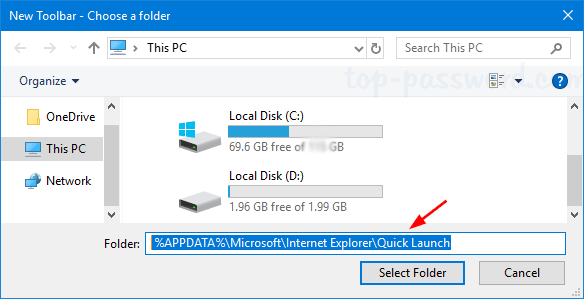
When the “New Toolbar – Choose a folder” window appears, paste the following path into the Folder field and press Enter. Then click Select Folder.
%APPDATA%\Microsoft\Internet Explorer\Quick Launch
Now, Quick Launch toolbar will appear on the far right of the taskbar.
Add Programs to Quick Launch Toolbar
If you want to add the applications you use the most to the Quick Launch toolbar, do the following:
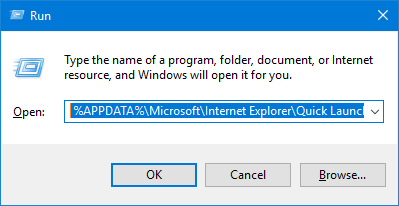
Press the Windows key + R to bring up the Run dialog box. Type the following path and press Enter.
%APPDATA%\Microsoft\Internet Explorer\Quick Launch
Windows Explorer will open the Quick Launch folder. Now you can drag your favorite applications or shortcuts and drop them here.
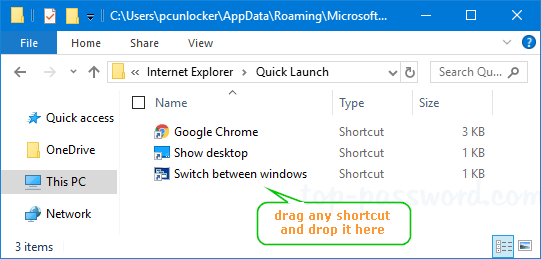
When you’re done, your application icons will appear in the Quick Launch toolbar for quick access.
Move Quick Launch Toolbar to Left
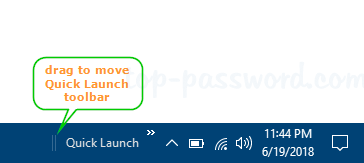
If you want to move the Quick Launch toolbar to the left, right-click the taskbar and uncheck “Lock the Taskbar” from the popup menu. Click on the left edge (two vertical dotted lines) of the Quick Launch toolbar, and drag it over to the left as far as it will go.
Remove the Quick Launch Toolbar
If you don’t want to use the Quick Launch toolbar any more, right-click an empty space on the taskbar, select Toolbars and click on Quick Launch to uncheck it.
Now you’ve successfully removed Quick Launch toolbar from Windows taskbar.