Quick Access Toolbar is part of the Ribbon interface that is located in the title bar of File Explorer. It provides quick access to commands you use most often. In this tutorial we’ll show you how to add or remove any Ribbon command on the Quick Access Toolbar, or reset Quick Access Toolbar to default in Windows 10.
Add Ribbon Commands to Quick Access Toolbar
Right-click on any command/button (such as Format, Cleanup or Optimize) in any Ribbon tab and then select “Add to Quick Access Toolbar” from the pop-up menu.
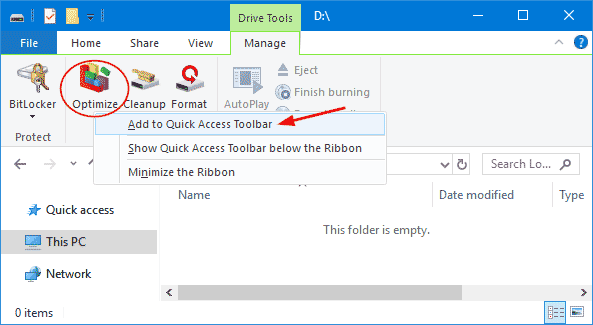
If the “Add to Quick Access Toolbar” menu is grayed out, it means that this command/button has already been added to the Quick Access Toolbar.
Remove Ribbon Commands from Quick Access Toolbar
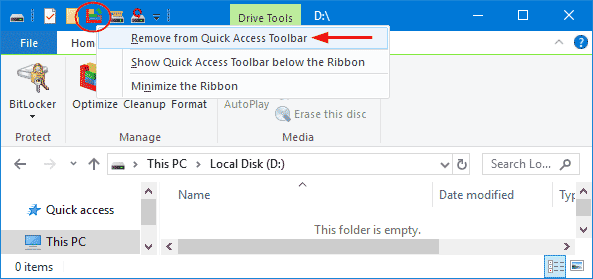
Right-click on any command that is present on the Quick Access Toolbar, and then choose “Remove from Quick Access Toolbar“.
Reset Quick Access Toolbar to Default
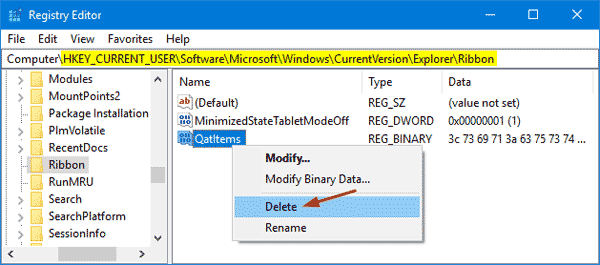
If you have messed up the Quick Access Toolbar, you can reset it to the default state. To do this, open the Registry Editor and go to the following key:
HKEY_CURRENT_USER\Software\Microsoft\Windows\CurrentVersion\Explorer\Ribbon
In the right pane, look for the QatItems value which stores all the settings for the Quick Access Toolbar. Just right-click on QatItems and then select Delete from the pop-up menu.
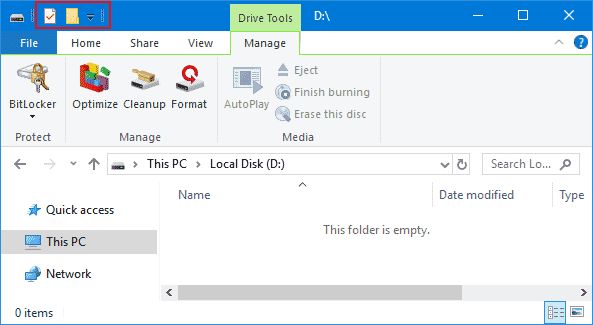
Restart your computer or sign out of your account. The next time you open File Explorer, the Quick Access Toolbar will contain only three default buttons: one for accessing the properties of the selected file or folder, one for creating new folder, and a down-pointing arrow that opens a menu that you can use to configure the Quick Access Toolbar.
That’s it!