Inline AutoComplete is a useful feature which can help fill in the Run dialog or the address bar of File Explorer with less effort. While typing in the Run dialog box, inline AutoComplete will automatically append the rest of the command based on your history, and the auto-fill data is highlighted in light blue.
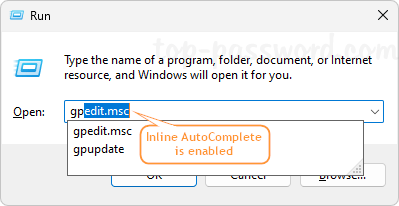
If the inline AutoComplete feature is disabled, the Run dialog box will not auto fill the rest of the command for you.

In this tutorial we’ll show you 2 methods to enable inline AutoComplete in File Explorer and Run Dialog in Windows 11. These methods also work with Windows 10/8/7.
Method 1: Enable Inline AutoComplete in Windows 11 via Control Panel
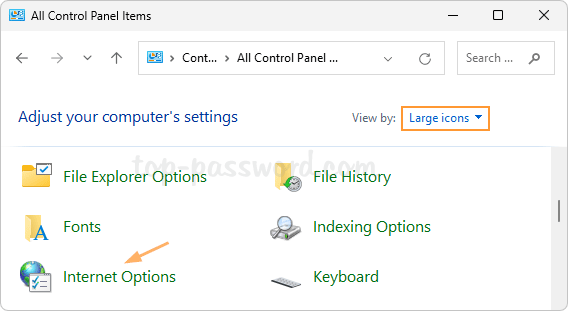
- Open the Control Panel and set the View by option to Large icons, then click Internet Options.
- Select the Advanced tab. Scroll down to Browsing section, and check the “Use inline AutoComplete” option.
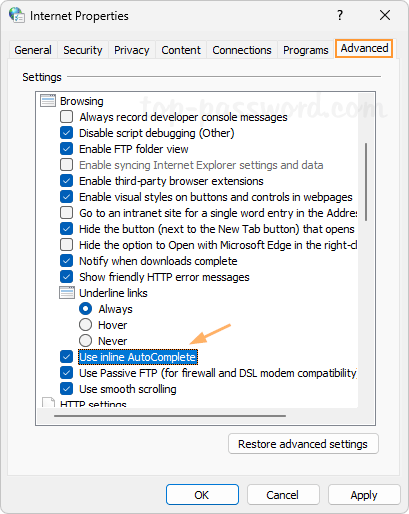
- Click Apply and then OK. Open a new Run dialog or File Explorer window, and you should be able to use inline AutoComplete to type.
Method 2: Enable Inline AutoComplete in Windows 11 via Registry Editor
- Open Registry Editor and browse to:
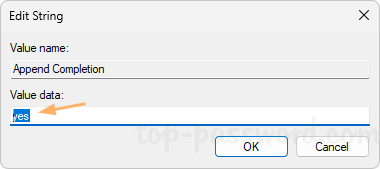
HKEY_CURRENT_USER\Software\Microsoft\Windows\CurrentVersion\Explorer\AutoComplete. Double-click the string “Append Completion” on the right pane.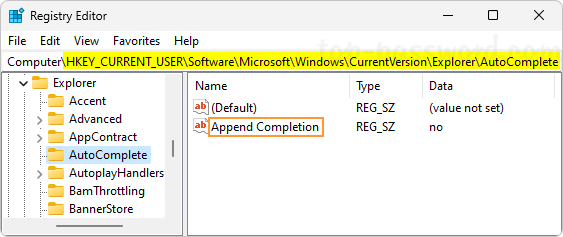
- Change the value data from “no” to “yes“, and click OK. It will turn on the inline AutoComplete feature immediately.
- Close Registry Editor. Reopen the Run dialog box or File Explorer, and you can now enjoy the inline AutoComplete feature.
Conclusion
Inline AutoComplete is turned off by default, and you can turn it on using the above methods. However, if you’ve deleted or disabled the Run command history, the inline AutoComplete feature will not automatically fill the data for you, even if it’s enabled actually.