Windows 11 comes with built-in support for DNS over HTTPS (DoH), which lets you encrypt all DNS requests between your PC and the DNS server to improve your online privacy and security. In this tutorial we’ll walk you through the steps to enable DNS over HTTPS for all programs (including browsers) on your Windows 11 computer.
How to Enable DNS over HTTPS in Windows 11
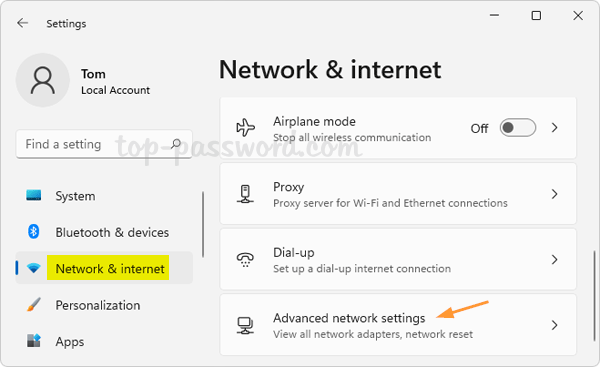
- Press the Windows key + I to open the Settings app. Choose “Network & internet” from the sidebar. On the right side, click on “Advanced network settings“.
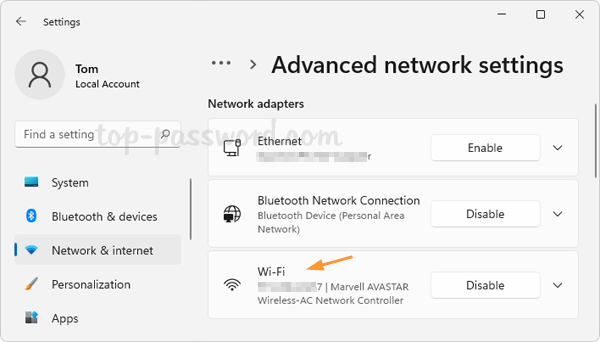
- You’ll see a list of installed network adapters. Click on Wi-Fi or Ethernet to expand the settings, depending on your active internet connection.
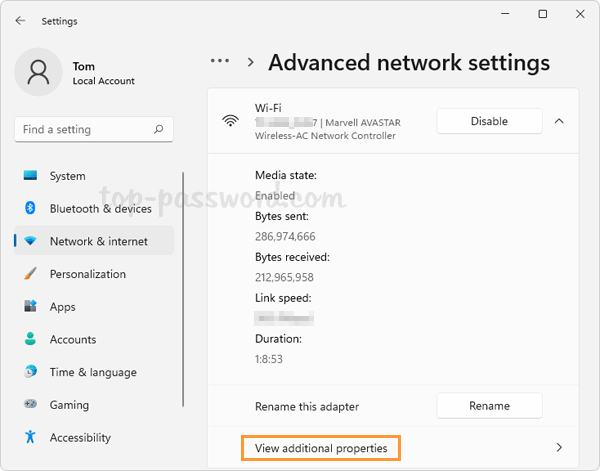
- Click on the “View additional properties” link.
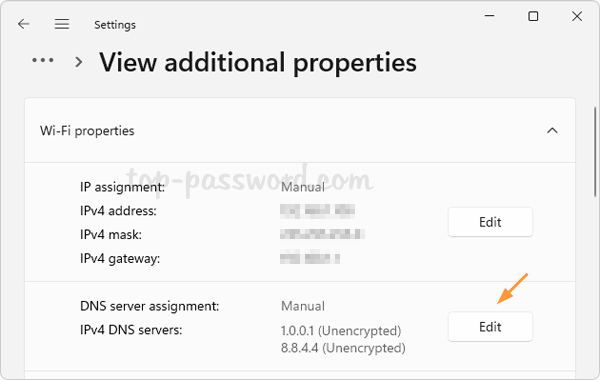
- click on Edit next to “DNS server assignment”.
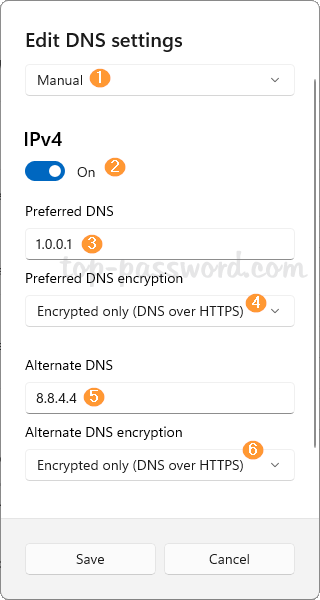
- In the window that pops up, make sure the “Edit DNS settings” drop-down list is set to Manual. Turn on IPv4 and enter the primary and secondary DNS server addresses which support DoH. Select the “Encrypted only (DNS over HTTPS)” option for both DNS servers.
Here are the public DNS servers which support DoH:
Google
IPv4: 8.8.8.8, 8.8.4.4
IPv6: 2001:4860:4860::8888, 2001:4860:4860::8844

Cloudflare
IPv4: 1.1.1.1, 1.0.0.1
IPv6: 2606:4700:4700::1111, 2606:4700:4700::1001

Quad9
IPv4: 9.9.9.9, 149.112.112.112
IPv6: 2620:fe::fe, 2620:fe::fe:9
- After clicking Save, Windows 11 will automatically start encrypting DNS requests for all your programs and web browsers.