Superfetch causing high disk or memory usage? SuperFetch, previously known as Prefetch, is a Windows service that makes your frequently-used programs load faster by preloading them into RAM. However, Superfetch can sometimes take up too many system resources (such as CPU, memory and storage). Here’s how you can disable Superfetch in Windows 10 / 8 / 7.
Method 1: Disable Superfetch Using Windows Services App
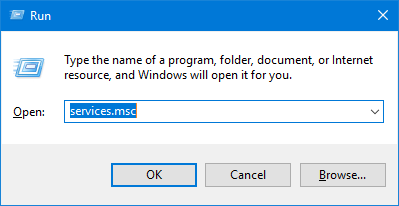
- Press the Windows key + R to open the Run prompt, then type services.msc and click OK.
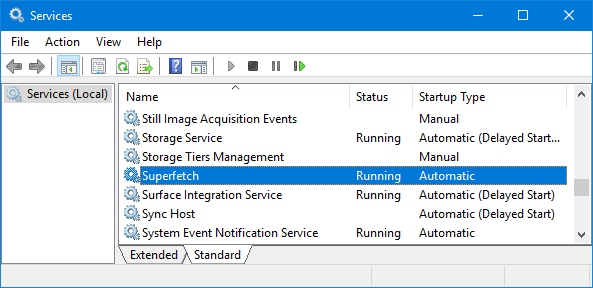
- In the Services window, scroll down to find the Superfetch service. Double click on it to configure its properties.
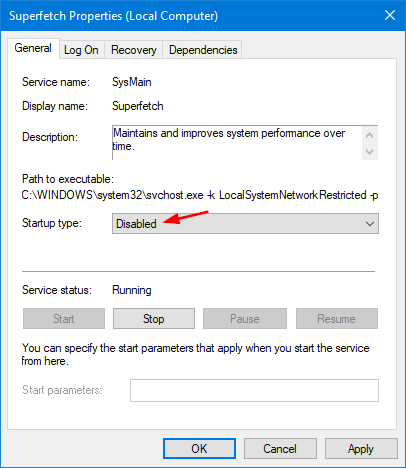
- Click the Startup type drop-down list and select Disabled, then click OK and restart your computer.
If you don’t want to permanently disable Superfetch, you can stop the service temporarily by running the following command at the Command Prompt:
net stop superfetch
Method 2: Disable Superfetch Using Registry Editor
- Press the Windows key + R to open the Run prompt, then type regedit and press Enter.

- Browse to the following registry location using the left sidebar:
HKEY_LOCAL_MACHINE\SYSTEM\CurrentControlSet\Control\Session Manager\Memory Management\PrefetchParameters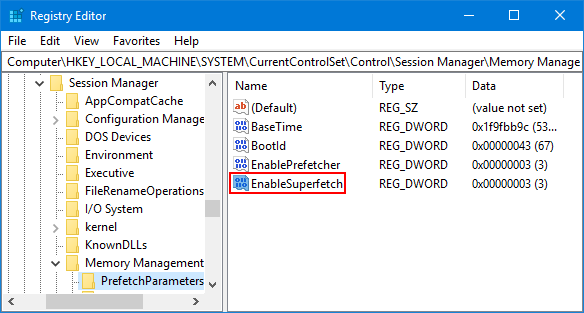
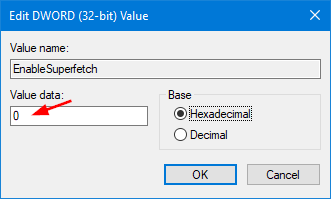
Then double-click the 32-bit DWORD value EnableSuperfetch in the right pane. If it doesn’t exist, you have to create it.
- To disable SuperFetch, change Value Data to 0 and click OK.
Once you reboot, Superfetch will stay inactive.
If you want to enable SuperFetch later, just restore the value of EnableSuperfetch back to 3 and you’re done!