How can I prevent other users from joining or leaving the Windows Insider Program? As a system administrator, you may need to prevent users from getting Insider Preview builds on a shared computer. In this tutorial we’ll show you 2 methods to disable Windows Insider Program settings in Windows 11.
Method 1: Disable Windows Insider Program Settings Using Group Policy
- Open the Local Group Policy Editor and browse to:
Computer Configuration -> Administrative Templates -> Windows Components -> Data Collection and Preview Builds. On the right pane, find a policy named “Toggle user control over Insider builds” and then double-click it to modify.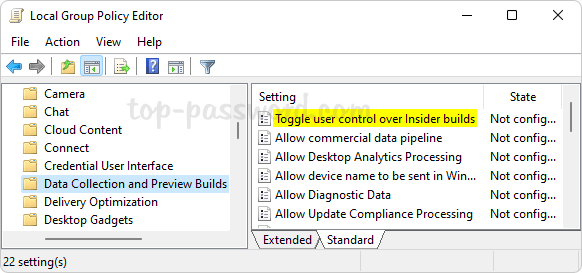
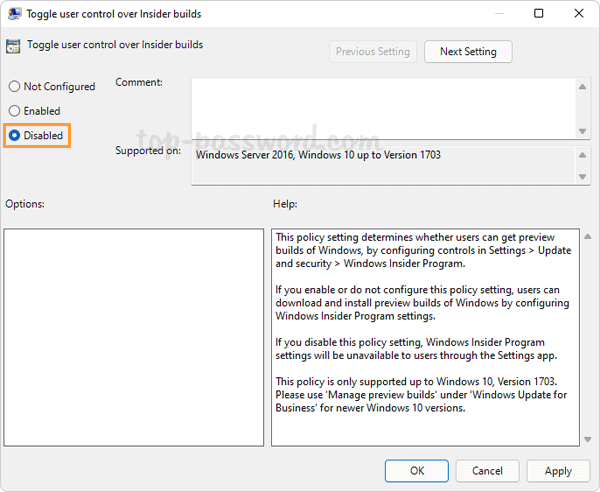
- Select the Disabled option, click Apply and then OK.
- Restart your computer. The next time you open the Settings app and navigate to:
Windows Update -> Windows Insider Program, you’ll find that most settings are no longer available to users.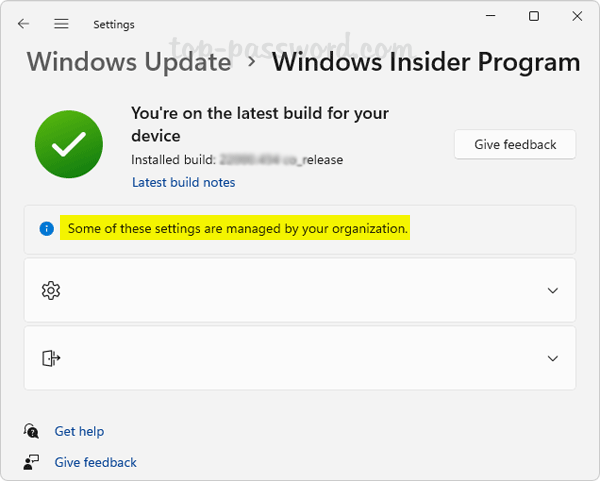
Method 2: Disable Windows Insider Program Settings Using Registry Editor
- Open Registry Editor and navigate to:
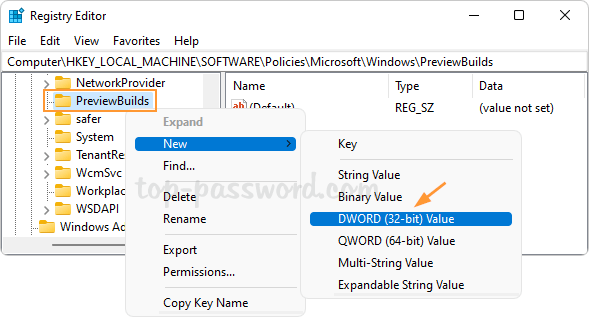
HKEY_LOCAL_MACHINE\SOFTWARE\Policies\Microsoft\Windows. Right-click on the Windows key in the left pane, and select New -> Key.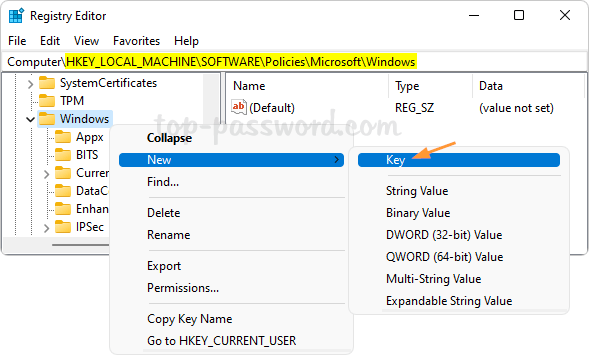
- Name the new key as PreviewBuilds, and then right-click it and select New -> DWORD (32-bit) Value.
- Name the DWORD as AllowBuildPreview. Leave its value data as 0.

Whenever you need to enable Windows Insider Program settings again, just set the value data of AllowBuildPreview to 1 or delete AllowBuildPreview.
- Close Registry Editor and reboot your system to apply the changes.