Is it possible to block telnet access to port 23? Open ports can pose a security risk and it’s a good practice to close some unused ports. In this tutorial we’ll walk you through the procedure of closing a TCP or UDP port in Windows 10, without using any third-party software.
How to Close a TCP / UDP Port Using Windows Firewall
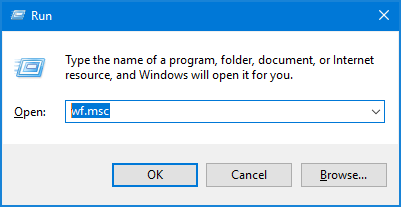
- Press the Windows key and R to bring up the Run box, enter wf.msc and hit Enter to open Windows Firewall.
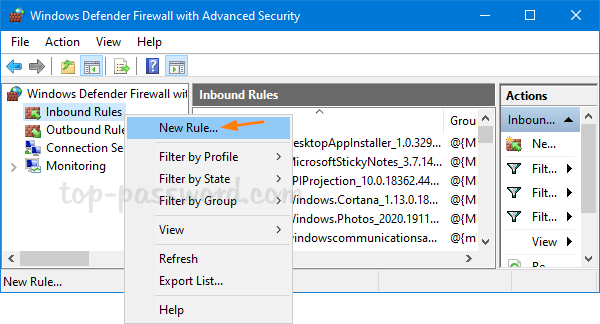
- Right-click on Inbound Rules in the left pane, and then select New Rule.
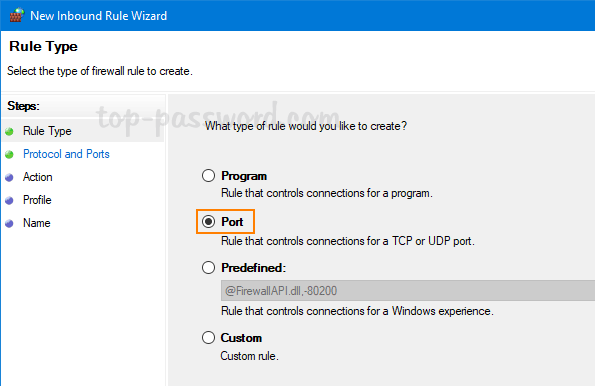
- When the New Inbound Rule Wizard window opens, select Port as the rule type. Click Next.
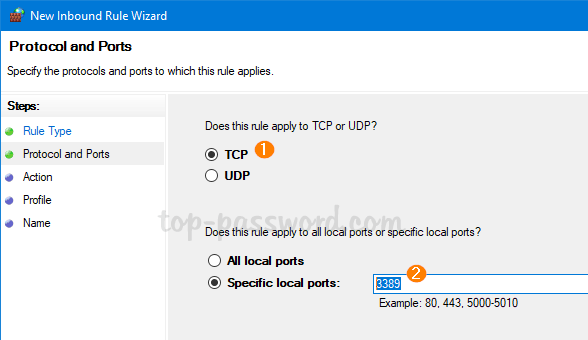
- Choose the type of connection to apply, either TCP or UDP. For safety purposes, I’m going to block incoming connections through remote desktop services, so I choose TCP and enter the port 3389.
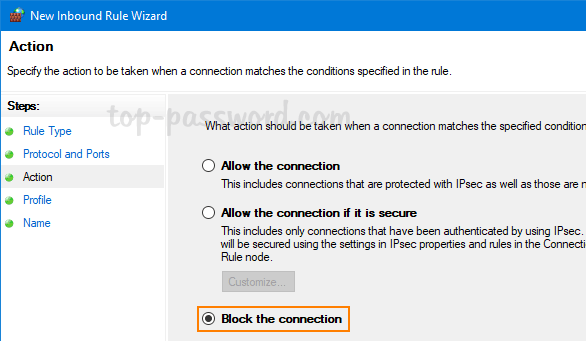
- Select the Block the connection option and click Next.
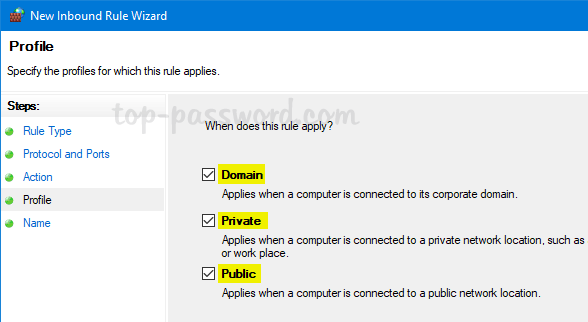
- Check all the profiles available (Domain, Private and Public) and click Next. Generally you should at least ensure “Public” is checked.
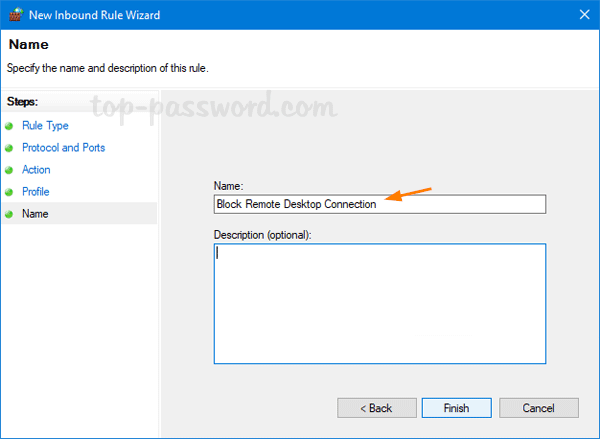
- Give a name for this new rule and click on Finish.
- Now you’ve successfully blocked / closed a port using Windows Firewall. Your system will block all the incoming connections on the port you specified. Whenever you need to open the port again, just delete the firewall rule you’ve created.