By default, Windows Defender is set in a low protection level so you’ll get less false positives. In this tutorial we’ll show you how to increase the cloud-delivered protection level in Windows 10 to make Windows Defender more proactive in scanning and detecting suspicious files.
How to Change Cloud-delivered Protection Level in Windows 10?
- To get started, you need to open the Local Group Policy Editor. Use the Windows key + R keyboard shortcut to open the Run command, enter gpedit.msc and press Enter.

- Navigate to the following path:
Computer Configuration > Administrative Templates > Windows Components > Windows Defender Antivirus > MAPS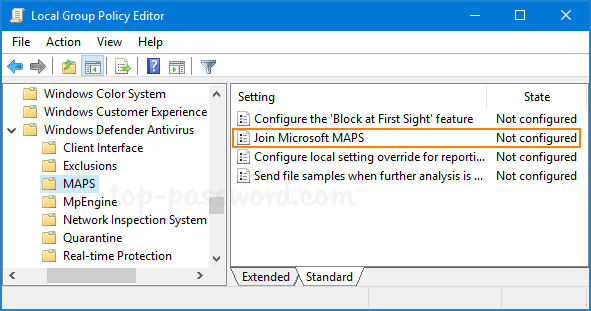
and then double-click the “Join Microsoft MAPS” policy on the right side.
- Select Enabled and then move to the drop-down box to select “Advanced MAPS“. Click OK.

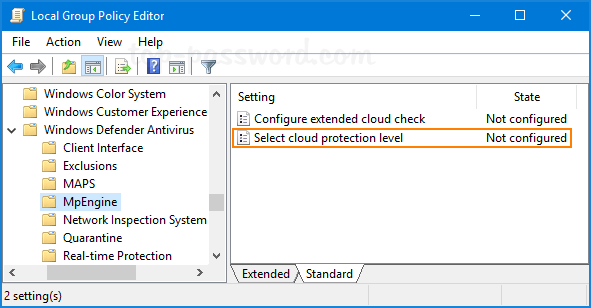
- Switch to the MpEngine folder on the left panel. On the right panel double-click on the policy “Select cloud protection level“.
- Select Enabled and then pick up the “High+ blocking level” option to increase the cloud protection level on your Windows 10 computer.
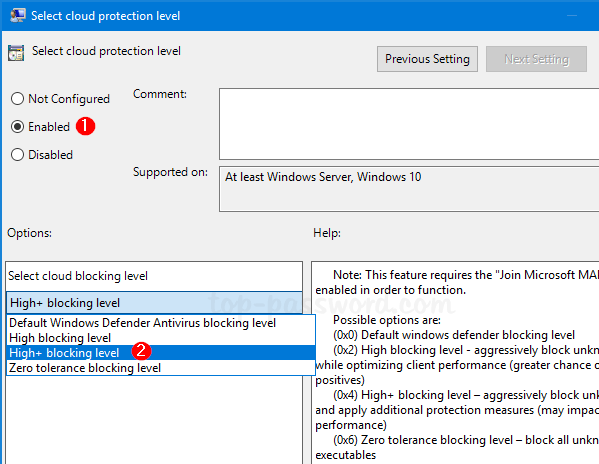
- Click OK and restart your computer. Windows Defender will scan and block suspicious files more proactively.
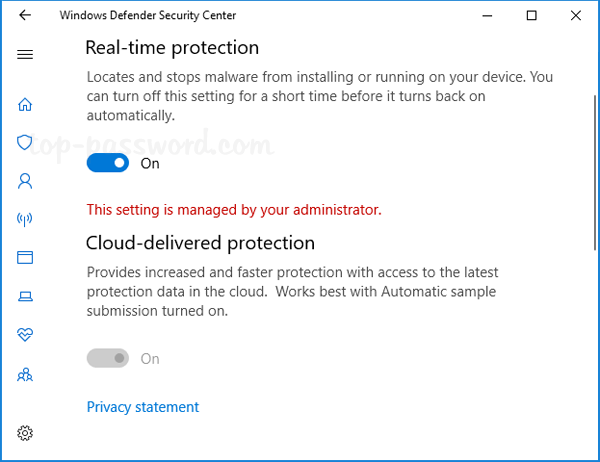
Note: After you’ve applied GPO to change the cloud protection level, the option to turn off cloud-delivered protection in Windows Defender will be greyed out.
That’s it!