Although BitLocker is not available on Windows 10 Home, you can still use a similar feature called “device encryption” to protect your data from unauthorized access. In this tutorial we’ll show you how to check if your computer supports device encryption, and walk you through the steps to turn on device encryption in Windows 10 Home.
Part 1: Check if Your PC Supports Device Encryption
Device encryption is usually available on most tablets or 2-in-1 laptops running Windows 10. These are the hardware requirements for device encryption:
- Trusted Platform Module (TPM) version 2.0 or higher
- Modern Standby support
- UEFI firmware
The easiest way to check if your PC supports device encryption is by using the System Information tool. Follow these steps:
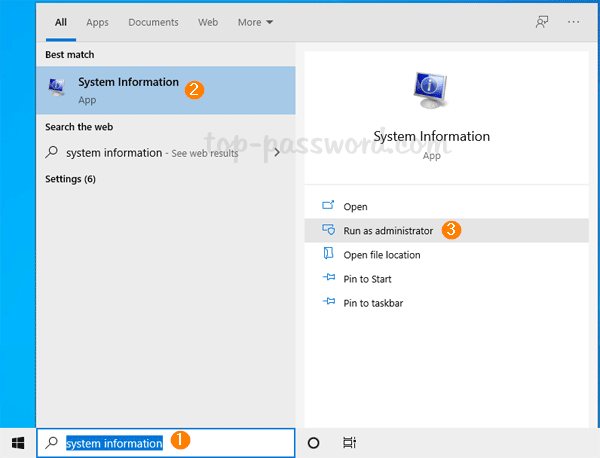
- Click the Search box in the taskbar and enter “system information”. When the results appear, select the System Information app and click on the “Run as administrator” option.
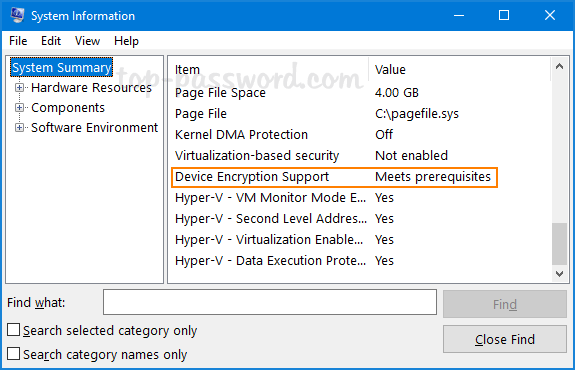
- At the bottom of the System Summary window, look for the “Device Encryption Support” item. If the value says Meets prerequisites, then device encryption is available on your PC.
Part 2: Turn on Device Encryption
If your PC meets the hardware requirements, you can proceed to enable device encryption on Windows 10 home by following these steps:
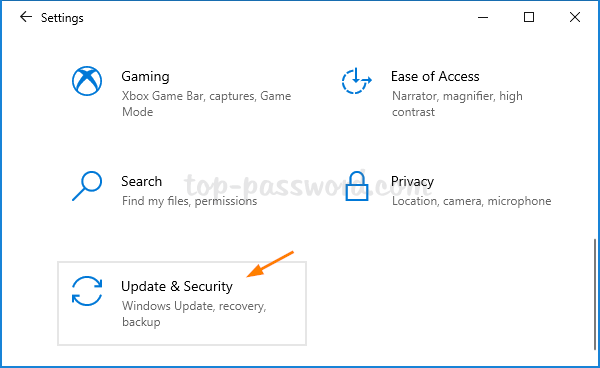
- Press the Windows key + I to launch the Settings app. Click on the Update & Security category.
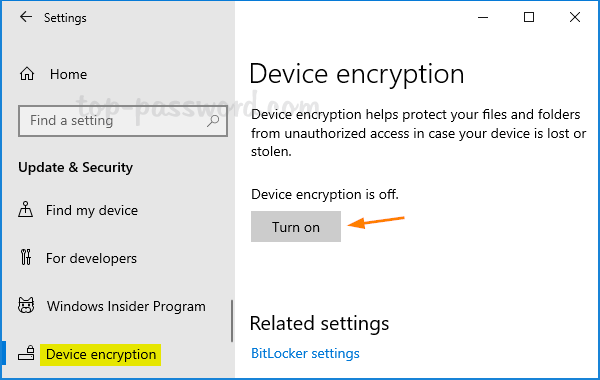
- Select Device encryption from the left pane, and click on the Turn on button on the right side. Windows will begin encrypting all current and future files automatically.
If you’re logged in with a local account, Windows may prompt you to convert to Microsoft online account before turning on device encryption so it can upload your recovery key to OneDrive. This can help recover your files in case you forgot Windows password.
That’s it!