How can I get a VirtualBox virtual machine to boot from a physical USB drive? The problem is that the GUI of Oracle VirtualBox does not have an option to set boot from USB. Luckily there is a workaround to boot a VirtualBox virtual machine from USB drive.
Just create a new virtual hard disk (VMDK) file and use it as a raw disk that VirtualBox maps to your USB drive. When you boot your virtual machine from the newly-created virtual hard drive, it will load the operating system on your USB stick. Here’s how.
How to Boot An Existing VirtualBox VM from USB Drive?
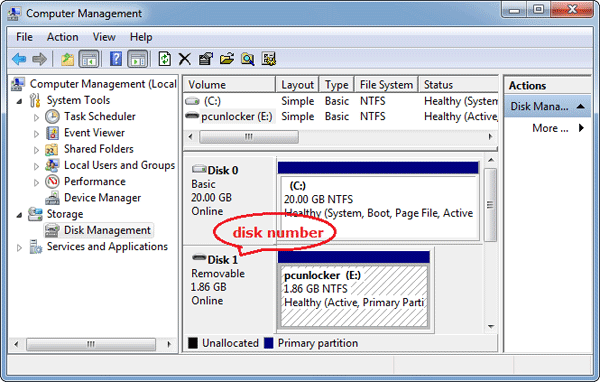
- Before doing anything, make sure you’ve created a bootable USB drive and plugged it into your computer. Now we need to find the disk number of your physical USB drive.
- Press Windows Key + R to bring up the Run box, type diskmgmt.msc and press Enter to open the Disk Management window. Locate your USB drive and note its disk number. In my case, the USB drive is listed as “Disk 1“, so the disk number is 1.
- Once you have the disk number, open up the Command Prompt as administrator. Use the cd command to navigate to VirtualBox’s installation directory. If you have installed VirtualBox in any other directory or drive, then change the command accordingly.
cd %programfiles%\Oracle\VirtualBox - Enter the following command while replacing # with the actual disk number you found above.
VBoxManage internalcommands createrawvmdk -filename C:\exusb.vmdk -rawdisk \\.\PhysicalDrive#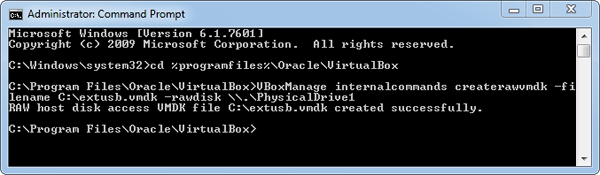
You can replace C:\extusb.vmdk with any file path you want. This command creates a virtual machine disk (VMDK) file that points to the physical USB drive.
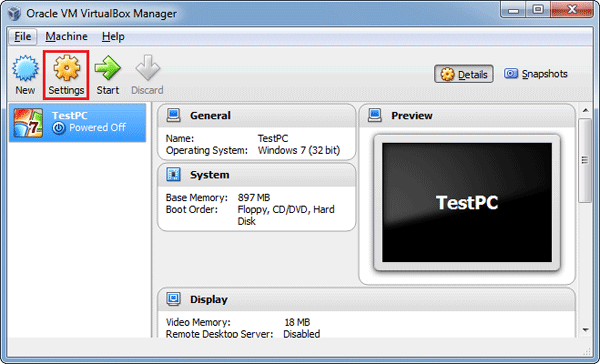
- Now open up the VirtualBox with administrative rights. If not, VirtualBox will fail to boot from the USB drive. In the VirtualBox main window, select your target virtual machine and click Settings.
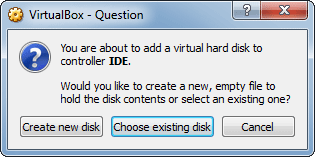
- Click on the Storage tab. Under the Storage Tree section, highlight Controller:IDE and then click on the “Add Hard Disk” icon to the right.
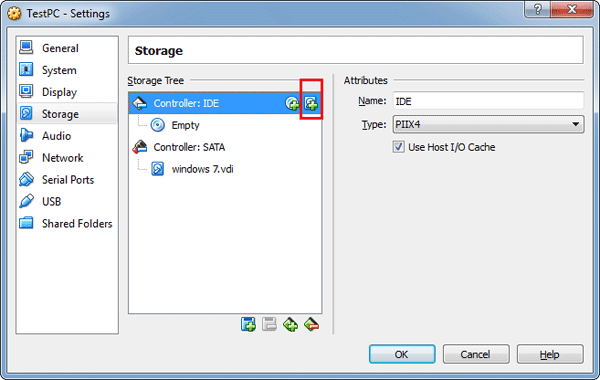
- In the popup box, click Choose existing disk and then choose the VDMK file (C:\exusb.vdmk in the example) you created in step 4. When this is done, click OK to save your changes.
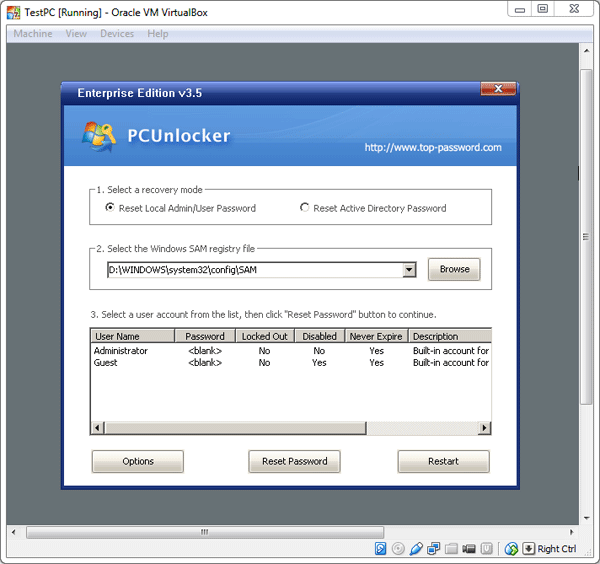
- Now starts Virtual machine and you’ll see that it starts booting from your physical USB drive. As you can see from the image below, I’ve successfully booted into my PCUnlocker Live USB drive.
With this method you can install the operating system from the USB stick, or boot your existing VirtualBox virtual machine from other third-party rescure & recovery USB drives.