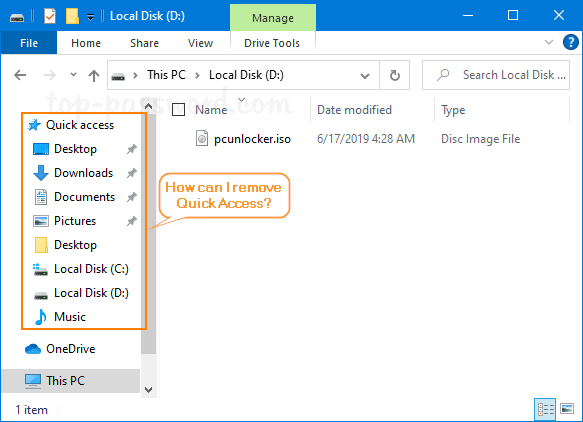
The Quick Access section is available at the left side of the navigation pane in File Explorer, which gives you an easy way to access your frequently used folders or files. But if you don’t like Quick Access or you’d prefer to see a traditional navigation pane, you can hide or remove it entirely. In this tutorial we’ll show you 2 simple ways to remove Quick Access from File Explorer’s navigation pane in Windows 10.
Method 1: Remove Quick Access from File Explorer in Windows 10 v1607 or Higher
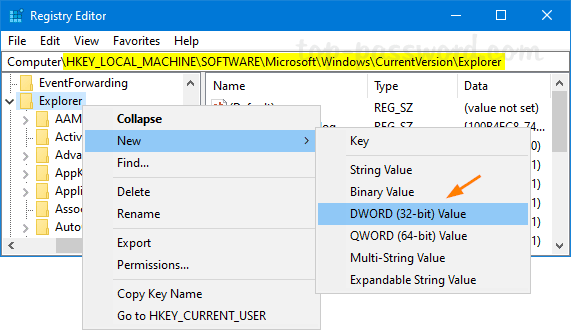
- Open Registry Editor. Just copy the below registry location and paste it in the address bar and then press the Enter key to get there.
HKEY_LOCAL_MACHINE\SOFTWARE\Microsoft\Windows\CurrentVersion\Explorer - In the left-side pane, right-click on the Explorer key and then select New -> DWORD (32-bit) Value.
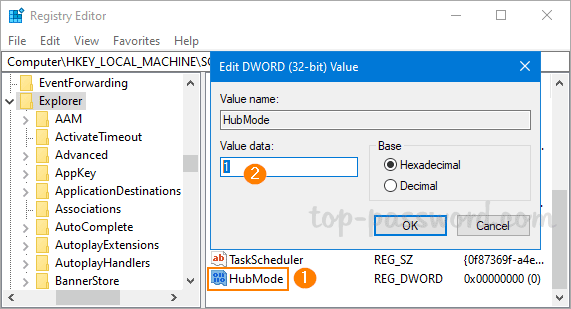
- Name the new DWORD as HubMode, and then double-click on it and change its value data to 1. Click OK.
- Now, close all File Explorer windows and re-launch File Explorer. The Quick Access section should be gone from the left navigation pane.
Method 2: Remove Quick Access from File Explorer in Windows 10 v1511 or Higher
- Open Registry Editor and navigate to:
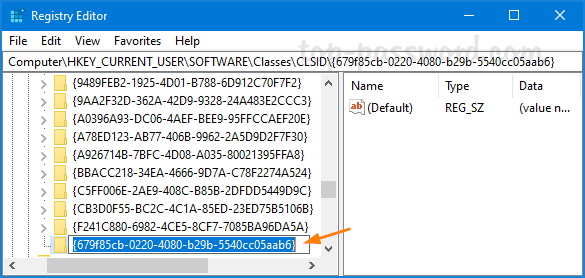
HKEY_CURRENT_USER\SOFTWARE\Classes\CLSID. Right-click on the CLSID key in the left pane and then select New -> Key.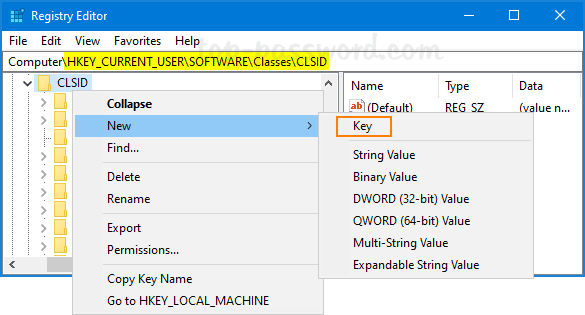
- Name the new key {679f85cb-0220-4080-b29b-5540cc05aab6}.
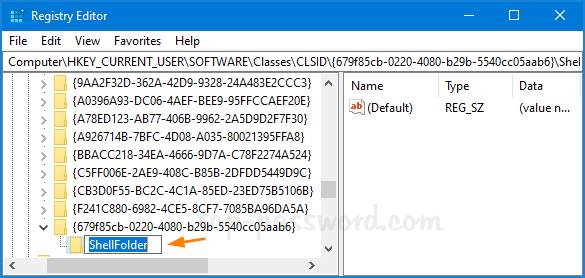
- Right-click the new key you just created and use the same method to create a new subkey named ShellFolder.
- Next, right-click on the ShellFolder key in the left pane, and select New -> DWORD (32-bit) Value.
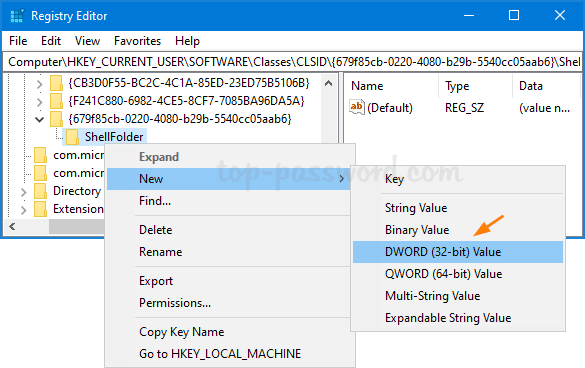
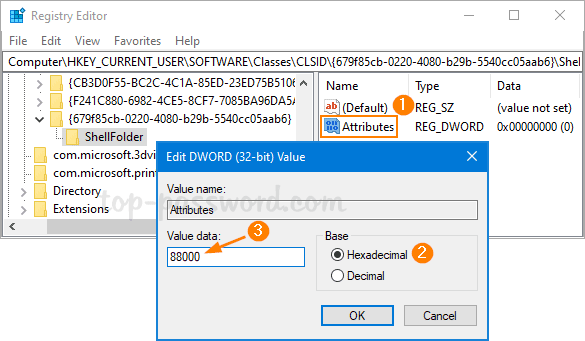
- Name the new DWORD Attributes and double-click it to modify. In the pop-up dialog box, select the Hexadecimal option and enter 88000 in the Value data box. Click OK.
- Close Registry Editor and reboot your computer. When you open File Explorer next time, Quick Access should be gone.