“My laptop came with Windows 8 preinstalled. I really don’t like the new interface of Windows 8. I want to uninstall Windows 8 and install Windows 7. How to go about it?”
If you don’t like Windows 10 / 8, or the new OS doesn’t work as you expected, you might want to downgrade to Windows 7. In this tutorial we’ll walk you through the steps of removing Windows 10 / 8 and then install a fresh copy of Windows 7.
How to Remove Windows 10 / 8 and Install Windows 7?
Before get started, you need to prepare a Windows 7 installation disc. Make sure any important files already on your PC are backed up on a portable hard drive or an online backup solution.
Part 1: Disable UEFI and Enable Legacy Boot
New Windows 10/8 PCs come with UEFI firmware and Secure Boot enabled. Starting with Windows 8, Microsoft replaced BIOS with UEFI. Secure Boot will prevent Windows 7 installation disc from booting, so you need to disable the Secure Boot option and enable Legacy/CSM boot.
Here’s how to enable Legacy boot on a Windows 8 ASUS notebook:
- When powering on the computer, quickly and repeatedly press F2 to enter BIOS Setup.
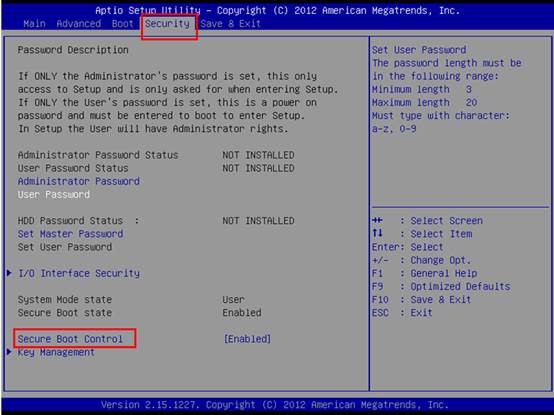
- In the Security menu, use the arrow keys on your keyboard to select the Secure Boot Control option. Press Enter to set it Disabled.
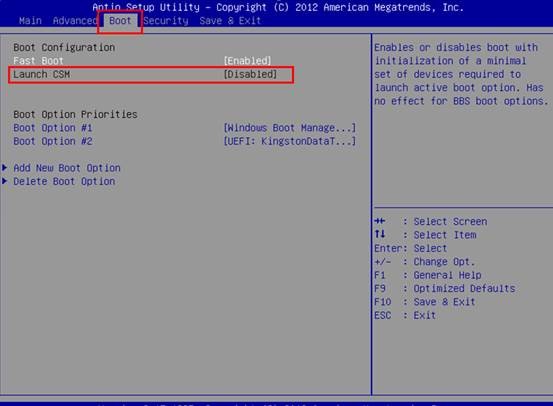
- Go to the Boot menu, enable Launch CSM.
- Press F10 to save and exit.
Your BIOS may be different. If you don’t know how to access the UEFI/BIOS or couldn’t find the UEFI secure boot option, please check out the following articles:
- 2 Options to Access UEFI BIOS Setup in Windows 8 / 10
- How to Set PC to Boot with Legacy BIOS Mode Instead of UEFI Mode
Part 2: Convert Partition Scheme from GPT to MBR
Now we need to convert the hard drive from GPT to MBR, because Windows 7 couldn’t be installed on GPT partition. Follow these steps:
-
Put the Windows 7 installation disc in your optical drive and restart to boot from it. You may have to change the boot sequence in your BIOS if it doesn’t boot to the CD. Watch for the “Press any key to boot from CD or DVD” message. Press a key as indicated.

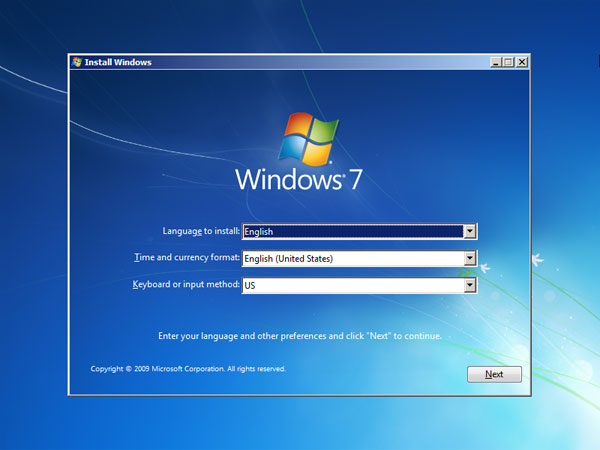
- When Windows 7 Setup appears, you’re asked to choose your preferred language and keyboard method. Just press Shift + F10 to launch the Command Prompt.
-
In the Command Prompt, type the following commands one by one, press Enter after each.
diskpart

list disk

select disk 0

clean

convert mbr

exit
This will delete all partitions on your hard drive and convert it to a MBR disk.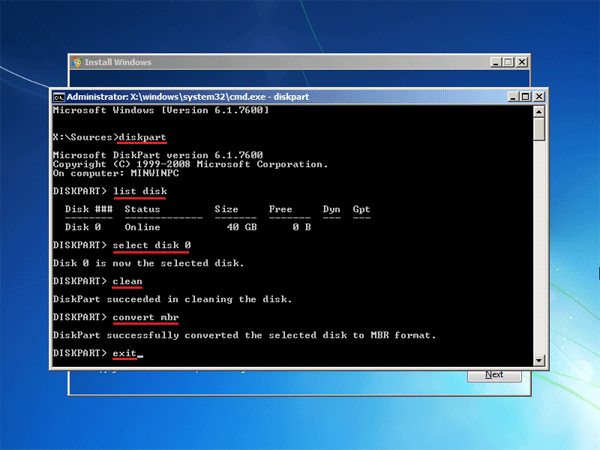
- Now close the Command Prompt. You’ll return back to Windows 7 Setup screen.
Part 3: Install Windows 7
-
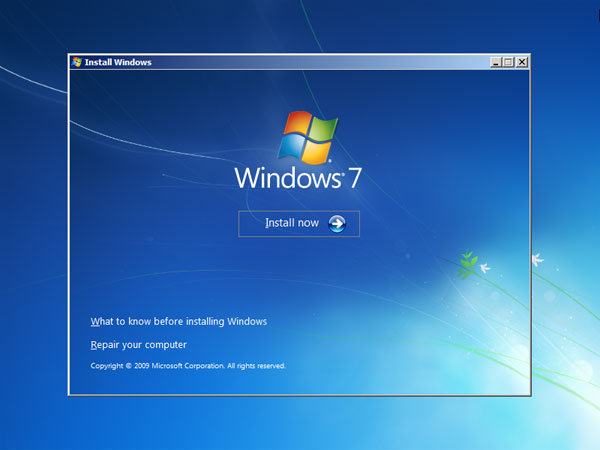
Once you come back to Windows 7 Setup Screen, select your language and click Next.
- You will be now taken to the Install now menu. Click on Install Now to proceed.
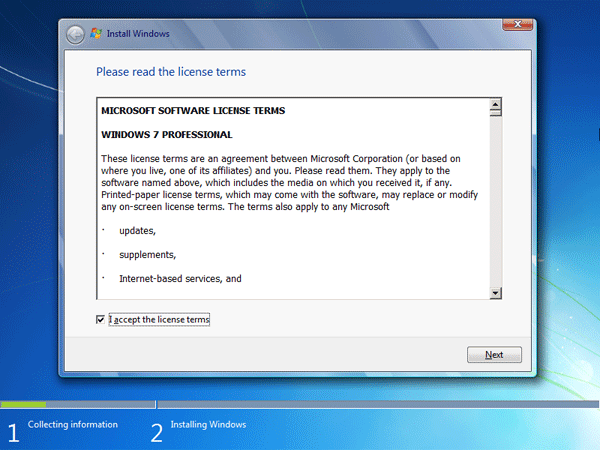
- Review the license agreement, and click “I accept the license terms“.
- On the Which type of installation do you want? window, click Custom (advanced).

-
The next step is to choose where you want to install Windows 7. Inexperienced users can simply highlight the unallocated space and click Next.
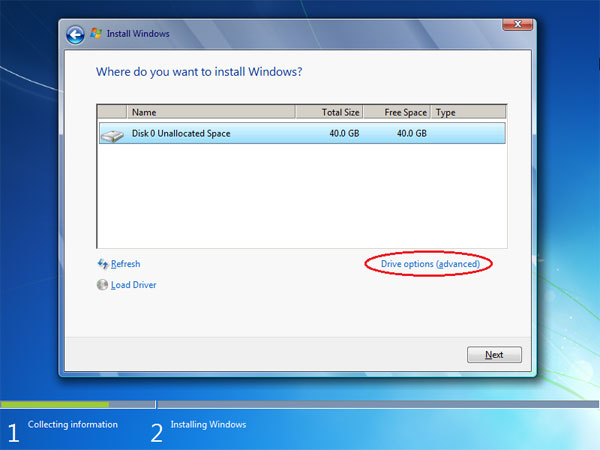
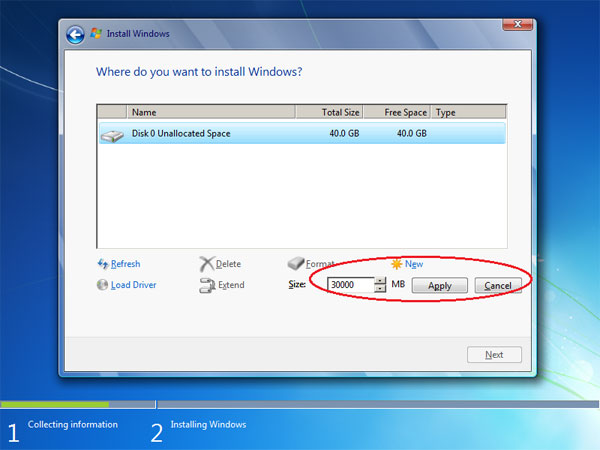
If you want to split the hard drive into two or more partitions, click on “Drive options (advanced)” which allows you to create new partitions, format or delete them. When it’s done, select the partition you want to install Windows 7 on and click Next.
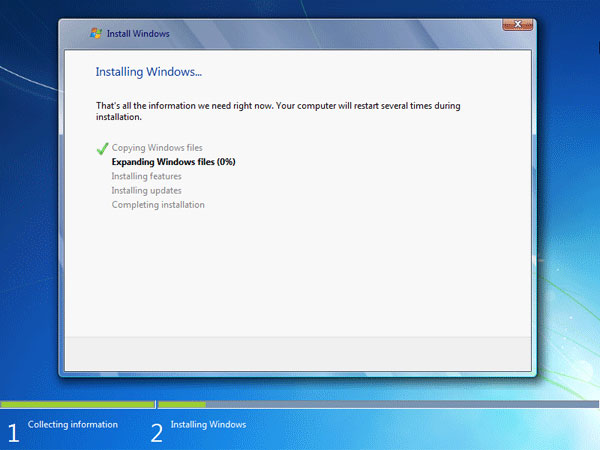
- Windows will begin installing. Now you can sit back and relax for a while, because this part is automatic. During this process, the PC will also restart on its own—don’t panic, that’s just part of the installation process.
- When the installation is complete, you’ll go through the first-time setup process: type your computer name, set up a user account and password, enter product key, etc.