Safe Mode is a special Windows boot mode used for troubleshooting and system diagnostics. Since Windows 8, there is no straight-forward method to access the Safe Mode and the traditional F8 key also doesn’t work any longer. In this tutorial we’ll show you how to add the Safe Mode option to Boot Menu in Windows 10/8.1/8.
How to Add Safe Mode to Boot Menu in Windows 10 or 8?
- Open an elevated Command Prompt by pressing the Windows key + X and then selecting “Command Prompt (Admin)“.
- Enter the following command or copy and paste the command in the Command Prompt window, and press the Enter key.
bcdedit /copy {current} /d "Safe Mode"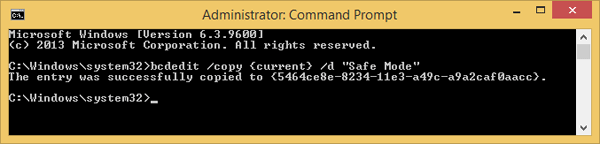
This command clones the current OS boot settings to a new boot entry named “Safe Mode”. Close the Command Prompt after the command above is executed.
- Press the Windows key + R to bring up the Run box. Type msconfig and press OK.
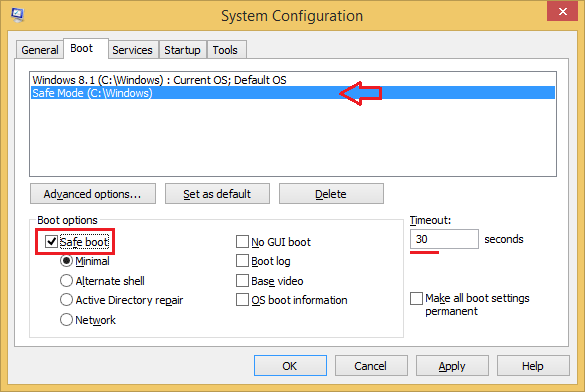
- In the System Configuration window, click on the Boot tab, select the newly-created boot entry “Safe Mode” from the list. Check the box labelled Safe boot (under Boot options), and set the Timeout to 30 seconds.
- Click OK, then apply changes. Restart your PC and the Safe Mode option would now appear in the boot selection menu.
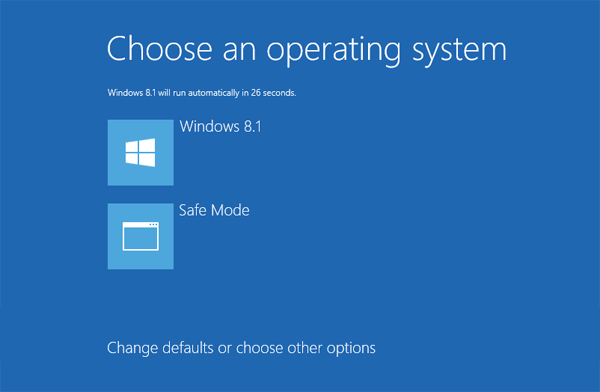
The boot screen menu will automatically disappear after 30 seconds to boot into Windows. Note that, when you select the Safe Mode option, your PC will reboot once again and bring you to Safe Mode automatically.