Archive for November, 2018

How to Add “Show Desktop” Shortcut to Taskbar in Windows 11 / 10 / 8 / 7

November 8th, 2018 by Admin

How can I switch to the desktop without closing all opened windows? You can use the Windows key + D shortcut to minimize all open windows at once to view the desktop. If you want to get to the desktop with a single click instead of keyboard shortcut, you can add a “Show Desktop” shortcut icon to the taskbar in Windows 11 / 10 / 8 / 7.

How to Add “Show Desktop” Shortcut to Taskbar in Windows?

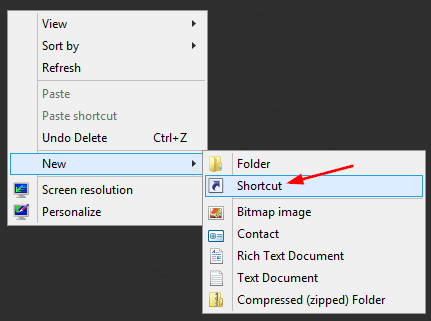
Right-click an empty area on your desktop and select New -> Shortcut.

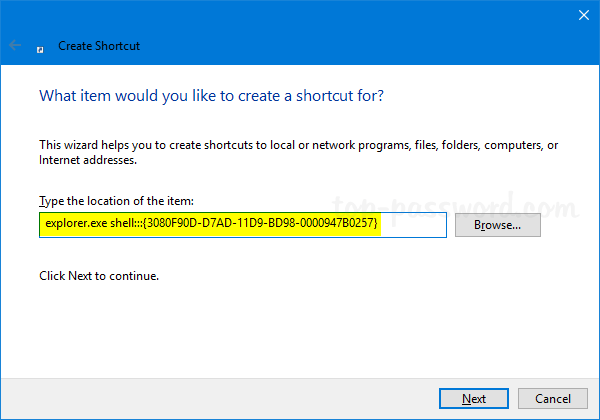
Paste the following into the location box and click Next.
explorer.exe shell:::{3080F90D-D7AD-11D9-BD98-0000947B0257}

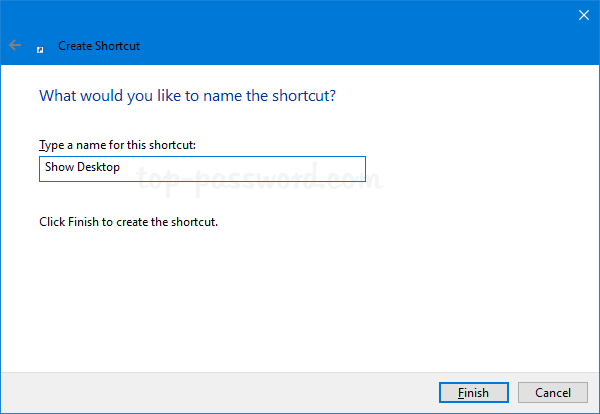
Name this shortcut something meaningful, and click Finish.

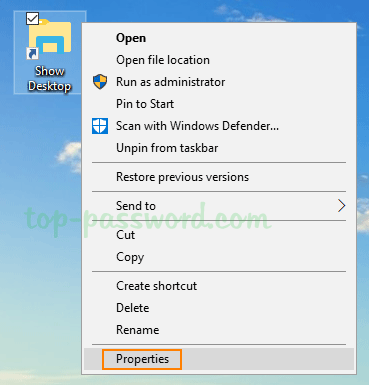
The icon of your created shortcut should appear on the desktop. Right-click it and select Properties.

Under the Shortcut tab, click the Change Icon button at the bottom.

Select the icon highlighted in blue, and click OK.

Now, right-click on the “Show Desktop” shortcut on your desktop, and you can pin it to the taskbar or pin it to the Start Menu as a tile.

Every time you need to switch to the desktop, just click the “Show Desktop” icon in the taskbar and it will hide all your open windows without closing.

That’s it!

How to Change BitLocker PIN in Windows 10

November 7th, 2018 by Admin

How do I change the BitLocker PIN? It’s a good practice to change your BitLocker PIN periodically to ensure the security of your operating system drive. In this tutorial we’ll show you the easiest ways to change BitLocker PIN in Windows 10.

Method 1: Change BitLocker PIN in File Explorer

Open File Explorer. Right-click on your operating system drive which is encrypted with BitLocker, and select “Change BitLocker PIN” from the context menu.

Enter the old PIN and then enter the new PIN twice, click on Change PIN.

You should receive the message “the PIN has been successfully changed” immediately. If you’ve forgotten your BitLocker PIN, just click the “Reset a forgotten PIN” link underneath. It will let you set up a new PIN without asking for your current PIN.

Method 2: Change BitLocker PIN from Command Line

Open an elevated Command Prompt.

To change your BitLocker PIN, enter the following command into the Command Prompt window. If your Windows partition is not C:, use the drive letter that’s correct for your system.
manage-bde -changepin C:

Once pressing Enter, you’ll be prompted to enter the new PIN twice. For security reasons, you will not be able to see your new PIN as you type it.

How to Reset Hosts File Back to Default in Windows 10

November 1st, 2018 by Admin

Every Windows version comes with a Hosts file which provides a simple mechanism to redirect website to IP address. If the HOSTS file is modified incorrectly or maliciously, it can break your Internet. In this tutorial we’ll show you how to easily reset the HOSTS file (C:\Windows\System32\drivers\etc\hosts) back to default in Windows 10.

How to Reset Hosts File Back to Default in Windows 10?

By default, the HOSTS file is protected by the operating system so you’re unable to edit it without admin rights. Here we’re going to open the HOSTS file with Notepad and restore its content back to default:

Click the Start button and type notepad. Right-click the Notepad app appeared in the search result, and then select “Run as administrator“.

With Notepad open in administrator mode, you’re ready to open the HOSTS file. Click on the File menu and select Open.

Browse to the directory C:\Windows\System32\drivers\etc\hosts. Change the file filter drop-down box from “Text Documents (*.txt)” to “All Files“, and select the HOSTS file and click Open.

Now, paste the following text into Notepad:

# Copyright (c) 1993-2006 Microsoft Corp.
#
# This is a sample HOSTS file used by Microsoft TCP/IP for Windows.
#
# This file contains the mappings of IP addresses to host names. Each
# entry should be kept on an individual line. The IP address should
# be placed in the first column followed by the corresponding host name.
# The IP address and the host name should be separated by at least one
# space.
#
# Additionally, comments (such as these) may be inserted on individual
# lines or following the machine name denoted by a '#' symbol.
#
# For example:
#
# 102.54.94.97 rhino.acme.com # source server
# 38.25.63.10 x.acme.com # x client host
# localhost name resolution is handle within DNS itself.
# 127.0.0.1 localhost
# ::1 localhost

Click on the File menu and Save. Now you’ve successfully reset the HOSTS file back to default in Windows 10. For Windows 8/7/Vista, the contents of the HOSTS file are different and you can copy them from Microsoft’s website.