Archive for December, 2016

SysKey: Lock & Unlock Windows PC with USB Drive

December 6th, 2016 by Admin

Is it possible to set up a USB Drive to log into Windows without installing any software on the PC? SysKey is a built-in Windows utility that allows you to set up a Startup Key/Password to protect the SAM (Security Accounts Management) database. You can store the Startup Key to USB drive. Whenever the computer boots up, you will have to insert the USB drive to login.

In this tutorial we’ll walk you through how to enable SysKey in Windows 10/8/7/Vista/XP, and use a USB drive as a key to lock & unlock your computer.

How to Lock & Unlock Windows PC Using SysKey?

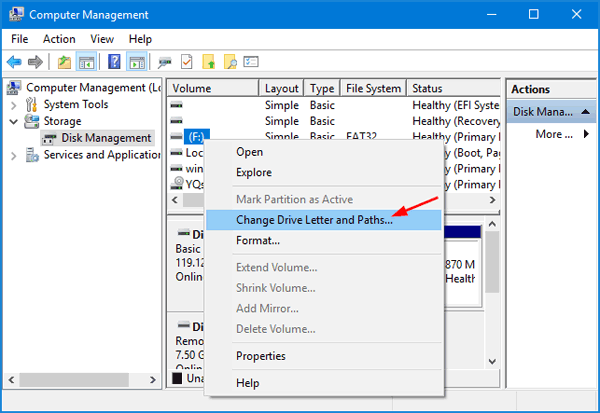
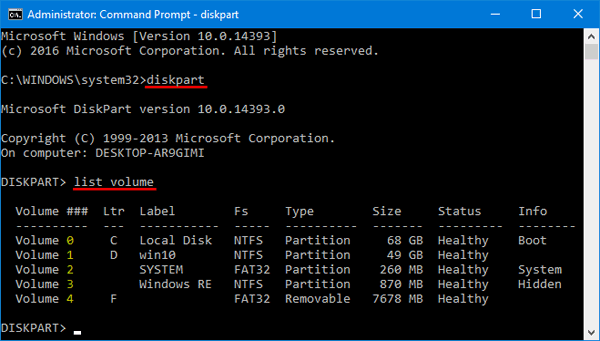
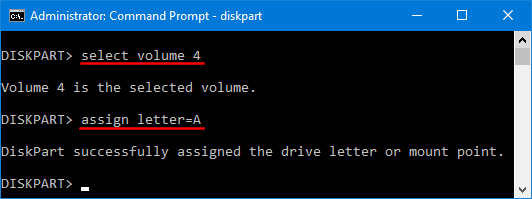
Syskey (also known as SAM Lock Tool) was introduced since Windows NT. It’s so old that it only stores the Startup Key on the A: drive. So you need to assign the drive letter A: to your USB flash drive before following the steps below.

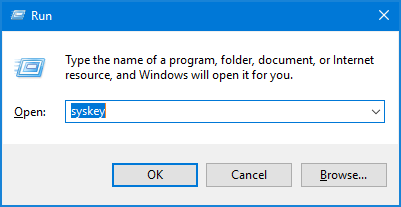
  1. Press the Windows key + R to open the Run box. Type syskey and press Enter.

    syskey

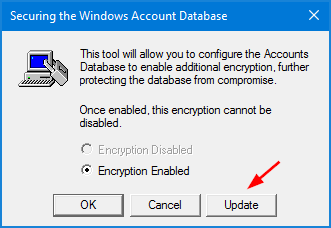
  2. Click the Update button.

    secure-windows-account-database

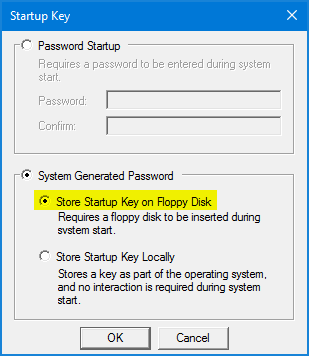
  3. Choose the System Generated Password option, and then select Store Startup Key on Floppy Disk and click OK.

    startup-key

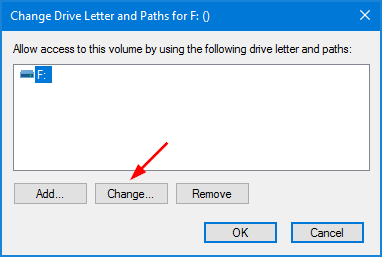
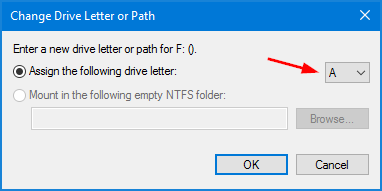
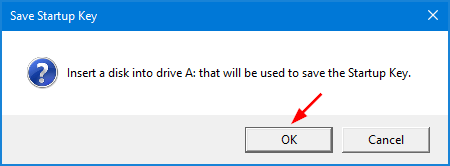
  4. You will be asked to insert a disk into drive A: to save the Startup Key. Make sure you change the drive letter of your USB drive to A: and click OK.

    save-startup-key-to-disk

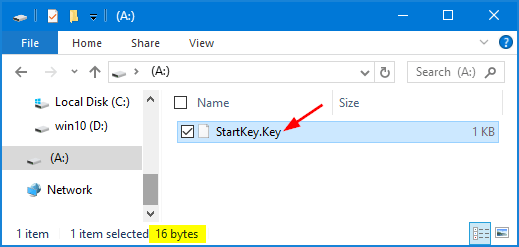
  5. After Windows writes the Startup Key into your USB drive, you’ll receive the message that the disk is now required to start up the system. Open your USB drive and you can see a single file named StartKey.Key, which is 16 bytes big.

    syskey-file

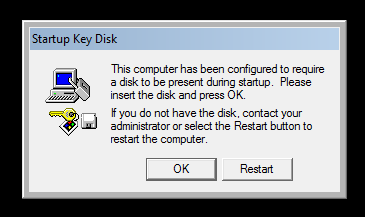
  6. Every time you computer boots up, you’ll be presented with the Startup Key Disk dialog which requires you to insert your USB drive. Without the USB drive, you’re unable to get past to access Windows login screen.

    startup-key-disk

2 Ways to Change Drive Letter in Windows 10

December 5th, 2016 by Admin

The drive letter you want is already used by another partition? Your drive doesn’t appear in File Explorer and no drive letter is assigned? In this tutorial we’ll show you 2 ways to manually change drive letter of any volume on your hard disk or USB storage device. Quickly get the missing or desired drive letter back in Windows 10.

Method 1: Change Drive Letter in Windows 10 Using Disk Management

  1. To get started, you need to open Disk Management. In Windows 10, you can access it by pressing Windows key + X and then selecting Disk Management.
  2. In the right pane you can see the details of all volumes and partitions on your hard drive and removable media. Right-click on the volume or partition you want to change, and select Change Drive Letter and Paths.

    change-drive-letter-and-paths

  3. In the next dialog box, click Change.

    change-or-remove-drive-letter

  4. Choose the the Assign the following drive letter option, then click the drop-down list to select your desired drive letter and click OK.

    assign-drive-letter

  5. A warning message box will pop up. Click Yes and your drive should now have the new letter assigned.

Method 2: Change Drive Letter in Windows 10 Using Command Prompt

  1. Open the Command Prompt in Administrator mode. This can be done by press the Windows key + X and then selecting “Command Prompt (Admin)“.

  2. At the command prompt, type diskpart and press Enter. Next type list volume to list out all volumes on your computer. Note down the volume number next to the drive that you want to change the letter of. In our case, that number is 4.

    list-volumes

  3. Type the following command to select the volume whose drive letter you want to change. Replace 4 with the volume number you noted down in above step.
    select volume 4
  4. Run the following command to assign a new drive letter. Substitute A for the new drive letter you’d like to use.
    assign letter=A

    change-drive-letter-from-cmd

    Tips: if you want to remove the drive letter only, type “remove letter=F“. Replace F with the current drive letter.

  5. Now you’ve successfully changed the drive letter in Windows 10. Your drive should show up with a new drive letter.

Ophcrack No Tables Found? How to Install?

December 5th, 2016 by Admin

When I launch Ophcrack Live CD on the computer, it boots up and says “No Tables Found”. However, when I look at the contents of the CD, tables are there. Any suggestions?

Ophcrack is a free Linux Live CD that cracks Windows login passwords by using LM/NT hashes through rainbow tables. The most common issue you may experience with Ophcrack is “Tables not found” or “No tables found”. In this tutorial we’ll show you how to manually install rainbow tables into Ophcrack Live CD.

Tips: A rainbow table is just a large database of precomputed hashes for a comprehensive set of passwords. But there are no guarantees Ophcrack will find a match for your password.

Ophcrack No Tables Found? How to Install?

Before getting started, browse to the Ophcrack Live CD you created and check if the “tables” directory is empty. If it’s empty, you need to download the rainbow tables from Ophcrack website. Unzip it and copy the contents to a USB thumb drive. Follow these steps to install rainbow tables into Ophcrack:

  1. When you see the warning “No tables found“, press Enter key as the screen indicates.

    ophcrack-no-tables-found

  2. Select “Ophcrack (Run Ophcrack QT graphical interface)” from the options that come up, and press OK.

    ophcrack-launcher

  3. When Ophcrack launches, click on the Tables button in the toobar. In the popup window, you might see no tables are installed. Click the Install button at the bottom.

    install-rainbow-table

  4. Browse to the rainbow table directory located in your CD or the USB thumb drive, and then click the Choose button.

    select-rainbow-table

  5. In the Table Selection dialog, you should see your table was installed on disk. Click OK.

    ophcrack-tables-installed

  6. Now you can load the SAM hive into Ophcrack, and click the Crack button to recover your password.

    crack-windows-password-with-ophcrack

2 Ways to Repair Corrupted or Damaged RAR / ZIP Files

December 2nd, 2016 by Admin

When trying to extract files from RAR/ZIP archive, you might come across the error message like “CRC32 failed”, “Checksum error”, “Unexpected end of archive”, etc. How to fix and extract corrupted archive?

zip-archive-corrupted

It’s quite common to get a corrupted RAR/ZIP file when you download it from the Internet with low or unstable Internet connection. Try downloading the file again and it may resolve the issue. When a redownload is not possible, you have to look for ways to repair the RAR/ZIP file. In this tutorial we’ll show you 2 ways to repair a RAR or ZIP archive whether it’s damaged, corrupted or partially downloaded.

Method 1: Repair Corrupted or Damaged RAR/ZIP File Using WinRAR

Before get started, you need to download and install WinRAR on your computer. If you don’t have a licensed copy of WinRAR, you can download a free evaluation copy which gives you about 40 days to try it out.

  1. Right-click on your corrupted RAR or ZIP file and select “Open with WinRAR” from the context menu.
  2. When WinRAR opens, click the Tools menu and select Repair archive.

    repair-archive

  3. Click the Browse button to select the destination location where the repaired RAR/ZIP file has to be saved. Leave the archive type as what it was and click OK.

    save-repaired-archive

  4. After WinRAR has completed repairing the archive, click the Close button.

    rar-zip-archive-repaired

    You’ll see a repaired archive created in the same folder as the corrupted archive.

Method 2: Extract Broken RAR/ZIP Archive

Unfortunately, after repairing RAR/ZIP archive, WinRAR may still say the file is corrupt. Then you can attempt to extract the content in the RAR/ZIP archive. WinRAR has an option to extract broken files using which you can actually extract the broken or corrupt files – ignoring all the errors no matter what.

  1. Double-click your corrupted RAR or ZIP archive to open it in WinRAR. Click Extract to in the toolbar at the top.
  2. Choose the destination folder where you want to extract the files. But most importantly, you have to check the Keep broken files option under the Miscellaneous section.

    winrar-keep-broken-files

  3. Click OK and wait while the files are extracted. Eventually you’ll have all the files present in your RAR/ZIP archive.

Conclusion

So that is how you can repair corrupted or damaged RAR/ZIP files. Of course, there are also many third-party RAR/ZIP repairing utilities available on the net, but I won’t recommend them as most tools might have even lower recovery rate than WinRAR.

How to Fix “Cannot Start / Open Microsoft Outlook”

December 2nd, 2016 by Admin

Cannot start Microsoft Office Outlook, unable to open the Outlook window? Outlook stuck on the “Load Profile” window? This can happen when your Outlook profile or Outlook data files have become corrupted or damaged. In this tutorial we’ll show you how to fix these issues by making a copy of Outlook profile.

Tips: If Outlook cannot start because your Outlook PST file is corrupt, you can check this how to repair PST article . If Outlook prompts you to enter PST password but you’ve forgotten it, you can recover PST password with this method: Recover Forgotten Password for Outlook Data File (.PST).

How to Fix “Cannot Start / Open Microsoft Outlook”?

  1. Open the Control Panel and set the View by option to Large icons. Click Mail (32-bit).

    mail-applet

  2. This will open the Mail Setup window. Click the Show Profiles button.

    show-outlook-profiles

  3. You should see the default profile called Outlook. Highlight it in the list and click Copy. (If you are told to make a new profile because your profile is corrupt, click the Add button to proceed).

    copy-outlook-profile

  4. Type a name for the new profile and click OK.

    type-new-profile-name

  5. Under the option of “When starting Microsoft Office Outlook, use this profile“, choose the first option (or select the new profile from the drop-down list and make Outlook automatically open that profile). Click Apply and then OK.

    enable-outlook-profile-prompt

  6. Now restart Outlook application. When prompted for a profile to be used, choose your new profile and click OK.

    choose-profile-when-outlook-start

    Outlook will start with all your email, contacts and other data intact.

A Outlook profile is made up of email accounts, PST data files, contacts, calendars and preferences. If making a copy of your existing Outlook profile doesn’t fix your problem, you might need to create a new profile and set up your email accounts from scratch.