Archive for July, 2016

How to Turn Off or Disable Touch Keyboard in Windows 10

July 4th, 2016 by Admin

If your computer has a physical keyboard, then you might not need to use the Touch keyboard at all. In this tutorial we’ll show you a simple way to turn off, remove or disable Touch keyboard in Windows 10.

touch-keyboard

How to Turn Off or Disable Touch Keyboard in Windows 10?

  1. Press the Windows key + R on your keyboard to open the Run box. Type services.msc and press Enter.

    run-services

  2. When the Services applet opens, click on the Name column to sort the services by name, and then scroll until you locate the “Touch Keyboard and Handwriting Panel Service“. Double-click on that service.

    services

  3. In the resulting Properties window, change the Startup type to Disabled, and click the Stop button if this service is running now. Click OK to save your change.

    touch-keyboard-service

  4. If the Touch keyboard shortcut icon is displayed in the system tray, you can remove it by right-clicking on the taskbar and deselecting the “Show touch keyboard button” option.

    remove-touch-keyboard-button

  5. Reboot your computer. No more annoying keyboard icon in the system tray and the Touch keyboard will not pop up automatically and bother you anymore.

This will of course, disable both the Touch keyboard and handwriting service, so you won’t be able to use the handwriting. If you need to enable Touch keyboard again, just change the Startup type of the “Touch Keyboard and Handwriting Panel Service” service back to Automatic.

How to Open and Use Windows 10 Touch Keyboard

July 4th, 2016 by Admin

Touch keyboard is Windows’s built-in tool that lets you type on touch devices, or even type with a mouse when you don’t have access to a physical keyboard. In this tutorial we’ll show you the simplest ways to open Touch keyboard and use it in Windows 10.

Part 1: Open Touch Keyboard in Windows 10

Just press the Windows key + R to open the Run box. Type tabtip and press Enter. It should be the fastest way to launch Touch keyboard in Windows 10.

tabtip

If you want to access Touch keyboard frequently, you can add the Touch keyboard shortcut to the taskbar. Simply right-click on the taskbar and select/check the “Show touch keyboard button” option in the context menu.

show-touch-keyboard-button

You’ll see a keyboard icon appear in the lower-right corner of the taskbar. Click that icon and you can open Touch keyboard immediately.

touch-keyboard-button

Part 2: Make Windows 10 Show Touch keyboard Automatically

By default, Windows 10 will not make the Touch keyboard appear when you type on the address bar or text fields. The good news is that you can change that behavior in just a few steps:

  1. Press the Windows key + I to open the Settings app. Click on Devices.
  2. Select Typing in the left side, scroll down and toggle on: Automatically show the touch keyboard in windowed apps when there’s no keyboard attached to your device.
  3. The Touch keyboard will automatically pop up when tapping on text forms, address bars, or anywhere else that you need to type on.

Part 3: How to Use Touch Keyboard

Once the Touch keyboard is open, you can drag it around the screen or re-size it. Here are 4 main features for Touch keyboard:

touch-keyboard

  • To add languages to the keyboard, tap the button in the right corner and select Language Preferences. Or, add them from the Settings area in Settings > Time & language > Region & language.
  • Tap the button in the bottom right corner to change the keyboard layout to a standard keyboard, a minimal keyboard, or a handwriting panel for writing. After switched to standard keyboard layout, you’ll have access to the Alt, function, tab, and other keys missing from the default Touch keyboard.
  • Autocorrect and suggestions. As you type or write with your finger, word suggestions appear at the top of the keyboard. See the one you want? Just tap to select it, then keep typing.
  • Both the basic and split keyboards include a wide range of emoticons and emojis, including different skin tones. To view the many categories, click the smiley face icon, then tap the left arrow button to move through them.

2 Ways to Turn On / Off Network Discovery in Windows 10

July 3rd, 2016 by Admin

Network discovery is a Windows setting that can control whether your PC can find other computers and if other computers on the same network can see your PC. In this tutorial we’ll show you how to turn on or off network discovery from Control Panel or Command Prompt in Windows 10.

network-discovery-off

Method 1: Turn On / Off Network Discovery from Control Panel

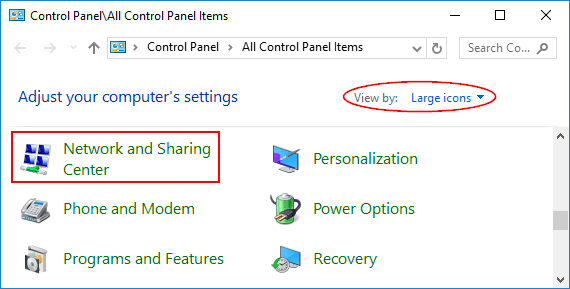
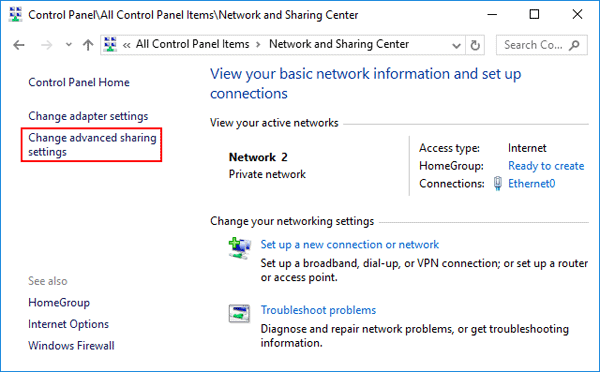
Open the Control Panel in Large icons view. Click Network and Sharing Center.

network-sharing-center

In the left pane of Network and Sharing Center, click the Change advanced sharing settings link.

change-sharing-settings

Now you can find 2 different profile: Private, Guest or public. Expand the options of the network profile that you want to change, select the Turn on network discovery option to enable network discovery, or select the “Turn off network discovery” option to disable network discovery. Click Save changes.

turn-on-off-network-discovery

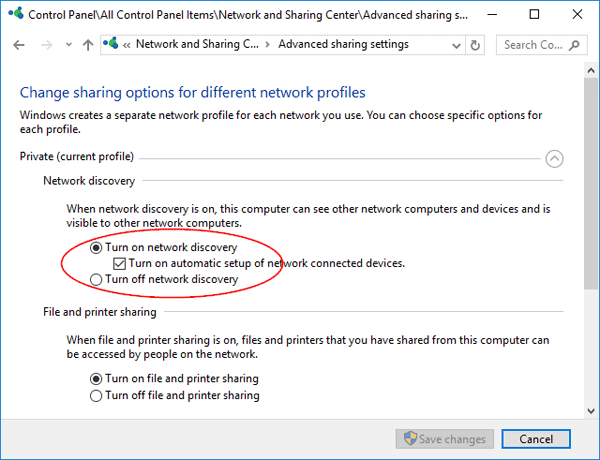
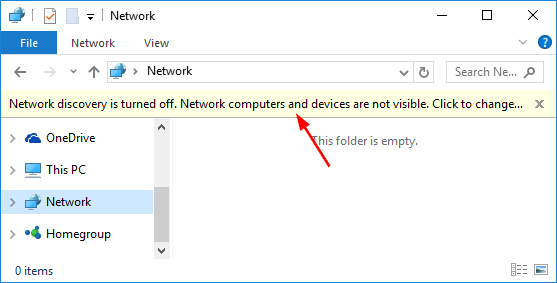
If prompted by UAC, then click on Yes. If network discovery is turned off, your computer won’t be able to view the other connected devices, and conversely, won’t be visible to the other devices as well.

Method 2: Turn On / Off Network Discovery from Command Prompt

To get started, Open the Command Prompt in administrator mode.

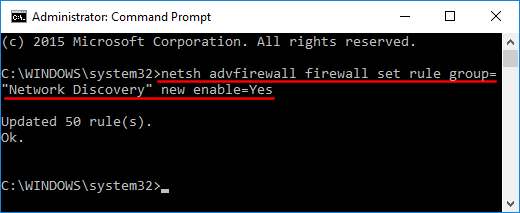
Copy and paste the following command into the Command Prompt and press Enter. This will turn on network discovery for private and public network profiles:
netsh advfirewall firewall set rule group="Network Discovery" new enable=Yes

enable-network-discovery-cmd

If you want to turn off network discovery again, copy and paste this command into the Command Prompt, and press Enter.
netsh advfirewall firewall set rule group="Network Discovery" new enable=No

When finished, you can close the elevated Command Prompt.

Automatically Sync Windows Time More Often Than Default

July 1st, 2016 by Admin

How often does Windows sync time? Is there a way to set a frequent period for Windows to sync time automatically? By default, domain controller will sync clock once per one hour, and standalone computer will sync clock once every week. In this tutorial we’ll show you how to change the time synchronization interval/frequency and make Windows automatically sync time more often than default.

windows-time

How to Make Windows sync time more often than default?

  1. To change the time synchronization interval, we have to access the Registry Editor. Press the Windows key + R to open the Run box. Type regedit and press Enter.

    regedit

  2. Once the Registry Editor opens, navigate to the following registry key:
    HKEY_LOCAL_MACHINE\SYSTEM\ControlSet\Services\W32Time\TimeProviders\NtpClient
  3. Look for the SpecialPollInterval entry in the right pane. This entry specifies the interval in seconds for the Windows Time service to sync the time. The default value on standalone computer is 604800 seconds, that is equal to 7 days.

    SpecialPollInterval

  4. Double-click on the SpecialPollInterval entry. From the pop-up dialog, click Decimal and enter the time interval (in seconds). For example, if you want to let Windows sync time each hour, just type 36000. Click OK and close Registry Editor.

    change-time-syn-interval

  5. Now we need to check if the Windows Time service is configured to start during boot. Press the Windows key + R to open the Run box. Type services.msc and press Enter.

    run-services

  6. From the service list, find the service named Windows Time and then double-click on it.

    windows-time-service

  7. Change the Startup type to Automatic and click OK.

    W32Time

    Reboot your computer and Windows will automatically sync the time at the interval you specified. Every time Windows loads up or you start or restart the Windows Time service, it will also sync time immediately.
    That’s all there is to it.