Archive for May, 2018

3 Ways to Restart File Explorer in Windows 10

May 5th, 2018 by Admin

How do I restart Windows Explorer manually if it isn’t responding? I accidentally turned off Windows Explorer. Now, nothing is on my desktop, including the start menu. How do I get it back? In this tutorial we’ll show you 3 easy ways to restart File Explorer manually in Windows 10.

Method 1: Restart File Explorer from Task Manager

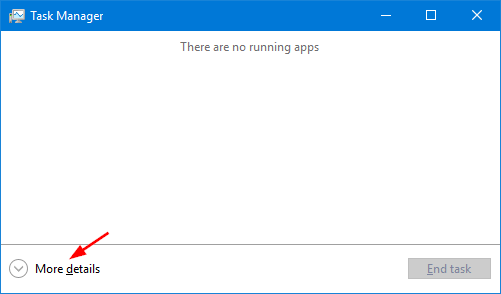
Press and hold down the key combination Ctrl + Shift + Esc to launch Task Manager. To see all of your PC’s current processes, click More details at the bottom of the Task Manager window.

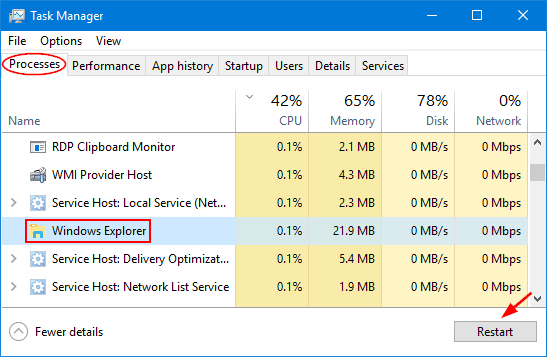
Switch to Process tab, locate the Windows Explorer entry from the list, then click the Restart button on the lower-right hand corner.

Method 2: Quit File Explorer and Then Start It

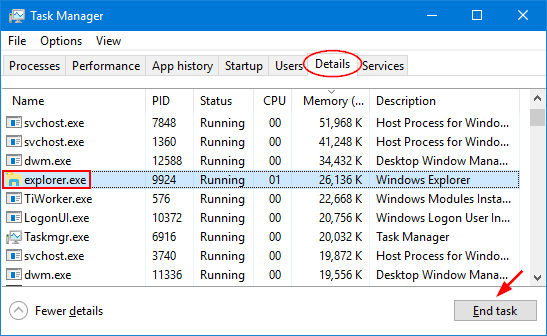
Open Task Manager. In the Details tab, locate the explorer.exe process and then click the End task button.

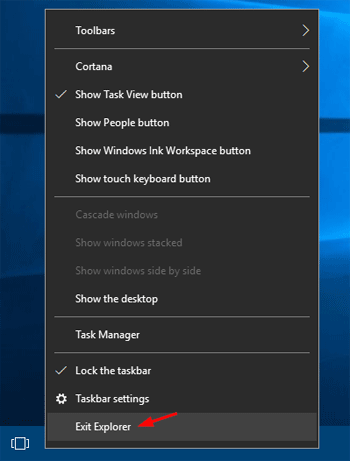
There is another handy way for quitting the Windows Explorer. In Windows 10 / 8, you can hold Ctrl+Shift while right-clicking any empty area of the taskbar. Click the Exit Explorer command from the popup menu.

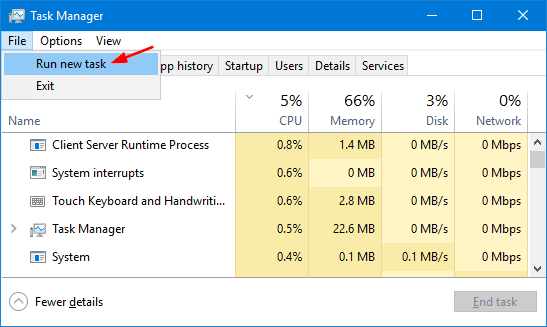
After quitting File Explorer, the taskbar and desktop icons will disappear. To access File Explorer again, press Ctrl + Shift + Esc keys on your keyboard to open Task Manager. Click the File menu and then choose “Run new task“.

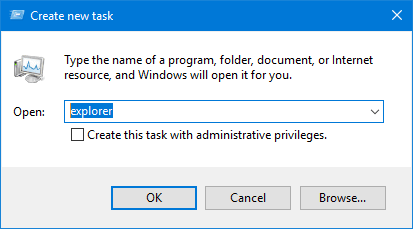
Type explorer.exe into the Open box and hit OK to relaunch Windows Explorer.

Method 3: Restart File Explorer Using Command Prompt

You can also use the taskkill command to perform a restart of File Explorer. Here’s how to restart File Explorer from Command Prompt:

  1. Open the Command Prompt as administrator.
  2. Copy the following commands and paste them into Command Prompt:
    taskkill /f /IM explorer.exe
    start explorer.exe

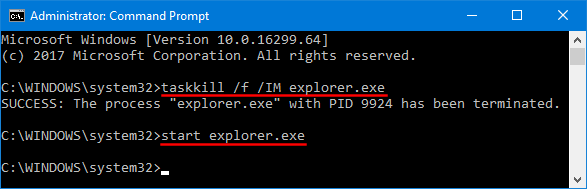
    The first command will terminate File Explorer, while the second one will relaunch it.

Quick Ways to Open Internet Options in Windows 10 / 8 / 7

May 3rd, 2018 by Admin

Where do I find Internet Options in Windows 10? Internet Options is a Control Panel applet which lets you manage browser security level, control your privacy, block or allow specific websites and so on. In this tutorial we’ll show you 4 quick ways to open Internet Options in Windows 10 / 8 / 7.

Method 1: Open Internet Options from Internet Explorer

Open up the Internet Explorer. Click the Settings icon in the upper-right corner, or click the Tools menu.

Select Internet options from the drop down menu, you can then access Internet Options immediately.

Method 2: Open Internet Options via Run Command Box

Press the Windows key + R to open the Run command box. Type inetcpl.cpl and press Enter.

You can now get to Internet Options.

Method 3: Open Internet Options from Control Panel

Open the Control Panel, and change it to the Large icons view.

Click Internet Options.

Method 4: Open Internet Options via Search

In Windows 10, type “internet options” in the Cortana Search box and you can then access Internet Options from the search result.

If you’re running Windows 7, click the Start button and type “internet options” in the Search box. Click its shortcut and it will open Internet Options quickly.

Disable Beep Sound When Plugging / Unplugging Laptop Charger

May 2nd, 2018 by Admin

Disabling annoying power cord beep? When plugging in or plugging out the power adapter, there will be an annoying beep sound. In this tutorial we’ll show you 2 simple ways to disable beep sound when plugging or unplugging laptop charger.

Method 1: Disable Beep Sound When Plugging / Unplugging Laptop Charger via Device Manager

If you’re running Windows 7:

  1. Press the WIN + R keys together to open the Run box. Type devmgmt.msc and press Enter.

  2. When the Device Manager window opens, click the View menu and then select Show hidden devices.
  3. In the left pane, click on Non-Plug and Play Drivers to expand it, then double-click the Beep device.

  4. Switch to the Driver tab. Set Startup type as Disabled.

    Click Apply and reboot your computer.

If you’re running Windows 10 or Windows 8, you have to disable the System Speaker device instead:

  1. Press the WIN + R keys together to open the Run box. Type devmgmt.msc and press Enter.
  2. In the left pane of the Device Manager window, Expand “System Devices“. Right-click on System Speaker and select Disable.
  3. Reboot your computer.

Method 2: Disable Beep Sound When Plugging / Unplugging Laptop Charger via BIOS

  1. Press a specific key (F2, F12, DEL, ESC, etc) repeatedly after restarting your laptop to access the BIOS Setup utility.
  2. Use the arrow keys to navigate through BIOS settings to look for “Power Beep“, “Power Control Beep” or a similar option, and set it to Disabled.

  3. Save your changes and exit BIOS.