Archive for February, 2017

Fix Error: “Windows cannot Change the Password” in Windows 10 / 8 / 7

February 15th, 2017 by Admin

Unable to change Windows password? When you try to change or set a Windows password from Control Panel, you might get a popup message saying “Windows cannot change the password“.

windows-cannot-change-password

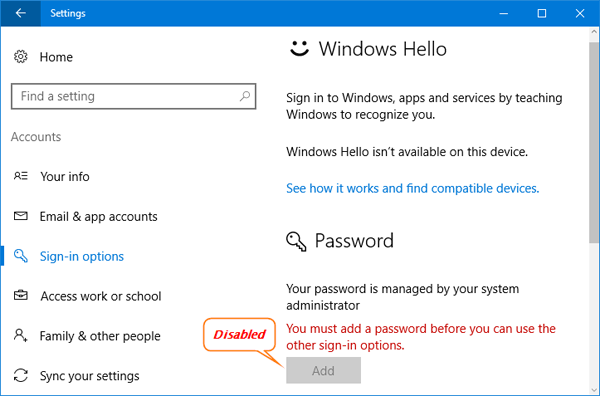
If you’re using Windows 10, open the Settings app and you might also find the option to change/reset password is greyed out.

unable-change-windows-password

In this tutorial we’ll show you a simple way to fix the issue “Windows cannot change the password” in Windows 10, 8 and 7.

Fix Error: “Windows cannot Change the Password” in Windows 10 / 8 / 7

  1. Press the Windows key + R to open the Run dialog box, then type compmgmt.msc and press Enter to open the Computer Management.
  2. Now, you can expand Local Users and Groups -> Users. In the right side, right-click on the user account which is not allowing you to change its password, then select Properties from the context menu.

    windows-account-properties

  3. You need to uncheck a box “User cannot change password“. Click Apply and then OK.

    user-cannot-change-password

    Now you should be able to change or set a Windows password in Control Panel.

How to Remove ‘Settings’ from Windows 10 Start Menu

February 14th, 2017 by Admin

How can I disable the Settings button in Windows 10 Start Menu? Windows 10 allows you to customize the left section of Start Menu, by adding or removing the folders such as Settings, File Explorer, Documents, Download, Music, Picture, Video etc.

remove-settings-from-start-menu

By default, File Explorer and Settings are the only folders listed there. In this tutorial we’ll show you how to remove the ‘Settings’ from Windows 10 Start Menu.

How to Remove ‘Settings’ from Windows 10 Start Menu?

  1. Open the Start Menu and then select Settings. If the Settings icon is missing from the Start Menu, you can press the Windows logo + I keys simultaneously to open the Settings app.
  2. Once the Setting app is launched, click Personalization.

    Personalization

  3. Click Start on the left side. On the right side, scroll down to the bottom and click Choose which folders appear on Start.

    choose-folders-appear-on-start

  4. Choose whatever folders you want to appear on the Start Menu. To remove Settings from Windows 10 Start Menu, toggle the “Settings” option to Off and you’re done.

    disable-settings-in-start-menu

Now click the Start button, you’ll see the Settings icon disappeared from Windows 10 Start Menu. But you can still access the Settings app by pressing the Windows logo + I shortcut keys. If you want to bring the Settings icon back to the Start Menu, just repeat the steps above and toggle the “Settings” option to On.

How to Enable / Turn On Microphone in Windows 10

February 13th, 2017 by Admin

Microphone doesn’t work after Windows 10 upgrade? How can I re-enable the built-in microphone? In this tutorial we’ll show you 3 ways to enable / turn on microphone in Windows 10.

Method 1: Turn On Windows 10 Microphone Using Device Manager

  1. Press the Windows key + X shortcut to open the WinX menu, and then select Device Manager.

    winx

  2. Double-click on Sound, video and game controllers to expand that section. Locate your audio driver (for example, Realtek High Definition Audio) and right-click on it. Click on Enable. Restart your computer.

    enable-audio-device

Note: If there is a yellow mark (most probably an exclamation mark or a question mark) next to your microphone device, there is problem with the driver. Then you need to reinstall or update the audio driver.

Method 2: Turn On Windows 10 Microphone from Sound Settings

  1. Right-click on the Volume icon in the system tray and click on Recording devices.

    recording-devices

  2. Click on the Recording tab, and then right-click in the space under the last recording device and click “Show Disabled Devices“.

    show-disabled-devices

  3. Select your Microphone from the list, and then click on Properties.

    microphone-properties

  4. Choose the “Use this device (enable)” option under the Device usage drop-down list, click Apply and then OK.

    use-this-microphone

  5. You may also check if the microphone that you are using is set as default. Note: Current default device is indicated by a green check mark.

    set-default-microphone

Method 3: Turn On Windows 10 Microphone from PC Settings

  1. Press the Windows key + I shortcut to open the Settings app. Click Privacy.

  2. Choose Microphone in the left pane. You’ll see an option that says “Let apps use my microphone“. Slide the toggle to On and select which of the apps underneath can use your microphone.

    let-apps-use-microphone

How to Set Ethernet / Wi-Fi Connection as Metered in Windows 10

February 9th, 2017 by Admin

Windows 10 allows you to set the network connection as metered. This is a useful feature especially if your Internet service provider limits the data you can use. Turning on metered connection will prevent Windows from using your bandwidth except you choose.

  • Stop Windows 10 from automatically downloading updates in the background.
  • Windows Store won’t automatically download updates for your installed apps.
  • Start Menu tiles will stop updating live data from the Internet.
  • Offline files will not sync with other devices.

In this tutorial we’ll show you how to set Ethernet / Wi-Fi connection as metered in Windows 10. This can effectively reduce the internet data usage so you don’t have to pay for extra bandwidth.

Part 1: Set Wi-Fi Connection as Metered in Windows 10

  1. Open the Settings app by pressing the Windows key + I shortcut, or launch it by clicking the Settings icon from your Start Menu.

    open-settings-via-start-menu

  2. Click Network & Internet.

    network-security

  3. Select Wi-Fi from the left hand menu. You will get a list of network connections on the right hand pane. Click the Wi-Fi network you want to change to metered.

    wifi-settings

  4. Move toggle for Set as metered connection to On.

    set-metered-connection

This method only allows you to set mobile and Wi-Fi connections as metered. There is no GUI option to do this with wired Ethernet connections.

Part 2: Set Ethernet Connection as Metered in Windows 10

To set your Ethernet connection to metered, you’ll have to dive into the Windows Registry to tweak the settings. Here’s how:

  1. Press Windows key + R to open the Run command box, type regedit and hit Enter to open Registry Editor. Navigate to the following key:
    HKEY_LOCAL_MACHINE\SOFTWARE\Microsoft\Windows NT\CurrentVersion\NetworkList\DefaultMediaCost
  2. By default, the DefaultMediaCost key is protected and you don’t have the permissions necessary to edit it. Right-click the DefaultMediaCost key and select Permissions, follow this article to take ownership of that registry key.

    DefaultMediaCost-Permissions

  3. While the DefaultMediaCost key is selected in the left pane, double-click Ethernet value in the right pane, and change its value from 1 to 2.

    Ethernet-metered-connection

  4. Close Registry Editor and reboot your computer.

If you want to verify your Ethernet connection is set to metered, you can open Office Outlook 2016 application, which will detect and alert you that you are using a metered connection.

How to Enable / Disable Camera (or Webcam) in Windows 10

February 7th, 2017 by Admin

How can I turn off camera on my laptop? Look for a way to prevent a specific app from accessing your camera? Nowadays many laptops and tablets have integrated cameras that could be used as a webcam to video chat. But some users might want to turn them off because of security concerns. In this tutorial we’ll show you 2 methods to enable / disable Camera (or Webcam) in Windows 10.

Method 1: Enable / Disable Camera Using Windows 10 Settings

  1. Open the Settings app by pressing the Windows + I shortcut key, or clicking the Settings icon from the Start Menu in Windows 10.

    open-settings-via-start-menu

  2. From the Settings window, click Privacy.

    privacy-settings

  3. Choose Camera in the left pane. You’ll see an option that says “Let apps use my camera“. Slide the toggle to On and select which of the apps underneath can use your camera, or toggle Off to prevent all apps from accessing your camera.

    let-apps-use-camera

Method 2: Enable / Disable Camera Using Device Manager

If you want to completely disable your camera in Windows 10, just follow these steps:

  1. Press the Windows + R keys together to open the Run box. Type devmgmt.msc and press Enter.

    devmgmt

  2. Once the Device Manager window opens, expand Imaging devices (or Integrated Camera) to display your camera. Just right click on it and select Disable. You may be asked for confirmation. Select Yes.

    disable-camera-in-device-manager

  3. Your camera will now be turned off. If you ever need to use the webcam, repeat the above process, but select Enable when right-clicking on your camera.

How to Disable Automatic Maintenance in Windows 10

February 6th, 2017 by Admin

Automatic Maintenance is a built-in feature in Windows 10/8 that is turned on by default. When your computer is idle, the system will automatically run its maintenance tasks (windows updates, security scanning, disk checking, etc) at the background.

Just open the Control Panel in Large icons view, click Security and Maintenance.

security-and-maintenance

You can then see if automatic maintenance is in progress. From there you can see a link for stopping the automatic maintenance.

windows-automatic-maintenance

If you want to prevent Windows 10 from automatically running the maintenance next time, you can disable it using the following registry hack.

How to Disable Automatic Maintenance in Windows 10?

  1. Press the Windows Key + R keys simultaneously, then type regedit in Run dialog box and press Enter.
  2. When the Registry Editor window appears, navigate to the following key:
    HKEY_LOCAL_MACHINE\SOFTWARE\Microsoft\Windows NT\CurrentVersion\Schedule\Maintenance
  3. In the left pane, right-click on the Maintenance key, and then select New -> DWORD (32-bit) Value.

    new-dword-value

  4. Name the new value MaintenanceDisabled.

    MaintenanceDisabled

  5. Next, double-click on the new value to modify. In the Value data field, type 1 if you want to disable automatic maintenance (If you want to enable automatic maintenance again, just set its value to 0.) and click OK.

    disable-automatic-maintenance

  6. Close Registry Editor and reboot your computer. Now you’ve successfully disabled automatic maintenance in Windows 10. That’s it!

Enable Caret Browsing in Microsoft Edge Using F7 or Regedit

February 6th, 2017 by Admin

Caret browsing is a useful feature in Microsoft Edge, which allows you to copy a block of text from a web page using the keyboard, not the mouse. Just place your cursor anywhere on a body of text, then use the arrow keys to move the cursor to select the text you want to copy. In this tutorial we’ll show you 2 methods to enable / disable caret browsing in Microsoft Edge in Windows 10.

use-caret-browsing

The “Always use caret browsing” option seems to be gone from the Settings menu in Microsoft Edge. So you have to turn on/off caret browsing using the F7 shortcut or registry editor.

Method 1: Enable / Disable Caret Browsing in Microsoft Edge Using F7 Shortcut

Open Microsoft Edge and browse to a web page where you’d like to select text, press F7 key on your keyboard. This will bring up a confirmation window, asking you if you want to turn caret browsing on. Select Yes to turn it on.

turn-on-caret-browsing

If you don’t want to be prompted the next time you press F7, just check the option “Don’t ask me again when I press F7“. When you want to turn off caret browsing, just hit F7 again.

turn-off-caret-browsing

Method 2: Enable / Disable Caret Browsing in Microsoft Edge Using Regedit

  1. Press the Windows Key + R keys simultaneously, then type regedit in Run dialog box and press Enter.
  2. When the Registry Editor window opens, navigate to the following key:
    HKEY_CURRENT_USER\SOFTWARE\Classes\Local Settings\Software\Microsoft\Windows\CurrentVersion\AppContainer\Storage\microsoft.microsoftedge_8wekyb3d8bbwe\MicrosoftEdge\CaretBrowsing
  3. In the right pane, double-click the DWORD EnableOnStartup to modify. Set its value data to 1 if you want to enable caret browsing, or turn off caret browsing by resetting it to 0.

    enable-caret-browsing-in-edge

  4. When it’s done, close Registry Editor and relaunch Microsoft Edge to see results.

If you don’t want to use Registry Editor to make the registry changes above, just download one of these .reg files (enable-caret-browsing-in-edge.reg, disable-caret-browsing-in-edge.reg). After downloading, double-click the .reg file and apply the registry settings to your system.

Fix: Sleep Option Missing in Windows 10 / 8 / 7 Power Menu

February 5th, 2017 by Admin

Missing sleep option in the power menu in Windows 10? When you click the Start button, then click the Power icon (or click the arrow next to shut down), you might find the Sleep option is missing or greyed out. In this tutorial we’ll show you how to fix the issue: Sleep option missing in Windows 10 / 8 / 7 Power menu.

sleep-in-power-options-menu

Method 1: Enable Sleep Mode in Control Panel

  1. Open the Control Panel in Large icons view. Click Power Options.

    power-options

  2. Click the “Choose what the power button does” link on the left side of the window.

    choose-what-power-does

  3. Click the link that says “Change settings that are currently unavailable“.

    change-settings-unavailable

  4. Scroll down to the Shutdown settings section. Now check the Sleep checkbox and click Save changes button.

    enable-sleep-option

Method 2: Enable Sleep Mode Using Group Policy

  1. Open the Local Group Policy Editor. Navigate to Computer Configuration -> Administrative Templates -> Windows Components -> File Explorer.
  2. On the right side panel, double-click on Show sleep in the power options menu settings in the list as shown.

    show-sleep-in-power-options-menu

  3. In the next window that opens up, select either Enabled or Not Configured and then click OK.

    enable-sleep-via-group-policy

    This would add the Sleep option in the Power Options menu in Windows.

Method 3: Turn on Connected Standby (InstantGo)

InstantGo (previously called Connected Standby) is a smart feature in Windows 10/8 that allows your PC to maintain network connectivity when your screen is off in sleep mode. However, Any attempt to disable InstantGo may likely disable the regular Standby/Sleep mode too, as most devices supporting Connected Standby does not support traditional sleep options.

If you’ve disabled InstantGo, you have to turn it on again. Follow these steps:

  1. Open the Registry Editor. Navigate to the following key:
    HKEY_LOCAL_MACHINE\SYSTEM\CurrentControlSet\Control\Power
  2. On the right side pane, double-click CsEnabled and set its value to 1.

    enable-connected-standby-InstantGo

  3. When it’s done, close the Registry Editor and reboot your computer.

Method 4: Install the Latest Display Driver

If your system is using the generic display driver, the Sleep option might also disappear from the Power Options menu. You need to download and install latest display driver from the manufacturers website.

How to Slide to Shut Down Windows 10 Laptop / Desktop Like a Tablet

February 4th, 2017 by Admin

The “Slide to shut down your PC” feature is the easiest & funny way to shut down a Windows 10/8 tablet. Just hold the Power button for a few seconds to slide to power off. Actually this feature also works with non-touch screen devices. In this tutorial we’ll show you how to slide to shut down Windows 10 laptop/desktop like a tablet.

Part 1: Add the “Slide to shut down” Shortcut in Windows 10

Right-click on the empty space on the desktop, then select New -> Shortcut.

new-shortcut

When the Create Shortcut wizard opens, copy and paste the following path in the shortcut location box, and click Next.
%windir%\System32\SlideToShutDown.exe

slide-to-shutdown-location

Enter a descriptive name for the shortcut (e.g., SlideToShutdown). Click Finish.

name-the-shortcut

Part 2: Slide to Shut Down Windows 10 Laptop / Desktop Computers

Now, you can drag the new shortcut icon to the taskbar if you want, or you can leave it on the desktop.

slide-to-shut-down-shortcut

When you want to shut down, just double-click the shortcut icon, and the slide to shutdown screen will open from the top. Use your mouse to slide down or press the Enter key, and your computer will power off.

slide-to-shut-down-pc