Archive for November, 2015

Reset Dell Laptop to Factory Settings without Knowing Admin Password

November 5th, 2015 by Admin

How to reset your Dell computer to original factory settings if you forgot the administrator password? A forgotten password should not become an obstacle on the way! This guide explains how to perform a factory reset on Windows 10/8/7/Vista Dell laptop, without knowing the admin password.

Note: a factory reset is used to wipe and take your computer back to where it was on the day you opened the box. It will delete everything on your hard drive. Be sure to backup anything you don’t want to lose.

Part 1: Reset Windows 10/8 Dell Laptop to Factory Settings without Admin Password

Locked out of your Dell laptop after forgot the admin password? Don’t worry! Follow these steps and you can factory reset Windows 10 or 8 from the login screen:

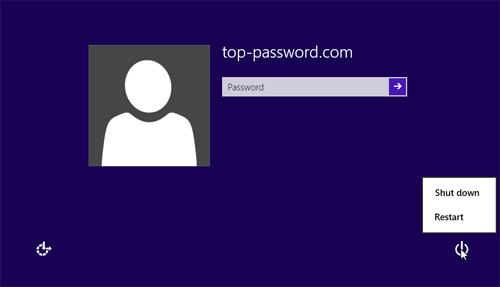
  1. From the login screen, click the Power icon in the lower right corner of the screen. While holding the Shift key, click Restart.

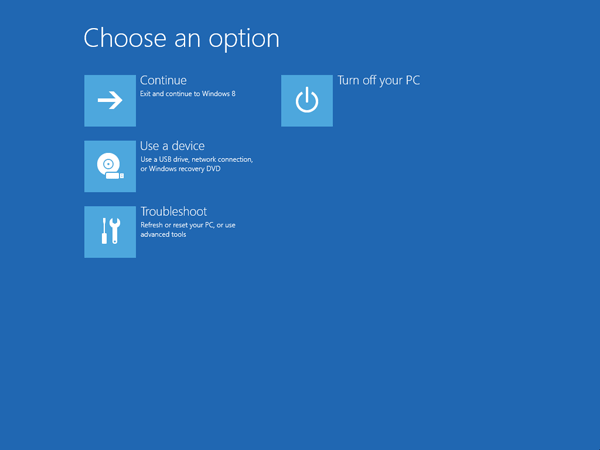
  2. The computer will restart and take you to the troubleshooting option screen. Click on Troubleshoot.

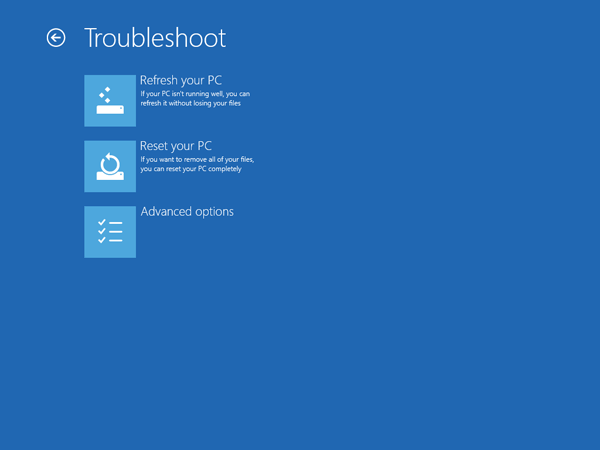
  3. Now you’ll see the options to reset or refresh your computer. Click on Reset your PC.

  4. Click Next. The system will reboot and begin preparing to reset the PC.
  5. At the Reset your PC screen, click Just remove my files and then Click Reset.

Part 2: Reset Windows 7/Vista Dell Laptop to Factory Settings without Admin Password

Unlike Windows 10/8, Windows 7 and Vista will require you to enter admin password when resetting it to factory state. If you’ve forgotten your password, you can remove the password by booting your Dell lapltop from PCUnlocker Live CD. If you don’t have such as a Live CD, you can create one from another computer you have access to.

Once you’ve successfully removed the admin password (or you could remember your password), let’s proceed with a factory reset on your Windows 7/Vista Dell laptop:

  1. Turn on the laptop. As soon as the Dell logo appears on the screen, repeatedly press the F8 key until you see the “Advanced Boot Options” menu.

    repair-your-computer

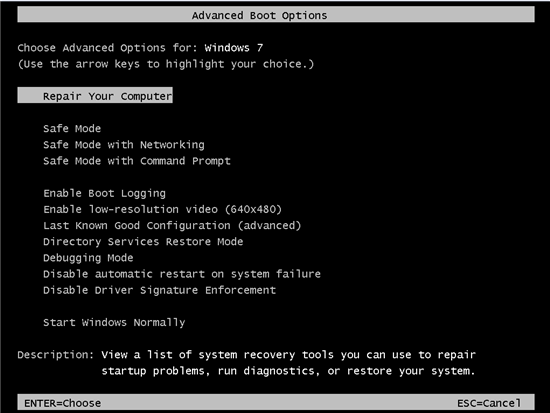
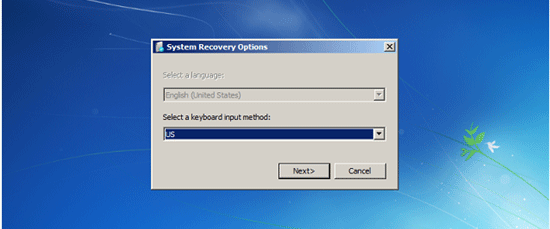
  2. Select “Repair your computer” and press Enter. The System Recovery Options screen opens.
  3. Select your keyboard layout, and then click on Next.

    select-keyboard-layout

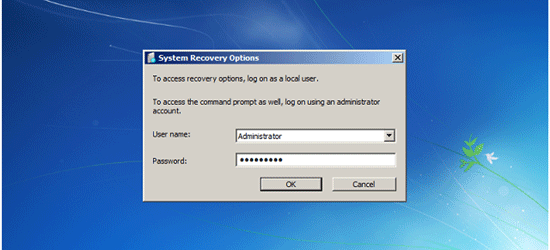
  4. At the next screen it will ask you for the user name and password. Type your Administrator username and password, and then click OK. If you’ve removed the admin password, leave the password field blank.

    enter-admin-password

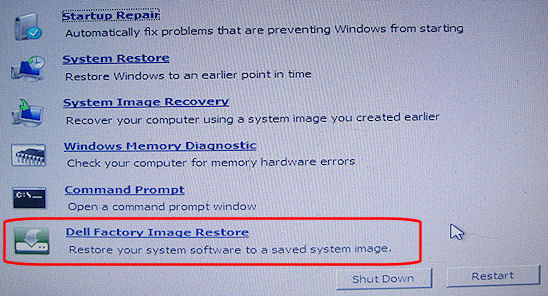
  5. When you’re presented with a list of system recovery options, look for an option named “Dell Datasafe Restore and Emergency Backup“, “Dell Factory Image Restore“, or “Dell Backup and Recovery Managers“. Click on it and follow the on-screen instructions to reset your Dell laptop to factory settings.

    dell-factory-reset

Windows 10 Password Recovery on Surface Book & Surface Pro 4

November 1st, 2015 by Admin

Lost Windows 10 password for signing in to your Surface Book or Surface Pro 4? Is it possible to recover or reset Windows 10 password on a UEFI-based laptop or tablet? The Surface machine is equipped with UEFI and Secure Boot which add security but make old password recovery methods obsolete. Here we’ll show you how to reset forgotten Windows 10 password on Surface Book and Surface Pro 4, by using a UEFI-compatible bootdisk – PCUnlocker.

Requirements:

The following things are needed before you begin:

  • A USB thumb drive with at least 1Gb space (USB 3.0 is recommended as Surface has a full-size USB 3.0 port).
  • PCUnlocker Enterprise
  • A USB burning tool – ISO2Disc

How to Reset Windows 10 Password on Surface Book & Surface Pro 4?

The first thing you’ll need to do is download the zip file of PCUnlocker Enterprise (trial version) to a computer you have access to. When the download is complete, extract the contents of the ZIP file using 7-Zip or your favorite unzip program. You should see a file called pcunlocker.iso.

Download and install the freeware ISO2Disc. With your USB thumb drive plugged in, launch ISO2Disc. Click on Browse button to select the PCUnlocker ISO image you’ve downloaded. Click on “Burn to USB Flash Drive” option and select your USB drive, next choose “GPT (required for UEFI boot)“.

Click on Start Burn. Wait until ISO2Disc utility erases your USB drive and transfers PCUnlocker ISO file to it. When this is completed, close ISO2Disc utility, unplug the USB stick and use it to troubleshoot your locked Surface computer.

Insert the PCUnlocker Live USB drive into the USB 3.0 port on your Surface. Press and hold the Volume Down (-) button on the top edge of the device’s screen, then press the Power button. When the Surface logo appears, release Volume Down button and the machine will now boot from the USB drive.

surface-volume-button

Once booted to the PCUnlocker program, you can see all your Windows user accounts. Select an account from the list and click on “Reset Password” button. The program will remove your forgotten password immediately. If the account you selected is linked to a Microsoft account, PCUnlocker will automatically help you switch the Microsoft account back to local account.

Click on Restart button. While rebooting, unplug the USB drive and let the Surface boot from hard drive normally. When comes to the login screen, just click on your user icon and you can log on to your Surface Book or Surface Pro 4 without typing a password! That’s it!