Have too many shortcuts and files on your desktop? Got too many apps or windows open on one screen? Windows 10 comes with a new built-in feature called Task View, which allows you to create multiple virtual desktops on a single monitor. In this tutorial we’ll show you how to create and use multiple virtual desktops in Windows 10.
Part 1: Create Virtual Desktop
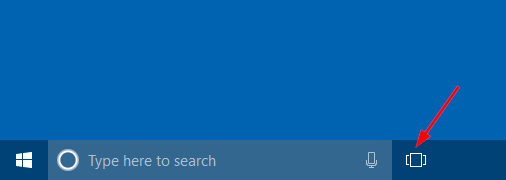
Click the Task View button next to the Cortana search box on your taskbar. Alternatively, press the Windows+Tab keyboard shortcut to open Task View.
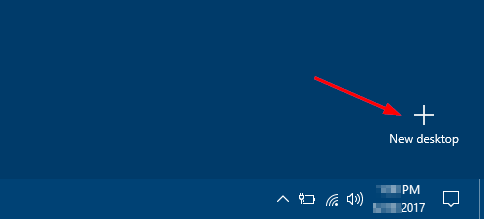
You’ll see a button in the bottom-right corner of your screen labeled “New desktop“. Just click this button to create a new virtual desktop. You can use this method to create an unlimited number of virtual desktops.
Part 2: Switch Between Virtual Desktops
Virtual desktops not only give you more desktop space for separate task-related windows, but also allow you to quickly and easily access what you need. For example, you can run productivity apps (such as Office, OneNote, email) on your first virtual desktop, and use the second desktop for gaming.
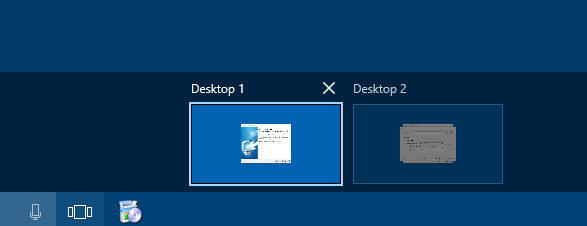
To switch between virtual desktops, click the Task View button on the taskbar and then select the desktop you want to switch to.
You can also quickly switch virtual desktops by using the keyboard shortcuts: Windows key + Ctrl + Left Arrow, Windows Key + Ctrl + Right Arrow.
Part 3: Move Application from One Virtual Desktop to Another
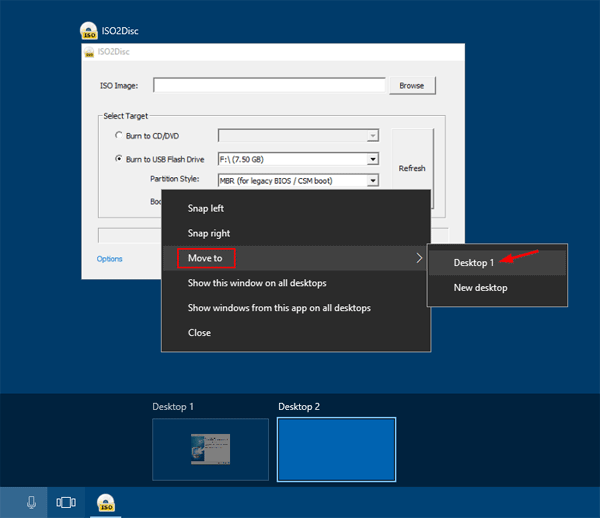
Click the Task View button on the taskbar. From Task View, you can drag-and-drop open program windows from the current desktop into a different one, or right-click the app you want move, select Move to, and select the desktop you want to move the app.
Part 4: Close Virtual Desktop
To close your current desktop, just press the keyboard shortcut: Windows key + Ctrl + F4. That’s about all there is to Windows 10 virtual desktops.