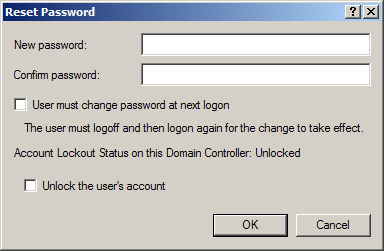
In Windows 10, Action Center can be accessed by clicking the square speech bubble icon located on the right-hand side of the taskbar. Action Center shows you your latest notifications, emails, updates and app messages all appear in a drawer that pulls out from the right hand side of the screen.
![]()
If you hate having to clear annoying notifications all the time, or you feel like the Action Center is useless, you can get rid of it. In this tutorial we’ll show you 3 ways to remove / disable Action Center from the taskbar in Windows 10.
Method 1: Disable Windows 10 Action Center Using the Settings app
- Open the Settings app either by clicking its icon in the Start Menu or pressing Windows + I keyboard shortcut.

- Click on Personalization.
- Select Taskbar from the left-hand navigation, and then click the link titled “Turn system icons on or off“.
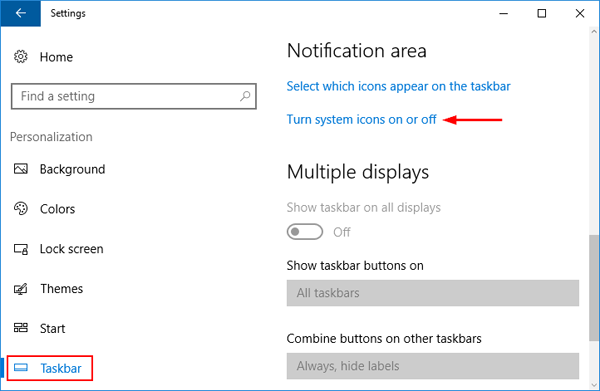
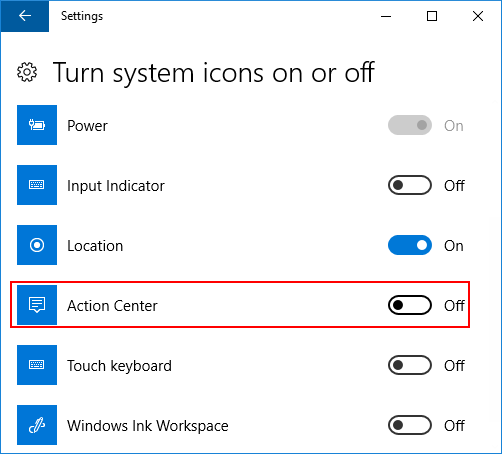
- Toggle the switch against Action Center to the Off position. This will remove & disable the Action Center icon right away.
If you’re running an old build of Windows 10, follow these steps:
- Open the Settings app.
- Click on System.
- Click the “Notifications & actions” category on the left. On the right, click the “Turn system icons on or off” link.
- To remove Action Center icon from taskbar, toggle Action Center to Off.
Method 2: Disable Windows 10 Action Center Using Group Policy
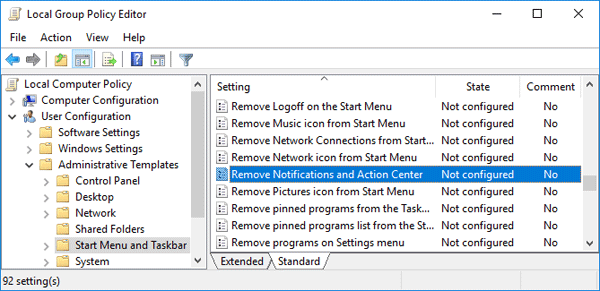
- Open the Local Group Policy Editor. Navigate to: User Configuration > Administrative Templates > Start Menu and Taskbar.
- On the right-hand pane, find the “Remove Notifications and Action Center” policy and double-click it.
- Select the Enabled radio button, and click OK to disable the Action Center.
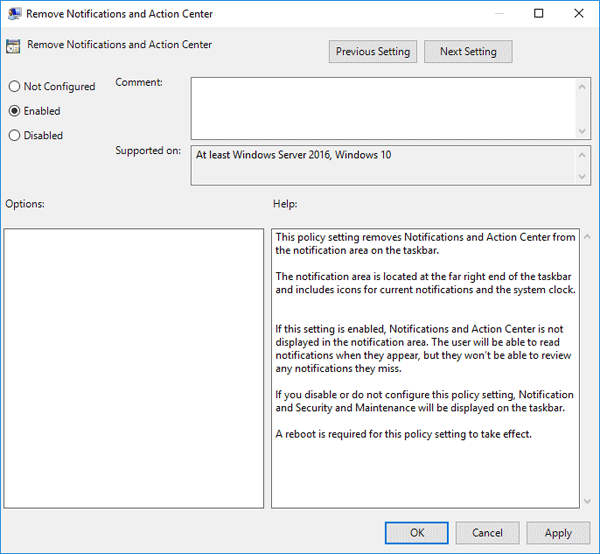
Just restart your system to make the changes take effect.
Method 3: Disable Windows 10 Action Center Using Registry Editor
- Open the Registry Editor. Navigate to the following key:
HKEY_CURRENT_USER\SOFTWARE\Policies\Microsoft\Windows\Explorer - Right-click any empty space on the right pane and select New > DWORD (32-bit) Value. Name it DisableNotificationCenter. Next double-click on it and give it a value of 1.
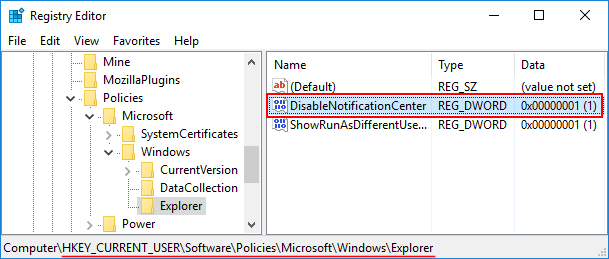
- Exit Registry Editor and restart your computer. The Action Center icon has completely disappeared from the taskbar. If you want to bring it back in future, follow the same instructions but set the DisableNotificationCenter value to 0.