Aero Peek is a usability feature available since Windows 7, which allows you to temporarily view the desktop without having to minimize all the open windows. Just move the mouse at the far right end of the taskbar, it makes all the open windows go transparent and you can see the desktop. Move the mouse away to see your open windows again.
If you don’t like Aero Peek, you can disable it easily. In this tutorial we’ll show you 4 ways to enable or disable Aero Peek in Windows 10 / 8 / 7.
Updated: These methods don’t work with Windows 11. If you want to disable desktop peek in Windows 11, please check out this tutorial.
Method 1: Enable or Disable Aero Peek via Right-clicking “Show desktop” Button
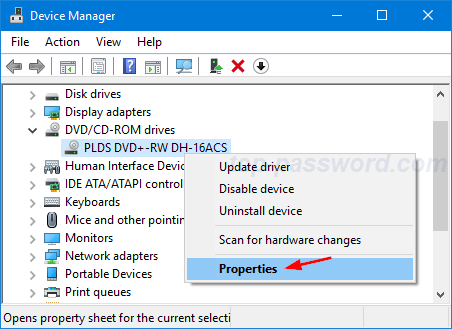
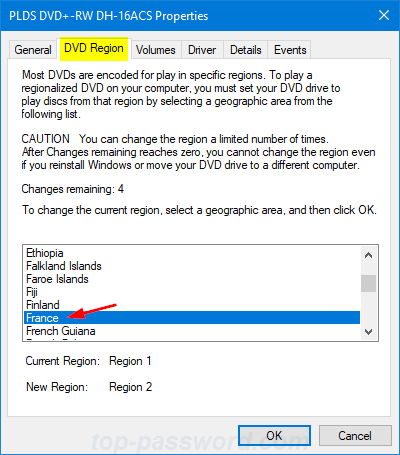
Move your cursor over the “Show desktop” button, which can be found as a small rectangle present at the right corner of the taskbar. Right-click the “Show desktop” button, and then select “Peek at desktop” from the popup menu.
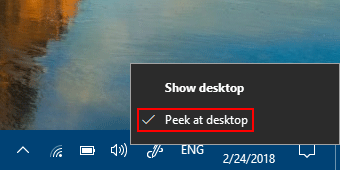
When Aero Peek is turned on, there should be a check mark next to the “Peek at desktop” option. Clicking that option again will then disable Aero Peek.
Method 2: Enable or Disable Aero Peek via Right-clicking Taskbar
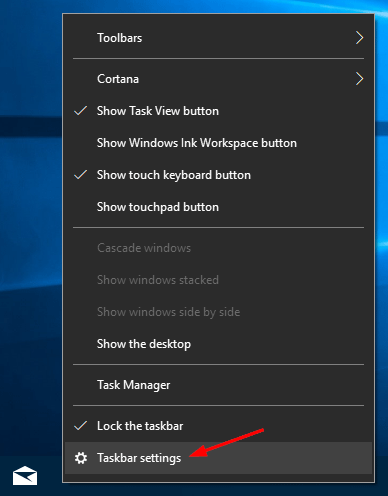
Right click an empty space on the taskbar, and then select Taskbar settings from the popup menu.
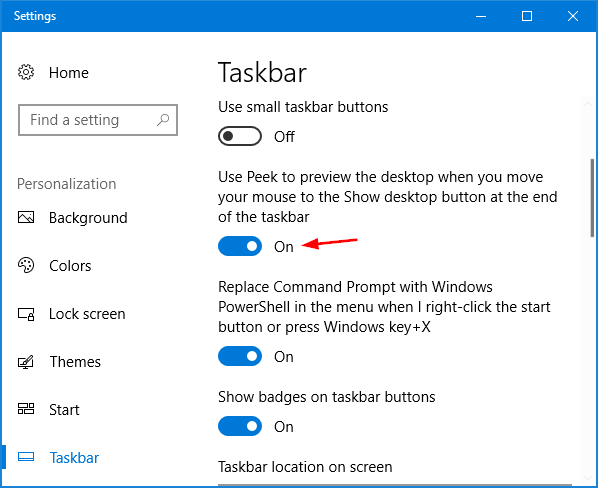
On the Taskbar settings window, just toggle the “Use Peek to preview the desktop when you move your mouse to the Show desktop button at the end of the taskbar” option on or off to enable or disable Aero Peek.
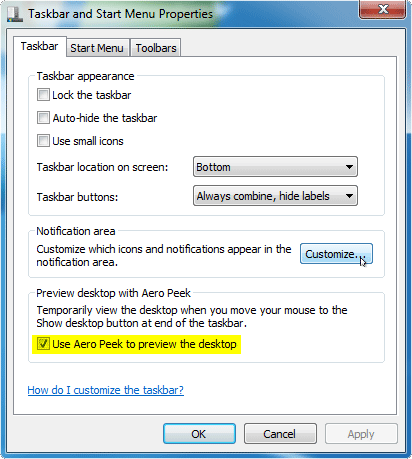
If you’re running Windows 7, right-click on the taskbar and select Properties. You’ll get a similar option “Use Aero Peek to preview the desktop” that allows you to enable or disable Aero Peek.
Method 3: Enable or Disable Aero Peek via System Properties
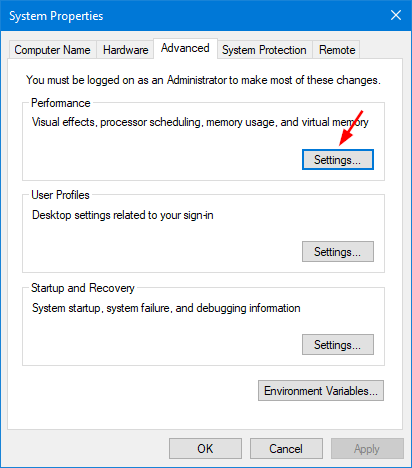
- Press the Windows + R keyboard shortcut to open the Run dialog, then type sysdm.cpl and hit Enter.
- On the System Properties dialog box, select the Advanced tab. Click the Settings button under the Performance section.
- Select the Visual Effects tab, look for the option entitled “Enable Aero Peek” or “Enable Peek“, which allows you to turn the Aero Peek feature on or off.
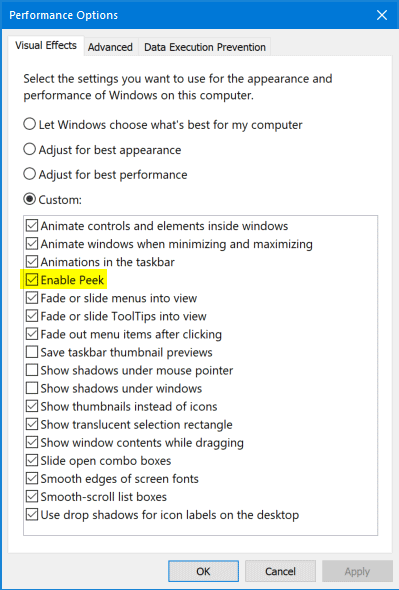
- Click Apply and then OK.
Method 4: Enable or Disable Aero Peek via Registry Hack
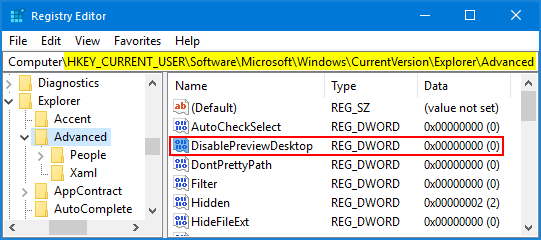
- Open the Registry Editor and navigate to the following key:
HKEY_CURRENT_USER\Software\Microsoft\Windows\CurrentVersion\Explorer\Advanced - Double-click a DWORD value called DisablePreviewDesktop on the right pane, set its value to 0 if you want to enable Aero Peek, or change its value to 1 when you don’t use Aero Peek.
- Close Registry Editor. Restart or log off your system.