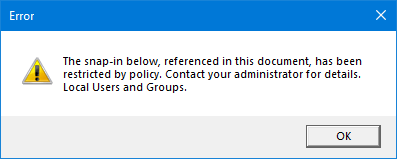
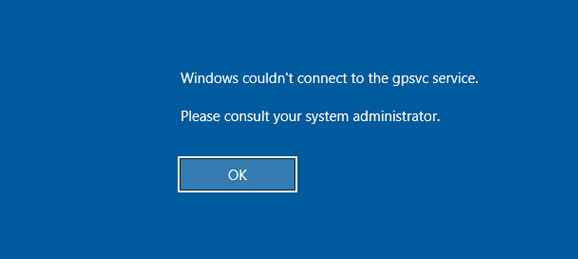
When you try to log into a standard user account, it may come up with a message saying: “Windows couldn’t connect to the Group Policy Client service. Please consult your administrator.”
If you’re facing this problem, you have come to the right place! In this tutorial we’ll show you effective ways to fix the error “Windows couldn’t connect to the Group Policy Client service” in Windows 10, 8 and 7.
Method 1: Perform a System Repair
- Open the Command Prompt as Administrator.
- Run the following commands one by one to scan for corrupt system files on your computer and repair them.
Dism /Online /Cleanup-Image /RestoreHealth

sfc /scannow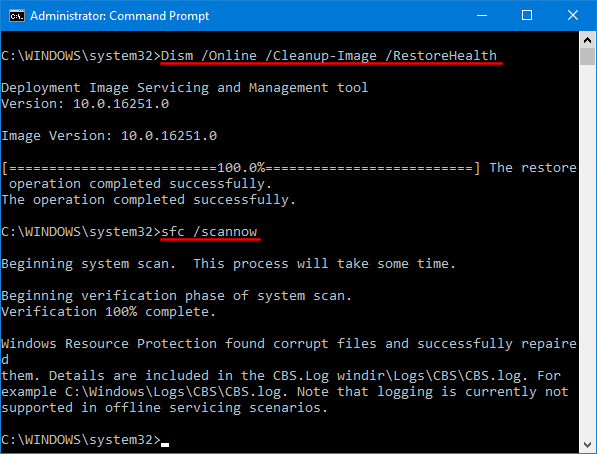
- Execute this command to reset winsock catalog back to default setting or clean state.
netsh winsock reset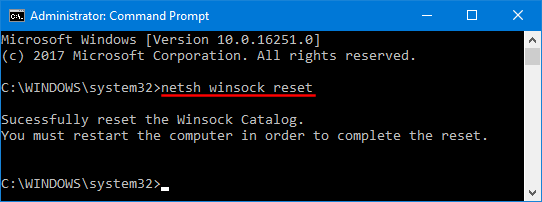
- You will then be asked to restart your computer, after which the issue is hopefully resolved.
Method 2: Fix the Registry Settings
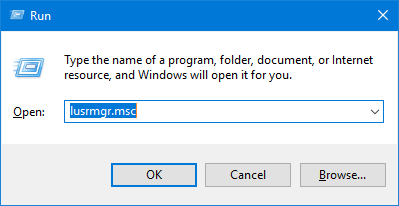
- Press the Win + R keys to open the Run box. Type regedit and hit Enter to open the Registry Editor.
- In the left pane of Registry Editor, navigate to following registry key:
HKEY_LOCAL_MACHINE\SYSTEM\CurrentControlSet\Services\gpsvc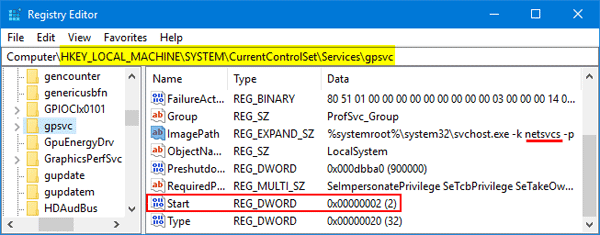
You should see a DWORD value named Start in the right pane. Make sure its value is set to 2. If you need to modify its value, you have to take ownership of the registry key gpsvc firstly.
- Next, look for the ImagePath string which contains a service name we’ll use later. In my example, the service name is “netsvcs”. You may have a different name like “GPSvcGroup”.
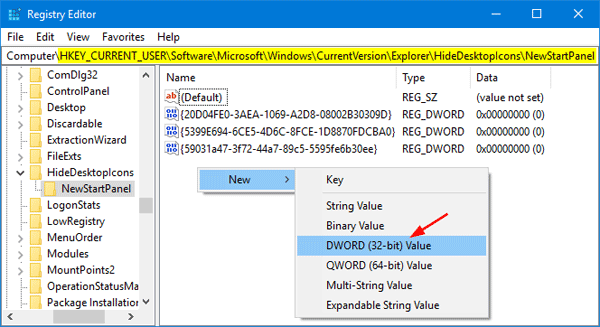
- Now, navigate to the following key:
HKEY_LOCAL_MACHINE\SOFTWARE\Microsoft\Windows NT\CurrentVersion\SvcHost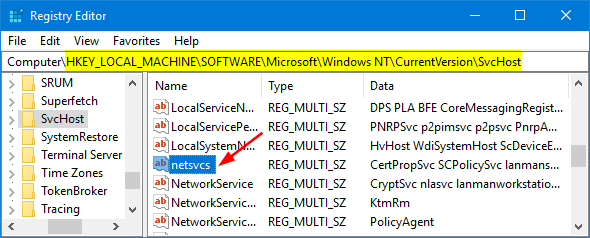
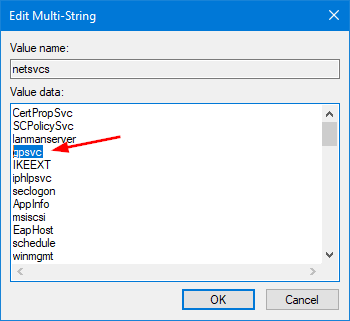
In the right pane, you should see a Multi-String named “netsvcs” (or “GPSvcGroup”). Double-click on it and make sure that ‘GPSvc’ is added into the list.
- Expand the SvcHost key in the left pane, and then click the “netsvcs” (or “GPSvcGroup”) subkey. Right-click an empty area in the right pane to create a DWORD (32-bit) value named AuthenticationCapabilities, give it a value of 12320 in decimal. Next, create another DWORD value called CoInitializeSecurityParam and set its value to 1.

- Once you complete all steps above, reboot the computer and the “Windows Couldn’t connect to the Group Policy Client Service” problem should be fixed.