Is there a way to keep Task Manager always stay on top of other windows? Task Manager comes with a built-in option which can make it show on top, without using third-party software such as AutoHotkey. In this tutorial we’ll show you 2 methods to make Task Manager always on top in Windows 11.
Method 1: Make Task Manager Always on Top via Task Manager Settings
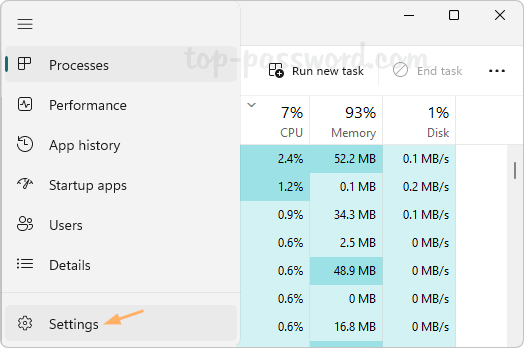
- After opening Task Manager, click the Settings icon in the lower-left corner.
- Under the “Window management” section, check the “Always on top” option.
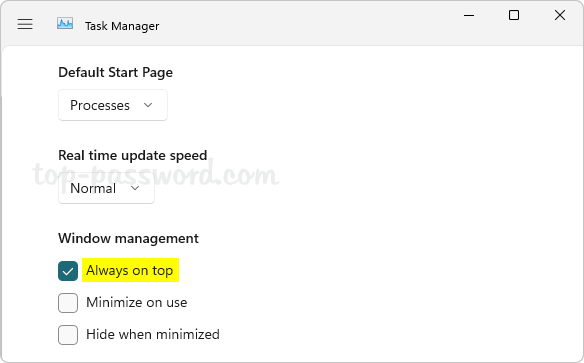
- The current Task Manager window will stay on the top. The next time you bring up Task Manager, it will launch and stay on top of all other windows by default.
Method 2: Make Task Manager Always on Top via System Tray
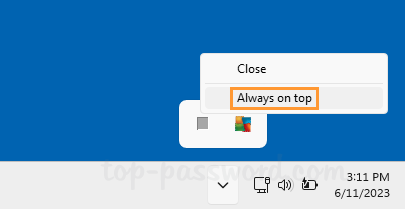
- When the Task Manager application is running, click the small upward arrow icon next to the Notification area. You’ll see all hidden icons for apps.
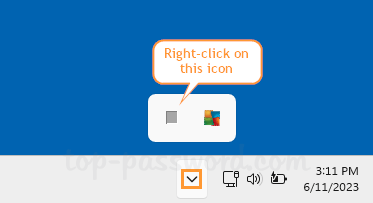
- Right-click the hidden Task Manager icon and choose “Always on top” from the pop-up menu.
- A check mark will appear beside the “Always on top” menu item. This will turn on “Always on top” for Task Manager in Windows 11.
That’s it!