Need to transfer Adobe Acrobat to a new computer but lost your serial number? How do you find Adobe Acrobat Pro serial number before formatting your hard drive? If you somehow lost your serial number, there may be a way to find it as long as Adobe Acrobat is still installed.
Product Key Finder is a utility for retrieving lost serial numbers from Adobe Acrobat, Adobe Acrobat Pro, Adobe Acrobat X, Adobe Acrobat XI. In just a few simple steps, you can find the serial number for your copy of Adobe Acrobat on your computer.
How to Find Your Lost Adobe Acrobat Serial Number?
- Download and install the Product Key Finder program on your computer.
- Start the program, and then click the Start Recovery button, it will bring up a drop-down menu that provides three recovery mode: From current system, From non-booting system and From remote computer.
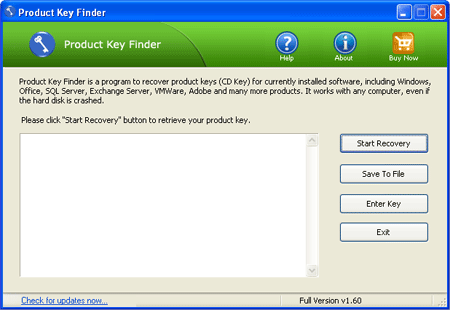
- Select the From current system mode from the drop-down menu. This program will scan both your Windows registry and Adobe folders on your computer, quickly locate Adobe Acrobat serial numbers, along with product keys of Windows, Office and other applications.
- Now click the Save To File button. It allows you to save your Adobe Acrobat serial numbers into a text file for safe keeping.
Obtaining the serial number from an installed Adobe Acrobat is legal. But if you’ve formatting your hard drive or done a fresh Windows installation, you’ll lose your serial number forever. In that situation, you need to purchase a new copy of Adobe Acrobat.