Although the words logins and users are often used interchangeably, they are very different things in Microsoft SQL Server. There has always been confusion over logins and users, especially for most new SQL Server users. Here I’ll explain the difference between SQL Server logins and database users.
Part 1: Logins vs. Users
Logins are created at the server level, while users are created at the database level. In other words, a login allows you to connect to the SQL Server service (also called an instance), and permissions inside the database are granted to the database users, not the logins. The logins will be assigned to server roles (for example, serveradmin) and the database users will be assigned to roles within that database (eg. db_datareader, db_bckupoperator).
Logins must be mapped to a database user to connect to a database. If your login is not mapped to any database user, you can still connect to SQL Server instance using SQL Server Management Studio (SSMS), but you’re not allowed to access any objects in the database. To access any objects in the database, you must have a login that’s mapped to a user in the database, and that user must be granted appropriate rights in the database.
The database user does not have credentials of its own and relies on the server login for authentication. This means that there is no password associated with a database user. Below we’ll walk you through the steps of creating a new login and user, mapping a user to a login.
Part 2: Create A New Login
To create a SQL Server login, please follow these steps:
- Open SQL Server Management Studio and connect to your SQL Server instance.
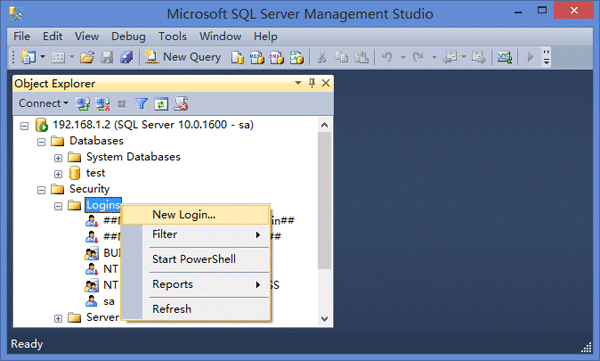
- In the Object Explorer panel (located on the left side), expand the server where you want to create a new login. Expand the Security option, right-click on Logins and then select New Login.
- In the Login – New dialogue that appears, enter a new login name. In this example, I create a new login named jack and choose SQL Server authentication. Uncheck the box labeled “User must change password at next login”.

- Click OK to create a new SQL Server login.
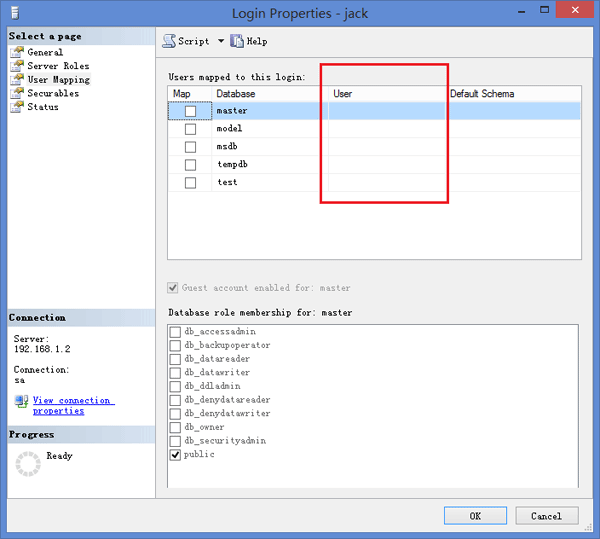
Till now I haven’t set up User Mapping for the new login jack, so there is no database users mapped to this login currently. You can check out this at the Login Properties window by right-clicking the newly-created login and select Properties.
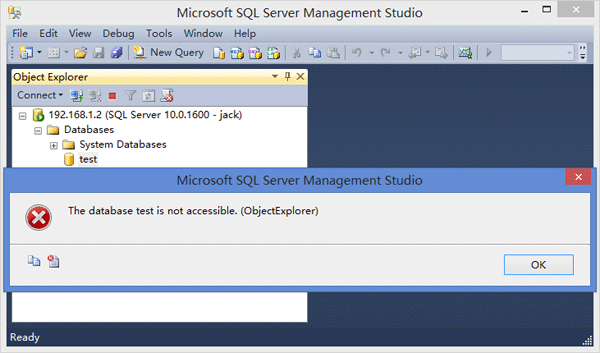
I can then use SQL Server Management Studio to connect to the SQL Server instance with this login. But when I try to expand the database test, I got the following error message due to lack of database permissions.
In order to get access to a specific database, we need to create a new database user and map it to the login jack.
Part 3: Create A New User
To create a database user, please follow these steps:
- Open SQL Server Management Studio and connect to your SQL Server instance.
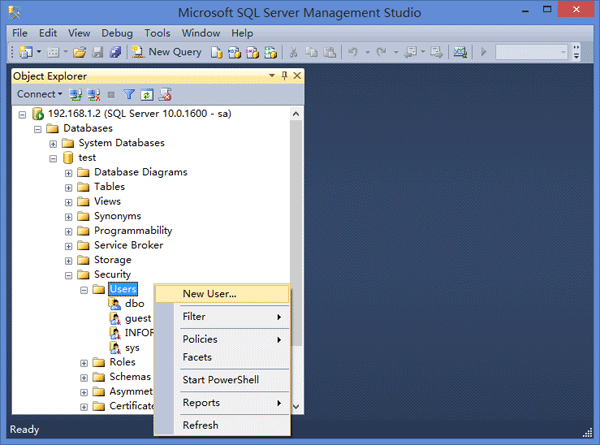
- In the Object Explorer panel (located on the left side), Expand the database in which to create the new database user.
- Expand Security and then Users. Right-click on Users and then select New User.
- In the Database User – New dialogue that appears, select SQL user with login from the User type list, and enter a name for the new database user.
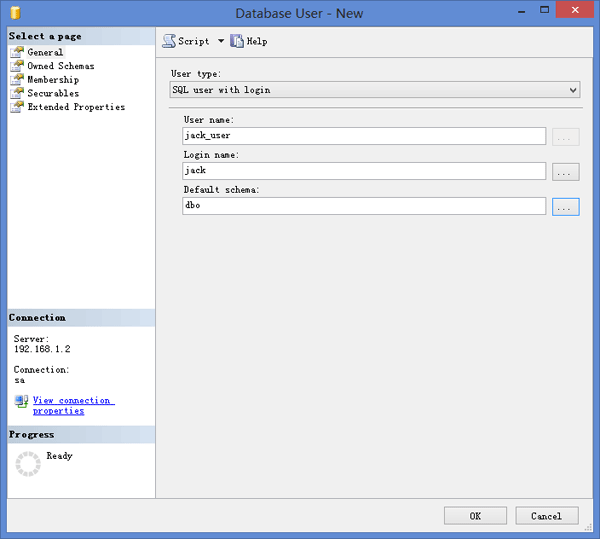
In this example, I create a new database user named jack_user, and set jack as the Login name as I want to map this database user to the login jack I created previously.
- Click OK to create the user.
Once the database user is created, check out the Login Properties for the login jack and you’ll find the database user jack_user is now mapped to the login.

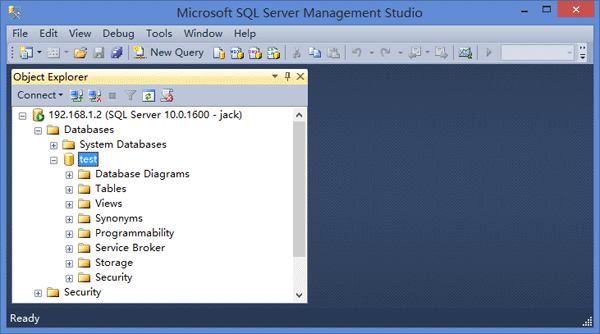
At this time you can connect to the SQL Server service with the login jack, and expand the database test without permission issue.
That’s it! I hope this article would be helpful for you to understand the difference between a login and a user in SQL Server.