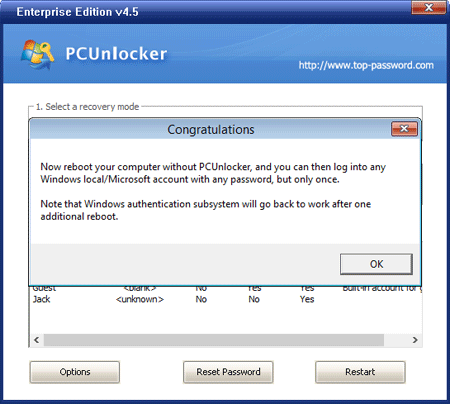
Only an administrator can perform the administration tasks such as installing a driver or an application. If you have an existing standard or limited account, you can grant it administrator privileges by adding it to the built-in Administrators group. Here are two options to add a user to the local Administrators group in Windows 10, 8, 7, Vista or XP.
Option 1: Computer Management
The easier way to add a user to the local Administrators group is to use the Computer Management app. Here’s how:
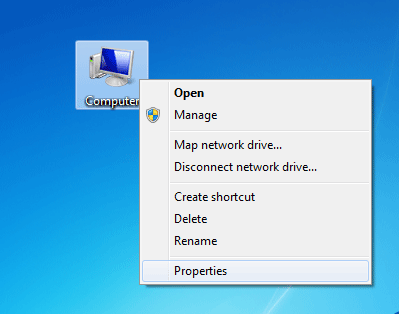
- To open the Computer Management, right-click on My Computer icon on your desktop and then select Manage. Another method is to press the Windows key + R to bring up the Run box, then type compmgmt.msc and hit Enter.
- When the Computer Management window opens, expand Local Users And Groups in the left pane, and click on Users (Please skip to the option 2 below if you don’t see Local Users and Groups.)
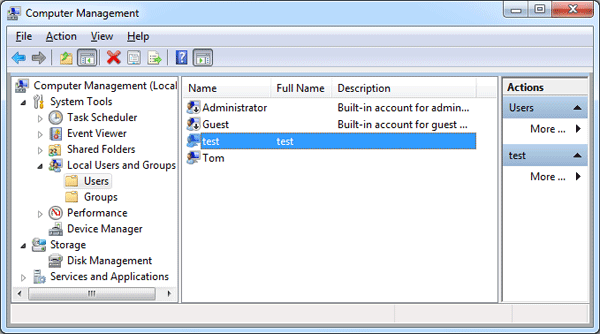
- Double-click your desired user account in the right hand side.
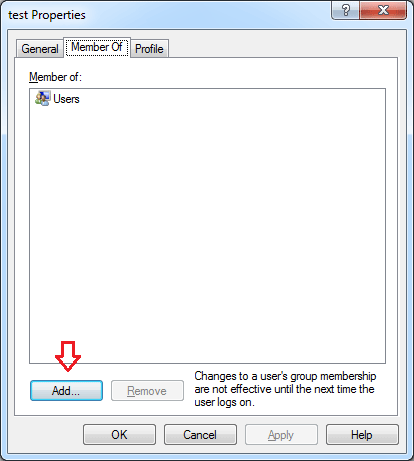
- In the User Properties window, click the Add button.
- In the Select Groups dialog, type the name of your administrators group. Click Check Names, and then click OK.
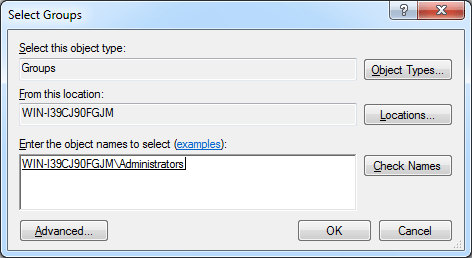
If you don’t know the name of your administrator group, click Advanced and next click Find Now.
Option 2: Command Prompt
However, not every edition of Windows have the Local Users and Groups entry in the Computer Management (for example, Windows 8 Home and domain controller). This method will work on all editions of Windows.
- Open an elevated Command Prompt. In Windows 10 or 8, press the Windows key + X and then click “Command Prompt (Admin)“. In Windows 7 or Vista, go to Start > All Programs > Accessories, then right-click on Command Prompt shortcut and select “Run as Administrator“.
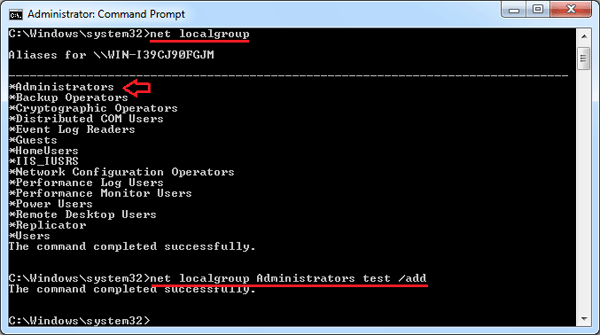
- To see a list of local groups available, just type:
net localgroup - You can add a user to the built-in Administrators group by running the following command:
net localgroup Administrators [username] /addFor example, add a user named test to the administrators group, we can run the below command.
net localgroup Administrators test /add