How can I convert legacy .doc to the new .docx in Word 2016? DOC is compound binary file format used for Microsoft Word 97/2003 documents. Starting with Word 2007, Open XML file format (.DOCX) has become the new default save format. In this tutorial we’ll show you how to easily convert .doc to .docx, or convert .docx to .doc in Microsoft Word 2016.
Part 1: Convert .DOC to .DOCX in Word 2016
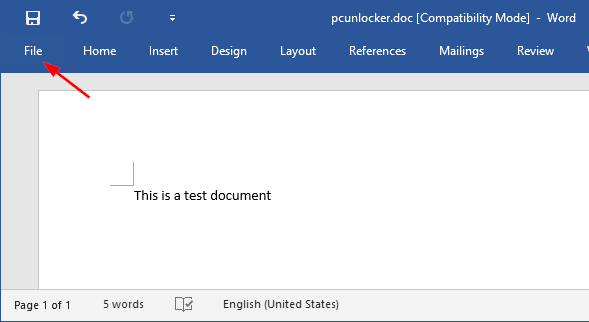
- When you open a .doc document in Word 2016, you will see “Compatibility Mode” in the title bar next to the filename. To convert it to .docx format, click the File menu.
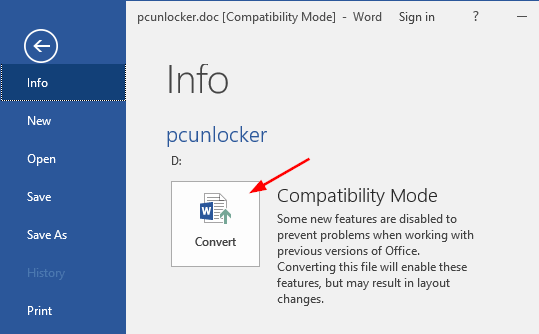
- Go to the Info tab and then click the Convert button.
- An information box lets you know that it will be upgraded to the newest file format. Click OK.

- Click Save and your document will saved in .docx format.
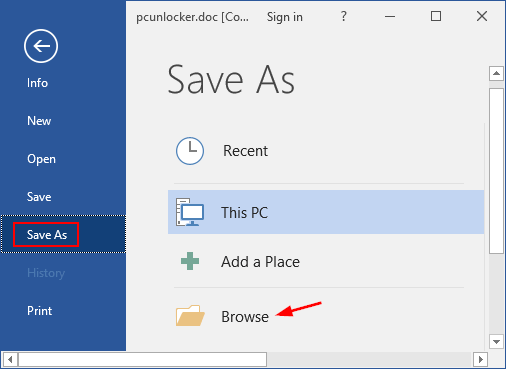
Part 2: Convert .DOCX to .DOC in Word 2016
- Open your .docx document in Word 2016 and click the File menu.
- Switch to the Save As tab and click the Browse button to select your desired location.
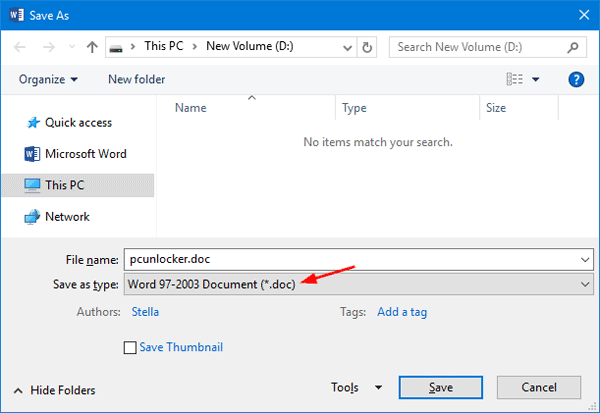
- When the Save As dialog opens, click the “Save as type” drop-down list and select “Word 97-2003 Document (.doc)“.
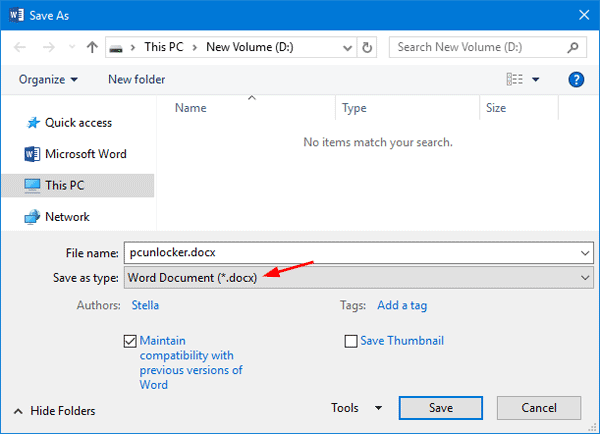
If you want to convert .doc back to .docx later, just select the “Word Document (*.docx)” from the “Save as type” list.
- Once you clicking Save, your document format will be converted to .doc quickly.