Could I log in to Windows without a password? How can I disable password at login screen? Looking for a way to turn off Windows password because you’ve forgotten it? In this tutorial we’ll show you 3 different ways to turn off Windows 10 / 8 / 7 password.
Option 1: Turn Off Windows Password by Deleting the Password
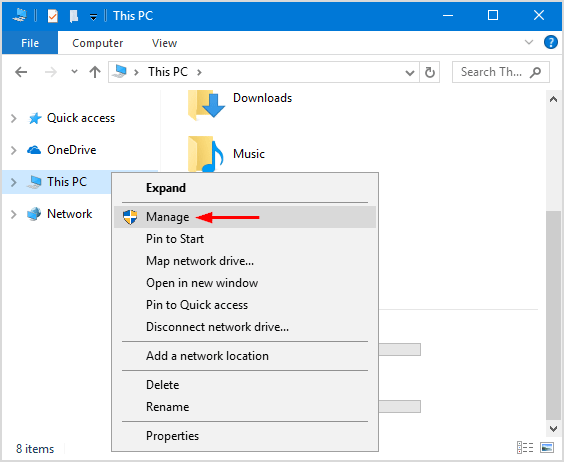
Right-click on My Computer shortcut on your desktop. If you’re running Windows 10, right-click This PC shortcut in the left navigation pane of File Explorer. Next choose Manage from the context menu.
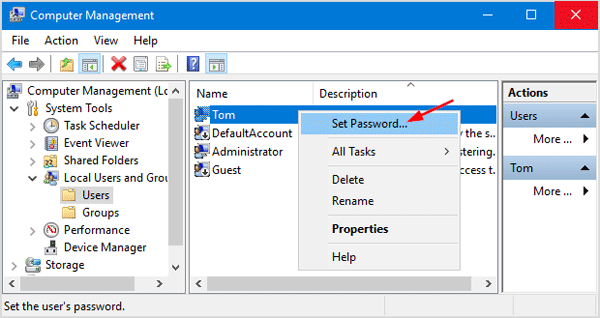
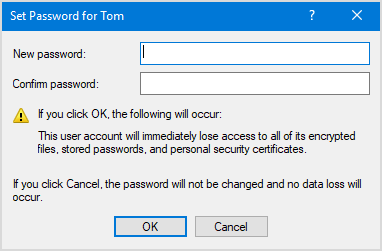
When the Computer Management window appears, navigate to Local Users and Groups -> Users. Right-click your local account and select Set Password. When get the warning prompt, click on Proceed to continue.
Type the new password and confirm. Click OK to remove the existing password for your Windows account.
Option 2: Turn Off Windows Password by Enabling Automatic Logon
This method allows you to disable Windows login screen without changing or deleting your password. After enabling automatic logon, Windows will automatically sign into your account every time you turn on or restart your computer. Here’s how:
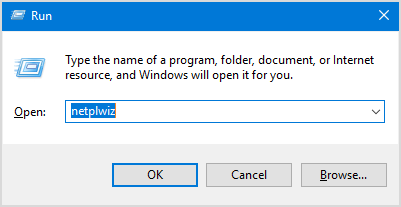
Press the Windows logo key + R to open the Run dialog box. Type netplwiz and press Enter.
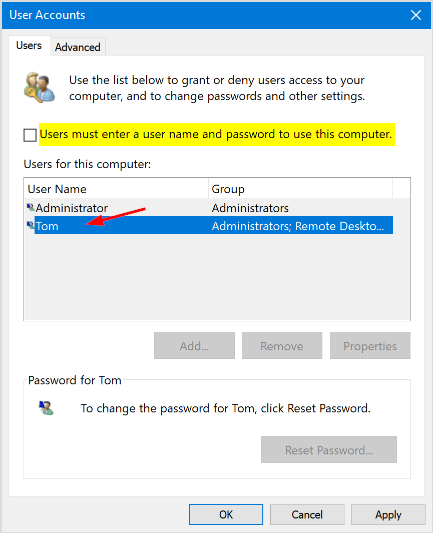
Uncheck the box “Users must enter a user name and password to use this computer“, and then select your Windows account from the list. Click OK.
Type your current password twice and click OK.
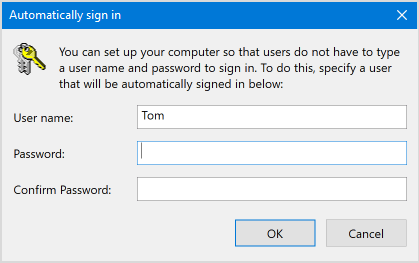
From now on, Windows will automatically log into your selected account with the password you provided.
Option 3: Turn Off Windows Password When You’re Locked Out of Computer
If you have physical access to a machine then there is nothing to prevent you from gaining administrative access. When you forgot your Windows administrator password or need to access a locked or disabled account, you can take use of PCUnlocker to log back in to your computer without reinstalling Windows.
To get started, you need to prepare a PCUnlocker Live CD (or USB) on another PC you have access to. Download the ISO image of PCUnlocker and burn it to a blank CD (or USB thumb drive) using ISO2Disc.

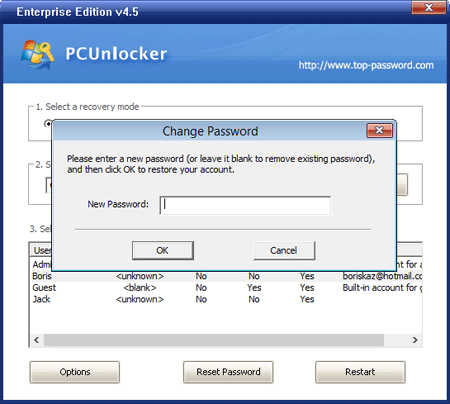
Boot your locked computer from PCUnlocker Live CD (or USB). Once you’re at the PCUnlocker screen, select one of your local accounts and click on Reset Password button.

When the Change Password dialog box opens, just leave the password field empty and click OK. This will turn off Windows password completely.
Reboot your computer and you can then sign into Windows account without being prompted for a password.