How do I stop certain files from showing up in Windows search? By default, Windows automatically indexes everything stored in the most common locations (like Downloads, Documents and Desktop), so you can quickly find your files or applications through Windows Search box or Cortana box.
If you want to hide some folders/files from appearing in the search result, you need to change the indexing options in Windows 10.
How to Hide Folders / Files from Search Results in Windows 10?
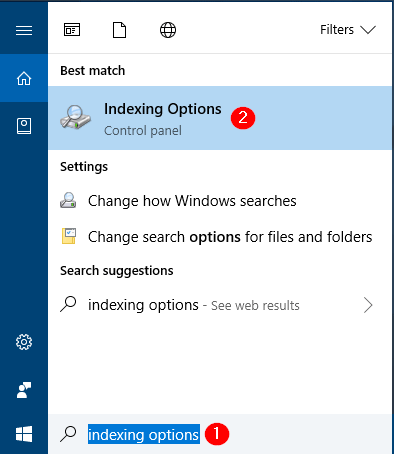
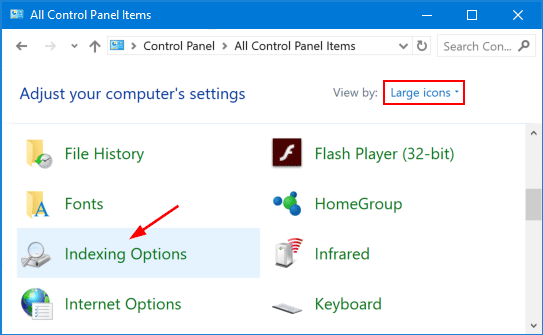
- Open the Control Panel in Large icons view and then click Indexing Options.
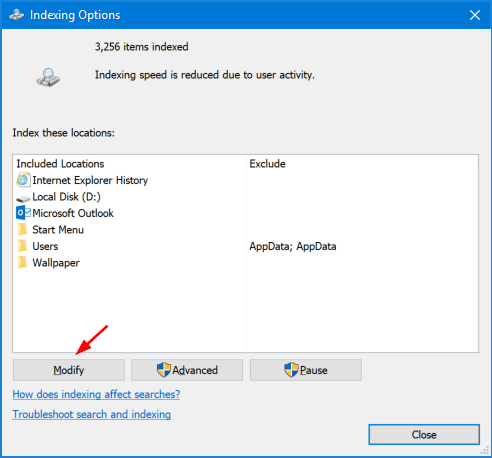
- The Indexing Options window lists all folders that are included or excluded from indexation. To hide certain files and folders from Windows Search, click the Modify button at the bottom.
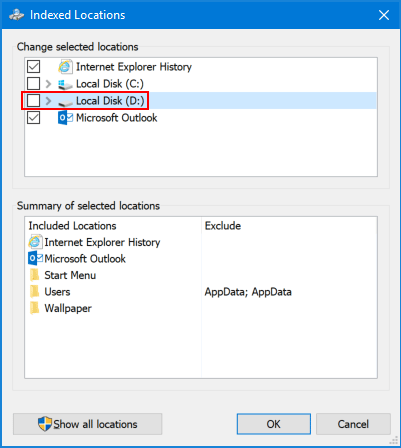
- In the folder tree, navigate to the folder you want to hide and uncheck the box for that folder. Click OK.
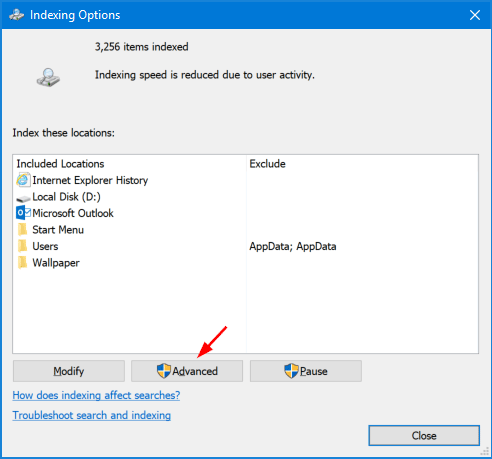
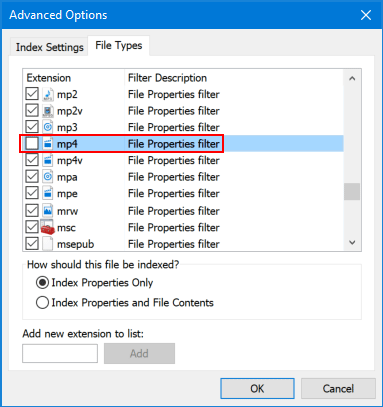
- When you’re back to the Indexing Options window, you can click the Advanced button if you want to hide certain file types from being indexed.
- Click the File Types tab. Navigate through the list of all file types and uncheck the file type that you wish to hide from search results, and click OK.
- Switch to the Index Settings tab and click Rebuild.

Now, you should see the folders/files you chose to hide will never show up in the search results in File Explorer or in the Cortana box on the taskbar.
However, if you disable Search indexing completely, your folders/files will become searchable again but it may take longer to run search. The most secure ways of hiding folders/files from Windows Search is to use the professional utility like Protect My Folders.