How to remove a Windows local account when you don’t need it any more? In this tutorial we’ll show you 5 ways to delete a local account in Windows 10, through Control Panel, Local Users and Groups, Netplwiz, Command Prompt, Settings Charm.
Note: If you’re currently logged in to the local account you want to delete, log off and sign in with another account in order to remove it. Deleting a user account requires you to log on as administrator, and the built-in Administrator account is undeletable.
Method 1: Delete Local Account Using Control Panel
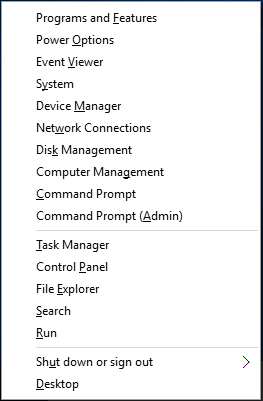
- First of all you need to access the Control Panel. Press the Windows key + X and then select Control Panel from the WinX menu.
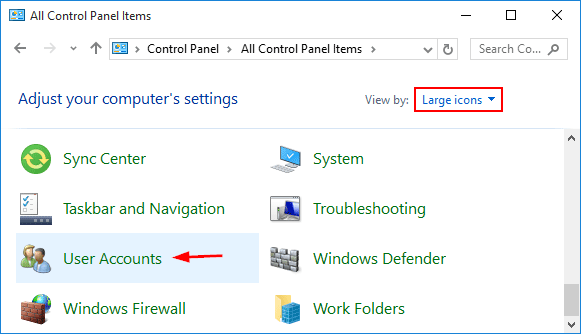
- Select the View by option at the top right of the Control Panel. Set it to Large icons and then click on User Accounts.
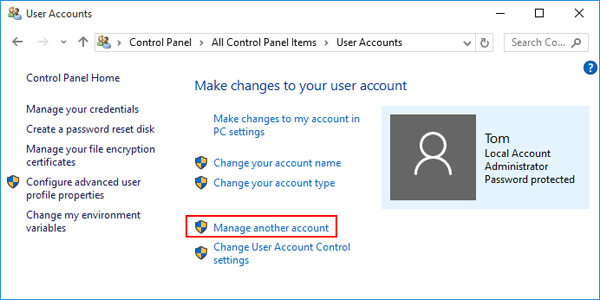
- Select Manage another account in the list options.
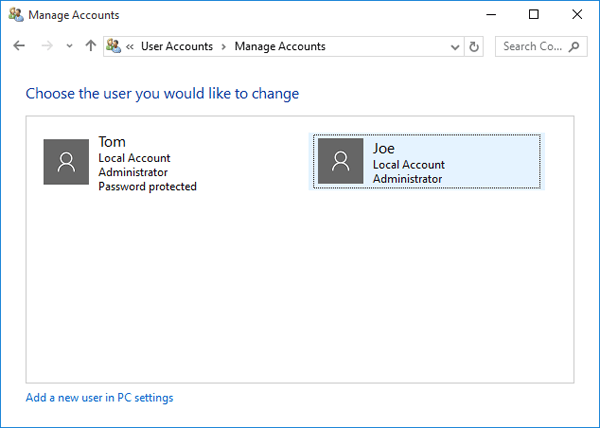
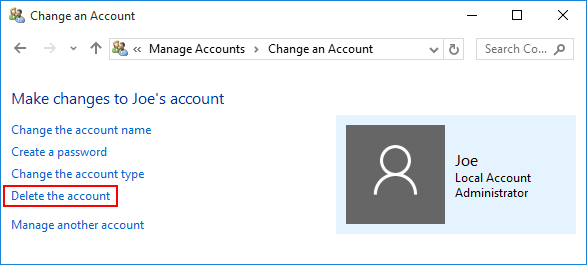
- Click on the account that you want to delete.
- Click on Delete the account link from the left pane.
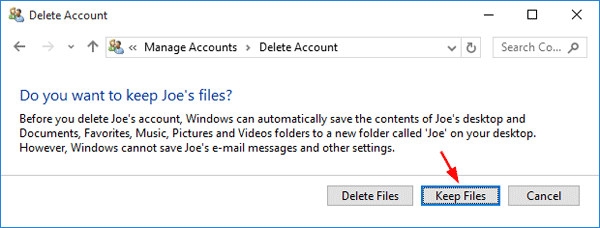
- Next it will ask you whether you want to keep or to delete the user’s file. It’s up to you as to which option you want to choose.
Method 2: Delete Local Account via Local Users and Groups
- Press the Windows key + R to open the Run box. Type lusrmgr and press Enter.

- In the Local Users and Groups window, click Users from the left pane.
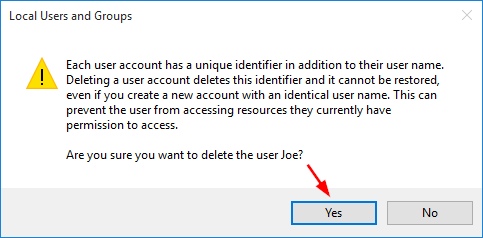
- Right-click on your unused user account in the center pane, and then select Delete.

- Click Yes and the user account will be removed immediately.
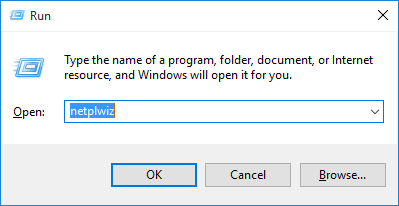
Method 3: Delete Local Account Using Netplwiz
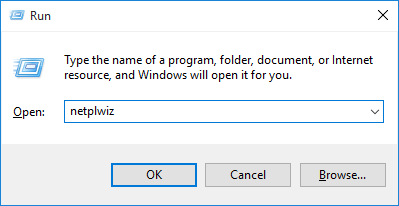
- Press the Windows key + R to open the Run box. Type netplwiz and press Enter. If prompted by UAC, then click Yes.
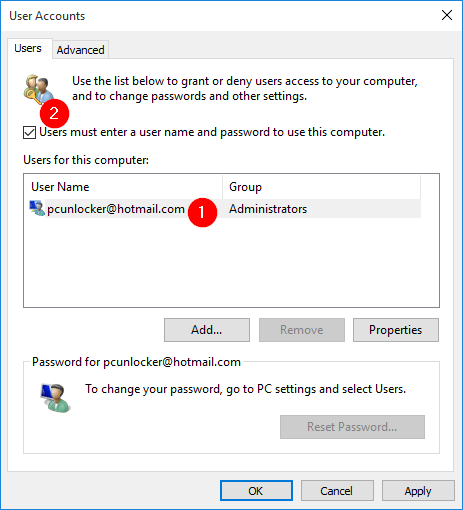
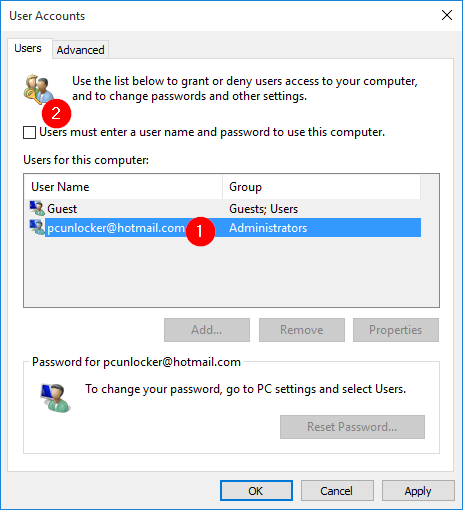
- Check the “Users must enter a user name and password to use this computer” box. When this box is unchecked, the user list below and the Remove button will be greyed out.
- Highlight the user account you want to delete and click on Remove.
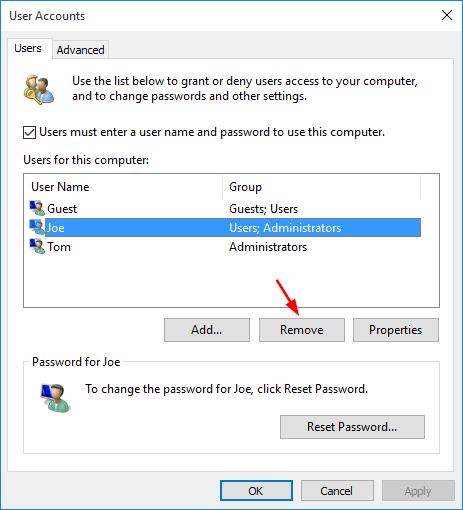
- Click Yes to confirm your account removal.

Method 4: Delete Local Account Using Command Prompt
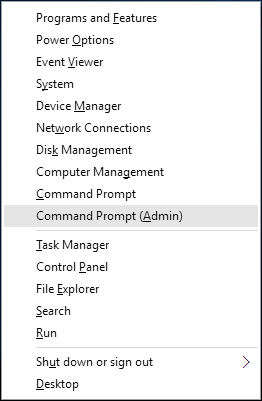
- To open an elevated Command Prompt, press the Windows key + X to access the WinX menu and then click on Command Prompt (Admin).
- Now you can run the net user command to delete a local account. For example, to remove a local account named Joe, type:
net user Joe /del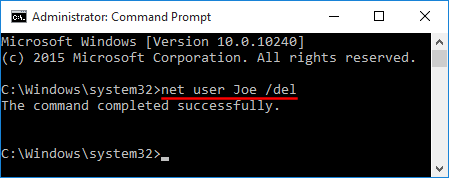
- Once the account is deleted, it will disappear from Windows 10 login screen.
Method 5: Delete Local Account from Settings Charm
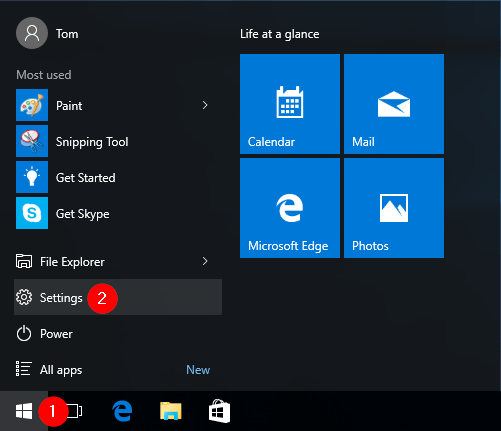
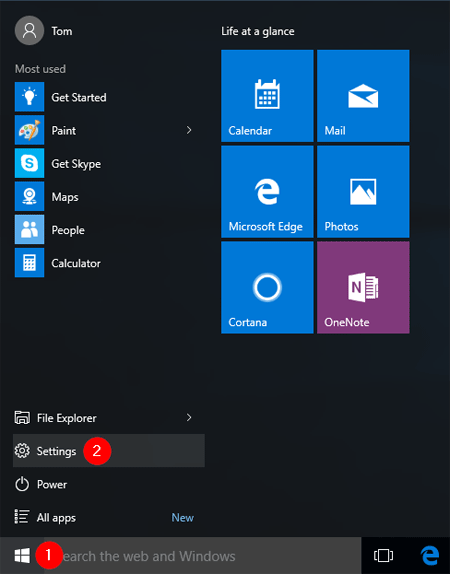
- Press the Windows key + I to open the Settings charm. You can also access it by clicking the Start button and then select Settings.
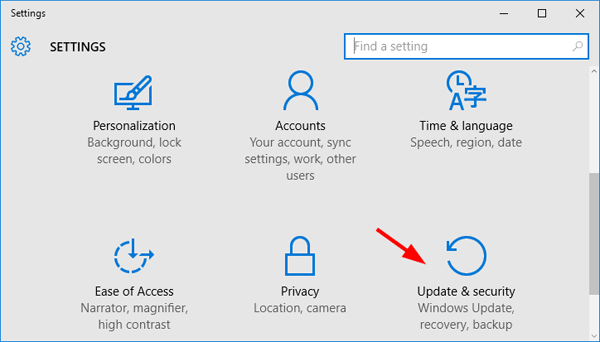
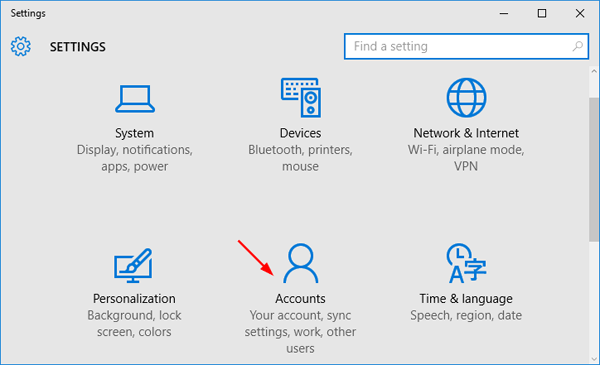
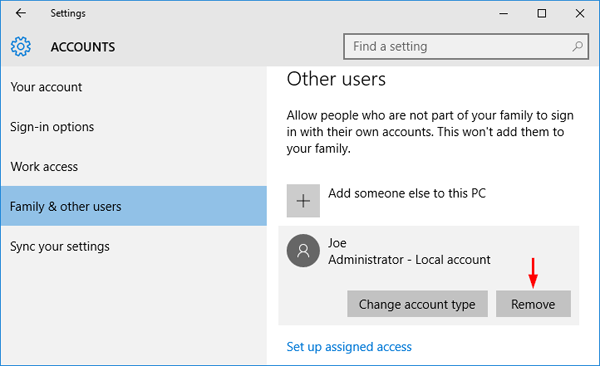
- From the setting window, click on Accounts.
- Click on “Family & other users” tab on the left pane, click on the user account you wish to delete and the Remove button will be shown. Click on it.
- You’ll be prompted to confirm, and if you really want to continue, click “Delete account and data“.
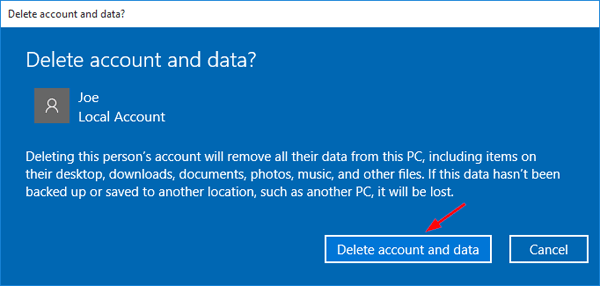
- This will remove the user account from the login screen, as well as any files, settings, and program data associated with that user account.