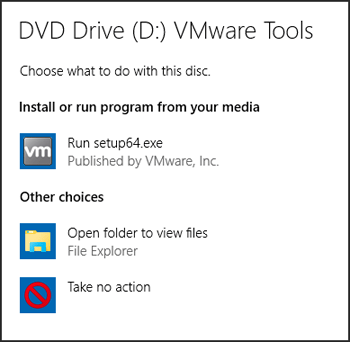
When you insert a CD or USB drive into your computer, an AutoPlay menu appears and asks how you want Windows to handle the device. In Windows 10, you can configure AutoPlay to automatically open photos or play videos on a removable media when you plug it into your PC. If AutoPlay annoys you, here are 4 simple ways to turn off / disable AutoPlay in Windows 10.
Method 1: Disable Windows 10 AutoPlay Using Settings Charm
- Press the Windows key + I to open the Settings charm app.
- In the Settings app, click on Devices.

- Click on AutoPlay on the left side, and switch off “Use AutoPlay for all media and devices“.
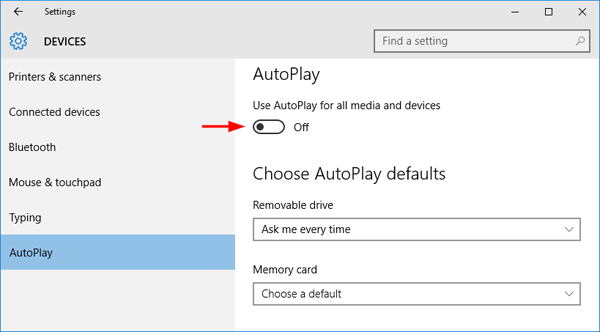
Now you will never see the AutoPlay window pop up when you plug in a USB or insert a disc to your Windows 10 PC.
Method 2: Disable Windows 10 AutoPlay Using Control Panel
- Press the Windows key + X to open the WinX menu. Click on Control Panel.
- By default, the Control Panel opens to the category view. Change it to display with Large icons. Next click the AutoPlay icon.
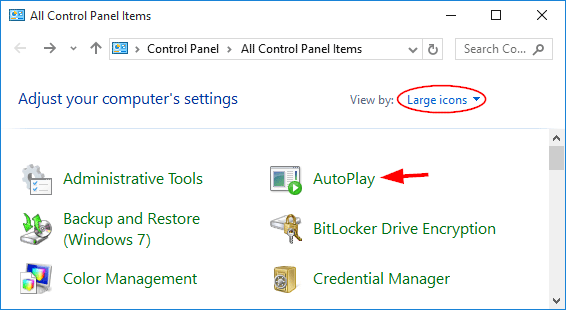
- In order to turn off AutoPlay, uncheck the the “Use AutoPlay for all media and devices” box. No need to select the default action for each type of media and device listed below it, because those options only work when you turn on AutoPlay.

- Click Save and you’re done!
Method 3: Disable Windows 10 AutoPlay Using Registry Editor
- Press the Windows key + R to open the Run box. Type regedit and press Enter.
- Navigate to the following registry key:
HKEY_CURRENT_USER\SOFTWARE\Microsoft\Windows\CurrentVersion\Explorer\AutoplayHandlers - Double-click on the DisableAutoplay entry on the right pane, change its value from 0 to 1.
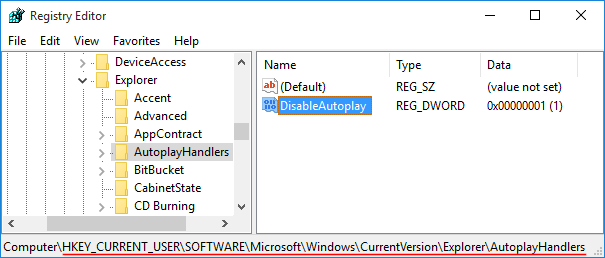
- Close Registry Editor and you’re done!
Method 4: Disable Windows 10 AutoPlay Using Group Policy
- Press the Windows key + R to open the Run box. Type gpedit.msc and press Enter.
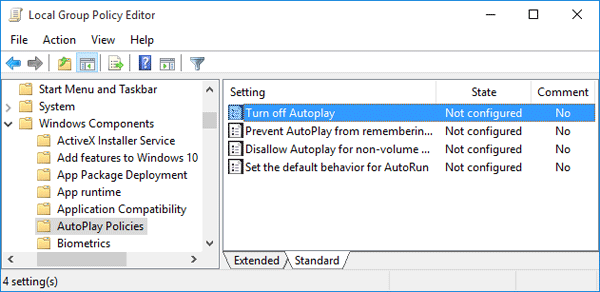
- When the Local Group Policy Editor opens, browse to:
Computer Configuration > Administrative Templates > Windows Components > AutoPlay Policies - In the right-hand side pane, double-click “Turn off AutoPlay” to open the Properties box.
- Click Enabled, and then select “All drives” from the “Turn off AutoPlay on” box to disable AutoPlay on all drives.

- Reboot your computer. Now you’ve turned off AutoPlay for all media and devices in your account in Windows 10.